
User manual


6) T
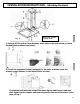
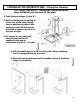
INSTALLATION INSTRUCTIONS – Fittin
g
the Chimne
y
w
c oring holes
usly made (see below).
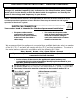
ake the fixing bracket ‘G’ (Fig. 4 – previous page), centre it
ith respect to the mark you previously made, keeping it in
ontact with the ceiling, and then mark the anch
(‘H’).
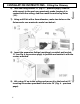
7) Using a drill bit with a 6m
fixing marks you previo
m diameter, make two holes on the
8) Insert the expansion fixings (rawlplugs) provided, put brac
‘G’ (see Fig. 4 on previous page) in po
ket
sition and secure it with the
crews provided.
s
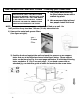
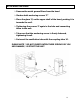
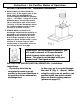
9) Lift casing ‘B’ up to the ceiling and secure it to the bracket ‘G’,
inserting the screws provided in the holes ‘M’ (Fig. 4 – previous
page).
17