User Manual for your BAH6008&BAH7006& BAH9007&BAH6008G &BAH9008GAH9009G Cooker Hood Chimney Hood in Stainless Steel NOTE: This User Instruction Manual contains important information, including safety & installation points, which will enable you to get the most out of your appliance. Please keep it in a safe place so that it is easily available for future reference.
CONTENTS YOUR COOKER HOOD’S SPECIFICATIONS ….……………..………….2 IMPORTANT SAFETY INFORMATION……………………………….…3-4 CARING FOR THE ENVIRONMENT…………………………………………5 USING YOUR COOKER HOOD………………………………..……………..6 MAINTAINING AND CLEANING YOUR COOKER HOOD ……….7-9 INSTALLING / CHANGING THE CARBON FILTER …………………10 INSTALLATION INSTRUCTIONS ……………………….……...….11-18 ELECTRICAL CONNECTION……………11 INSTALLING THE COOKER HOOD………12-14 FITTING THE CHIMNEY…………………15-16 INSTALLATION NOTES – EXTRACTION / PURIFYING VERSION .….
Dear Customer, Congratulations on purchasing your new product from Think Appliances. To register your parts and labour warranty (some conditions apply please refer to your warranty card for more details) please contact out Customer Care team on: 1800 444 357 Our Customer Care centre is there to ensure you get the most out of your appliance.
Specifications of your Cooker Hood Congratulations on purchasing a Cooker Hood! To fully enjoy using your appliance long into the future, please firstly familiarise yourself with its specifications, safety advice and operational instructions included in this manual. You will also need this manual to ensure that your Cooker Hood has been installed properly. Your cooker hood can work either as an extraction fan or as an air recirculator.
Important Safety Information: Please read this before installing & using. o Any installation work must be carried out by a qualified electrician or competent person. o The hood must be installed in accordance with the installation instructions and all measurements followed. o If the cooker hood is installed for use above a gas appliance then the provision for ventilation must be in accordance with the all applicable regulations.
Important Safety Information: Please read this before installing & using. o Your cooker hood is for domestic use only. o Please dispose of the packing material carefully – children are especially vulnerable to it. o Dirty oil is an even greater fire risk. Do not connect the ducting system of this appliance to any existing ventilation system which is being used for any other purpose. o Always put lids on pots Do not install above a cooker with a high level grill.
Environmental Note OBSERVE THE INSTRUCTIONS GIVEN HERE, FOR INSTALLATION, MAINTENANCE AND SUITABLE USE OF THE HOOD. Note: Before discarding an old appliance, switch off and disconnect it from the power supply. Cut off and render any plug useless. Cut the cable off directly behind the appliance to prevent misuse. This should be undertaken by a competent person. CONFORMITY TO W.E.E.E.
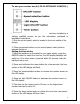
Using your Cooker Hood: To use your cooker hood: 1) Make sure it has been properly installed. 2) Find the CONTROL PANEL. It is located at the front of the canopy, to the right. 3) The CONTROL PANEL contains buttons as shown in the Figure below. These perform separate functions. You will need to understand what these buttons do before you attempt to use your cooker hood. * Note: The hood should be switched on at least as soon as you start cooking.
To use your cooker hood (LCD ELECTRONIC CONTROL) Before operating the hood, make sure that it has been installed by a suitably qualified person, as per the information contained in installation instructions. 1) Find the control panel, which is located in the front middle of the canopy. 2) There are several buttons on the control panel, which perform separate functions.
7) Use the same buttons as before to adjust the number shown on the LED display. 8) Press the timer button for a third time and this will confirm the time of day setting. Setting the fan speed 1) Press the ON/OFF button to switch the hood on; the LED display backlight will switch on. If no other button is pushed within 30 seconds, then the backlight will go out. 2) The motor has three speeds, low, medium and high. 3) Press the speed selection button once and the hood will run at low speed.
4) It is useful to use this feature when you have finished cooking. You can press the timer button and the hood will run on to extract any remaining odours and then switch itself off without you needing to return to the kitchen. To use your cooker hood (Electronic button) o You should use a good quality stainless steel cleaner and polish on ALL of the stainless steel areas of your cooker hood, before it is used for the first time.
PLEASE NOTE THAT YOUR COOKER HOOD CAN BE USED EITHER IN RECIRCULATION MODE OR IN EXTRACTION MODE. TO USE THE HOOD IN RECIRCULATION MODE, YOU WILL NEED TO FIT THE CARBON FILTERS (SEE PAGE 11) Cleaning your Cooker Hood: IMPORTANT!: Before cleaning, always ensure that you have switched your cooker hood OFF at the omni-polar switch, set at the wall from the cable: Cleaning Clean the external parts with mild liquid detergents on a damp cloth. Never use abrasive powder, corrosive solvents or brushes.
To prevent this fire hazard, the grille should be cleaned regularly (depending on use) every 10-15 days and at least once a month in a dishwasher or in hot water with normal washing-up detergent. Maintenance - Cleaning the Anti-grease Filters on: Please Read this before installing & using. First remove the grille by pulling down on it. Undo the side catches. You can now clean the anti-grease filter grilles.
DISHWASHER, ETC. Do not worry about the slight discolouration of the grille – its performance won‟t be affected. Let the filter grilles dry thoroughly before refitting them. Maintenance – Changing the Light Bulb and Carbon Filter a) Changing the light bulb Before changing the light bulb, ensure that the appliance is not live (i.e., ensure that you have switched it off at the wall switch).
Installing / Changing the Carbon Filter ______________________________________________________________________________________ Installing / Changing the Carbon Filter. Your Baumatic Cooker Hood uses a pair of CARBON FILTERS to purify the air for the air recirculation function. You will find that the filters will attach to both sides of the fan motor (please see figures at bottom of page). The active carbon filters must be replaced regularly, at least once every three months, to allow normal operation.
INSTALLATION INSTALLATION INSTRUCTIONS INSTRUCTIONS – Electrical - Electrical Connection. Before installation and usage, read all the instructions and make sure that the voltage (V) and the frequency (Hz) indicated on the identification plate (found inside your Cooker Hood) and all the data inside the appliance are exactly the same as the voltage and frequency in your home.
INSTALLATION INSTRUCTIONS – Installing your Cooker Hood PLEASE NOTE THAT YOU WILL HAVE TO DECIDE BEFORE INSTALLING YOUR COOKER HOOD THAT YOU CAN ADAPT IT AS AN EXTRACTION FAN. PLEASE SEE PAGE 18 NOW TO UNDERSTAND CRUCIAL DIFFERENCES IN THESE. The cooker hood must not be fitted above stoves with a radiant top plate. We recommend that at least two people install this hood. NOTE: Your Cooker Hood should only be fitted on a wall. Do NOT position it any less than 600 mm (60 cm) above the hob.
INSTALLATION INSTRUCTIONS – Attaching the Hood Rear view of your cooker hood. -------------------------------------------------------------------------- 3) Using a drill bit with an 8 mm diameter, make holes in the wall where you have marked these positions (see below).
INSTALLATION INSTRUCTIONS – Attaching the Hood 5) Hook the hood onto the screws (see above figure) and fasten it onto the wall, tightening the support and anchoring screws the rest of the way in (next page, at top.) ------------------------------------------------------------------------------------------- ------------------------------------------------------------------------------------------6) (EXTRACTION FUNCTION ONLY) Connect the coupling to the top of the cooker hood (see below).
INSTALLATION INSTRUCTIONS – Fitting the Chimney FITTING THE PIPE – Once your Cooker Hood has been installed, you can now fit the pipe. 1) Take the two casings „A‟ and „B‟: 2) Rest the bottom of the casing „A‟ on the top of the hood, taking care to position the tabs of the casing correctly on the back of the hood as shown as part „X‟ in Figure 4 at right. 3) Fix casing „A‟ onto the hood using the two screws „K‟ supplied in the bag of accessories (Figure 4 – at right).
INSTALLATION INSTRUCTIONS – Fitting the Chimney 6) Take the fixing bracket „G‟ (Fig. 4 – previous page), centre it with respect to the mark you previously made, keeping it in contact with the ceiling, and then mark the anchoring holes („H‟). 7) Using a drill bit with an 8mm diameter, make two holes on the fixing marks you previously made (see below). 8 8) Insert the expansion fixings (rawlplugs) provided, put bracket „G‟ (see Fig. 4 on previous page) in position and secure it with the screws provided.
9) Lift casing „B‟ up to the ceiling and secure it to the bracket „G‟, inserting the screws provided in the holes „M‟ (Fig. 4 – previous page). Extraction / Air Purifier Modes of Operation EXTRACTION OPERATION – Installation Instructions Ensure that you have fitted the union (‘N’) to the upper part of the hood using the packaged two screws supplied inside the packing (Fig. 1 – on right). Using a 125 mm diameter pipe, connect the union (N) on the upper part of the hood (see Fig.
If your Cooker Hood comes with a Lower Bracket ________________________________________________________________________________________________________________________________________________________________________________________________________________________ . AIR PURIFIER (RECIRCULATION) OPERATION - Installation Instructions In this case, air is recycled through The cooker hood can be the vent „R‟ (Fig. 1 – above).
1) Position the hanging plate on the ceiling and then mark the position of the screw holes. o The hanging plate should be securely fixed to the ceiling, using the 12 x ST6 (40 mm) screws. o Depending on the surface of the ceiling that you are fixing the hanging plate to, you may need to use 8 x expansion bolts (for concrete). 2) Fix the angle bars to the hanging plate, using the 8 x M4 nuts and bolts with metal washers.
3) Extend the angle bars to the required height and then fix them in position using the 16 x M4 nuts and bolts with metal washers. o IMPORTANT: The angle bars must have an overlap of AT LEAST 100 mm. 4) If your cooker hood is going to be used in extraction mode, then you should connect the ducting hose to the ceiling adaptor at this point. o Fix the upper chimney section to the hanging plate, using the 4 x self tapping screws.
body of the cooker hood at this stage. 7) Lift the main body of the cooker hood onto the angle bar and then fix it into position using the 16 x M4 bolts. o IMPORTANT: This stage of the installation process MUST be completed by two people. o IMPORTANT: The 16 x M4 bolts MUST be securely tightened. 8) If you are going to be using the hood in extraction mode, you should fix the ducting hose to the spigot.
Troubleshooting If something has gone wrong with your Cooker Hood, checking against this chart might keep you from having to call for service. Symptom The cooker hood will not start! The cooker hood is not working effectively! The cooker hood has switched off during operation! Solution Check that the hood is connected to the electricity supply. Check that the fan speed control is set properly. The fan speed is not set high enough. The grease filter is dirty.
My appliance isn’t working correctly IMPORTANT: If your appliance appears not to be operating correctly, then you should disconnect it from your mains supply and then contact Think Customer Care on telephone number 1 800 444 357 DO NOT ATTEMPT TO REPAIR THE APPLIANCE YOURSELF. Please note that if an engineer is asked to attend whilst the product is under guarantee and finds that the problem is not the result of an appliance fault, then you may be liable for the cost of the call out charge.
Fax:1300 133 279 Email:service@thinkappliances.com SALES DEPARTMENT Phone:1300 132 824 Fax:1300 660 188 Web:www.thinkappliances.