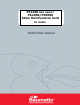
P610SS fan oven/ P620SS/P630SS 60cm Multifunction built in oven.
User Manual for your Baumatic P610SS 4 function fan oven P620SS 7 function/ P630SS 9 function multifunction oven You will be mine NOTE: This User Instruction Manual contains important information, including safety & installation points, which will enable you to get the most out of your appliance. Please keep it in a safe place so that it is easily available for future refe rence; for you or any person not familiar with the operation of the appliance.
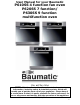
Contents Environmental note 4 Important safety information 5–7 Specifications Product specifications Standard accessories Optional extras Electrical details Control panel Oven programmer/timer display 8 8 9 9 9 10 11 Setting and using the oven programmer/timer Setting the time of day Setting the minute minder function Setting the duration function Setting the end cook function Setting the start and end time function Adjusting the audible signal 11 11 11-12 12-13 13-14 14 15 Selecting a cooking funct
Environmental note o The packaging materials that Baumatic uses are environmentally friendly and can be recycled. o Please discard all packaging material with due regard for the environment.
IMPORTANT SAFETY INFORMATION Your safety is of the utmost importance to Baumatic. Please make sure that you read this instruction booklet before attempting to install or use the appliance. If you are unsure of any of the information contained in this booklet, please contact the Baumatic Technical Department. General Information o This appliance is designed for domestic household use and can be built into a standard kitchen cabinet or housing unit.
Warning and safety instructions o This appliance complies with all current European safety legislation. Baumatic do wish to emphasise that this compliance does not remove the fact that the appliance surfaces will become hot during use and retain heat after operation. Child Safety o Baumatic strongly recommend that babies and young children are prevented from being near to the appliance and not allowed to touch the appliance at any time.
Installation This appliance must be correctly installed by a suitably qualified person, strictly in accordance with the manufacturer’s instructions. o Baumatic Ltd. declines any responsibility for injury or damage, to person or property, as a result of improper use or installation of this appliance. o Heat, steam and moisture will be created during use of the appliance, take care to avoid injury and ensure that the room is adequately ventilated.
Specifications Product Dimensions Aperture Dimensions Height: Width: Depth: 580 mm – 583 mm 560 mm 550 mm 591 mm 597 mm 525 mm Cooling fan o A tangential cooking fan is fitted inside of this appliance, to make the internal temperature of the oven stable and the external surface temperature lower.
Standard accessories o o o o o o o Removable side racks Safety shelf Enamelled drip trap with handle Trivet 2 x Safety shelves Removable roof liner Telescopic runners kit (not P610SS) (not P610SS) (P630SS only) Optional extras o BPS1 Pizza stone o TELKIT Telescopic runners kit o SCL2KIT Stay-clean liners kit* (not P630SS) * Please note that the TELKIT and SCL2KIT cannot be used together. You cannot fit the SCL2KIT to the P630SS, because it comes supplied with telescopic runners.
Control Panel P610SS P620SS P630SS 1) 2) 3) 4) 5) 6) Oven function selector knob 7) Timer “duration” button Power indicator light 8) Timer “end cook” button Oven programmer/timer 9) Timer “manual operation” button Oven operating light 10) Timer “minus” button Thermostat control knob 11) Timer “plus” button Timer “minute minder” button 10
Oven programmer/timer display 12) 13) 14) “Auto” function symbol “Minute minder” symbol “Manual operation” symbol. Setting and using the oven programmer/timer Selecting manual operation mode After your appliance is connected to your mains supply for the first time, the numbers on the timer display will flash. Before you can select a cooking function or set a temperature, you must set the appliance into “manual operation” mode.
o Once the display has got to your desired countdown time, let go of the “minus” and “plus” buttons. The minute minder symbol (13) will appear on the timer display. o Once a countdown time has been set, it is possible to shorten or lengthen the time by using the “minus” or “plus” buttons. o An alarm will sound when the countdown time has elapsed.
o To silence the audible signal and return the oven to manual operation mode, once the duration function has been used. You should press the “manual operation” button, the word AUTO will disappear from the display and the manual operation symbol will appear instead. o Important: If you do not turn the thermostat control knob and oven function selector knob to 0. Then the appliance will continue to operate as soon as you press the “manual operation” button.
o Important: If you do not turn the thermostat control knob and oven function selector knob to 0. Then the appliance will continue to operate as soon as you press the “manual operation” button. Setting the start and end time function This function will allow you to set a time in the future that the oven switches on at and a time that the oven will switch off at. o Use the thermostat control knob (5) to set the temperature that you require. The manual operation symbol (14) will appear on the display.
Adjusting the audible signal o The audible signal has three different settings, low, medium and high. o To adjust the level of the audible signal, make sure that the timer is in manual mode. Then press and hold the minus button and you will hear the current level that is set. o Press the minus button again and the audible signal will adjust to the next level. o When the required level of audible signal is reached, release the minus button and it will be set.
P610SS, P620SS and P630SS standard oven functions DEFROST MODE: The fan runs without heat to reduce the defrosting time of frozen foods. The time required to defrost the food will depend on the room temperature, the quantity and type of food. Always check food packaging for the defrosting instructions. FAN OVEN: This method of cooking uses the circular element while the heat is distributed by the fan. This results in a faster and more economical cooking process.
P630SS additional functions OVEN LIGHT: Separate light control which allows the light to be switched on, even when the oven is switched off. CONVECTION OVEN AND FAN: This method of cooking provides traditional cooking with heat from the top and the lower element, it also utilses the circulation fan. This ensures a fast and even distribution of the heat. Suitable for light and delicate baking, such as pastries. For the P620SS the oven light will switch on automatically when an oven function is selected.
o Make sure that frozen foods are thoroughly thawed before cooking, unless the instructions on the food packaging advise that you can “cook from frozen”. o You should pre-heat the oven and not place food inside of it until the oven operating light has gone off. You can choose not to pre heat when using the fan oven mode; however you should extend the cooking time given on the food packaging by approximately ten minutes. o Before cooking, check that any unused accessories are removed from the oven.
Cleaning and maintenance Cleaning operations must only be carried out when the oven is cool. The appliance should be disconnected from your mains supply before commencing any cleaning process. o The oven should be thoroughly cleaned before it is operated for the first time and after each use. This will avoid residual food stuffs becoming baked on the oven cavity. After residues have been baked on several times, they are far more difficult to remove. o Never clean the oven surfaces by steam cleaning.
Removable oven roof liner (P620SS and P630SS only) o Your appliance is supplied with a roof liner, which should be slid over the top of the grill element. o Once you have finished cooking, the liner should be removed and thoroughly cleaned after each use of the appliance. o Do not allow fat and grease to build up on the oven liner, as this could cause a fire hazard.
o You should grip the sides of the door at the centre and then incline it slightly towards the oven cavity and then by pulling it gently away from the oven cavity. o IMPORTANT: You should make sure that the door is supported at all times and that you place the door on some padded material whilst cleaning it. o The oven door and door glass should only be cleaned using a damp cloth and a small amount of detergent.
INSTALLATION The installation must be carried out by a suitably qualified person, in accordance with the current version of the following. o UK Regulations and Safety Standards or their European Norm Replacements. o Building Regulations (issued by the Department of the Environment). o Building Standards (issued by the Scottish Development Department). o IEE Wiring Regulations. o Electricity At Work Regulations.
Installing the oven into the kitchen cabinet Positioning the appliance o Ensure that the aperture that you will be fitting the oven into is of the size given in the above diagram. o The oven must be fitted into an oven housing with the ventilation cut-outs shown in the “Ventilation requirements” section on the next page. o Ensure that the rear panel of the furniture housing unit has been removed.
Ventilation requirements (Figure shows the ventilation and cut-out requirements for the installation of the appliance into a standard kitchen unit). (Figure shows the ventilation and cut-out requirements for the installation of the appliance into a tall housing unit). o Ensure that the oven has been securely fixed into the housing unit. The fixing of the oven into the housing is made by using four screws. These should be screwed through the oven cabinet and into the housing unit.
My appliance isn’t working correctly o The oven isn’t coming on. * Check that the oven is in manual operation mode. * Check that you have selected a cooking function and a cooking temperature. o There appears to be no power to the oven and grill. * Check that the appliance has been connected to the electrical mains supply correctly. * Check that the mains fuses are in working order.
o The oven light is not working * Refer to page 20 and follow the “Replacing the oven bulb” section. o I am getting condensation in my oven * Steam and condensation is a natural by product of cooking any food with high water content, such as frozen food, chicken etc. * You may get condensation in the oven cavity and forming between the oven door glasses. This is not necessarily a sign that the oven is not working correctly.
Baumatic Ltd. Conditions of Guarantee Dear Customer, Your new Baumatic appliance comes complete with a free 12 month guarantee coverin g both parts and labour costs resulting from defective materials or workmanship. Baumatic also gives you the opportunity to automatically extend the guarantee period for a further 12 months at no extra cost, giving an initial guarantee period of 24 months. The extended guarantee period applies to England, Scotland, Wales and Northern Ireland only.
Baumatic Ltd You will be mine Headquarters Baumatic Ltd. Baumatic Buildings, 6 Bennet Road, Reading, Berkshire RG2 0QX, United Kingdom Sales Telephone +44 118 933 6900 Sales Fax +44 118 931 0035 Service Telephone +44 118 933 6911 Service Fax +44 118 986 9124 Spares Telephone +44 118 933 6922 Technical / Advice Telephone +44 118 933 6933 E-mail: sales@baumatic.co.uk technical@baumatic.co.uk Http (Internet site): www.baumatic.