
User manual


o If possible, disconnect and move freestanding or slot-in cookers
from their position, to provide easier access to the rear wall and
ceiling. If this is not possible, then a thick, protective covering
should be placed over the worktop, hob top or cooker. This will
help to protect these surfaces from damage and debris.
o Select a flat surface for assembling the cooker hood. Cover that
surface with a protective covering and place all cooker hood
parts and fittings on it.
o Do not tile, grout or silicone this appliance to the wall or
cabinetry. This appliance is designed to be surface mounted
only.
Installing your cooker hood
IMPORTANT: YOU WILL HAVE TO DECIDE BEFORE
INSTALLING YOUR COOKER HOOD WHETHER TO USE
IT IN EXTRACTION MODE OR RECIRCULATION
MODE. PLEASE TURN TO PAGE 20 NOW TO
UNDERSTAND THE DIFFERENCES BETWEEN THESE
TWO MODES.
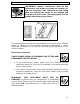
o We recommend that at two people install this hood.
o Your cooker hood can be fitted to the wall or to the underside of
a kitchen cabinet.
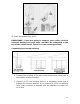
o It must be positioned at least 700 mm above the hob
underneath it. You cannot fit this product by securing it between
two cupboards.
IMPORTANT: YOUR COOKER HOOD SHOULD BE CONNECTED
TO YOUR MAINS SUPPLY AFTER
THE REST OF THE
INSTALLATION PROCESS HAS BEEN COMPLETED.
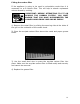
Wall installation
NOTE: All the screws mentioned in this section come with your
cooker hood.
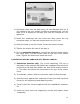
1) Position the hood against the wall and mark the positions for the
supporting bracket bolt holes of the exhaust hole (this hole must
be 130 mm in diameter).
17