READ MANUAL BEFORE USE MODEL #2212 LP GAS COOKER OWNER’S MANUAL SAFETY ALERTS, ASSEMBLY & OPERATING INSTRUCTIONS GENERAL MAINTENANCE & STORAGE WARNING • • • • The maximum size cooking vessel for frying with this cooker using oil/grease is 10-quart. The maximum amount of cooking oil/grease for the supplied 10-quart cooking vessel is 3 quarts. Do not use a cooking vessel smaller than 12.5 -inches diameter. This appliance is not for frying whole turkeys.
WARNING • This cooker is a high pressure gas appliance for OUTDOOR USE ONLY. • This cooker does not have automatic thermostat controls so must be attended and monitored at all times during use. • This cooker must never be used to fry whole turkeys. • The warnings and safety instructions in this manual MUST be followed to provide reasonable safety and efficiency in using the appliance. • If having any doubts or concerns about your ability to use this product call 800-864-6194.
CONTENTS Warnings & Dangers 1-6 Assembly Instructions 7 14 Pre-Cooking Check List & Operating Instructions 15 Test Your Thermometer and Placement 8 - 10 LP Gas Cylinder Warnings & Specifications Turning off Cooker and Disconnecting Hose 15 - 16 Regulator Hose Assembly 10 How to Determine Proper Amount of Oil Connecting Regulator Hose Assembly to Cooker 11 Frying Instructions Connecting Regulator Hose Assembly to LP Gas Cylinder 11 Cooking Oil: Important Facts to Know 18 Trouble Shootin
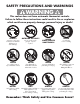
SAFETY PRECAUTIONS AND WARNINGS WARNING This cooker does not have automatic thermostat controls. Failure to follow these instructions could result in fire or explosion which could cause property damage, personal injury or death! ALWAYS operate in a open area a minimum of 10-ft from buildings, trees and overhangs. NEVER use on decks, boats or any combustible surface! NEVER! No barefeet or sandals when cooking.
NOTE TO CONSUMER This LP Gas Cooker is a specialized high pressure gas appliance having greater heat output than traditional kitchen stoves. It is referred to as cooker and appliance in this manual and on warning tags. Same as a kitchen stove, this cooker does not have automatic thermostat controls so must be attended and monitored at all times during use.
WARNING COOKING WITH OIL OR GREASE • This cooker does not have automatic thermostat controls so must be attended and monitored at all times during oil heat up and frying. • For frying with this cooker, do not use a cooking vessel larger than 36-qt or smaller than 12 inches diameter. • When cooking with oil or grease, a thermometer MUST be used for reasonable temperature reading. Follow instructions for proper testing, installation and use of a thermometer on pages 15-16 in this manual.
DANGER IF OIL OR GREASE FIRE OCCURS In the event of an oil/grease fire, do not attempt to extinguish with water. Immediately call your local Fire Department. A Type BC or ABC dry chemical fire extinguisher may in some cases contain the fire. If a fire occurs INSIDE THE COOKING VESSEL follow these steps. • Turn off gas supply. • Wearing a protective glove, cover the pot with a lid. DO NOT re-open lid as the oil/grease fire could re-ignite. Allow cooking vessel to cool down to 115˚F (45˚C) before opening lid.
WARNING GENERAL OPERATING • This appliance does not have automatic thermostat controls so must be attended and monitored at all times during use. • This appliance has an open flame. In sunlight or other bright light, the flame may be almost invisible. Use extreme caution keeping hands, hair and clothing away from the cooker. Do not lean over the cooker when lighting burner. Loose hair and clothing can catch fire during lighting and operation.
ASSEMBLY INSTRUCTIONS READ ALL SAFETY WARNINGS & ASSEMBLY INSTRUCTIONS CAREFULLY BEFORE ASSEMBLING OR OPERATING YOUR COOKER. Inspect contents in the box to ensure all parts are included and undamaged. FOR MISSING PARTS OR ASSISTANCE, PLEASE CALL 1-800-864-6194 M-F 8am - 5pm CST. Proof of purchase will be required.
DANGER CARBON MONOXIDE HAZARD This appliance can produce carbon monoxide which has no odor. Using it in an enclosed space can kill you. Never use this appliance in an enclosed space such as a camper, tent, boat, car or home. WARNING LP GAS CYLINDER • Use only a 20 pound LP Gas Cylinder or smaller with a protective collar. • LP (propane) gas is colorless, tasteless, heavier than air, and is both flammable and explosive. Combustion of propane consumes oxygen and produces carbon monoxide, a poisonous gas.
LP GAS CYLINDER SPECIFICATIONS NOT SUPPLIED WITH THIS COOKER WARNING LP GAS CYLINDER The LP (Liquid Propane) gas cylinder specifically designed to be used with this cooker must have a 20 lb (9.1 kg) capacity incorporating a Type-1 cylinder valve and an over-filling protection device (OPD). • DO NOT connect this cooker to an existing #510 POL cylinder valve with Left Hand Threads. The Type-1 valve can be identified with the large external threads on the valve outlet.
WARNING FILLING THE LP GAS CYLINDER: • Allow only qualified LP gas dealers to properly fill or repair your LP gas cylinder. • New tanks should be purged prior to filling; inform LP gas dealer if you are using a new tank. • DO NOT allow the cylinder to be filled beyond 80% capacity. Over-filled tanks can create a dangerous condition. Over-filled tanks can build up pressure and cause the relief valve to expel propane gas vapors.
CONNECTING REGULATOR HOSE ASSEMBLY TO BURNER The Regulator Hose Assembly is a pre-assembled unit. Do not take apart. Simply connect the regulator hose assembly to the LP gas cylinder and to the cooker. An adjustable wrench is needed when attaching the hose to the burner. Visually inspect the regulator hose assembly prior to each use. If there is evidence of abrasion, wear, cuts or leaks, the hose must be replaced prior to the appliance being put into operation.
WARNING WHEN TO PERFORM A LEAK TEST • • • • After assembling your cooker and before lighting for the first time, even if purchased fully assembled. Every time the LP gas cylinder is refilled or if any of the gas components are replaced. Any time your cooker has been moved. At least once per year or if your cooker has not been used for more than 60 days. GAS LEAK TEST INSTRUCTIONS Note: The gas leak test must be performed in an area that has adequate lighting in order to see if bubbles are developing.
POSITIONING THE COOKER 1. Check wind direction. 2. Position cooker DOWNWIND from the nearest structure; no closer than 10-ft from nearest building or railing, keeping flames from any potential oil/grease fire away from nearest structure. 3. Position cooker DOWNWIND from the LP Gas Cylinder keeping a minimum distance of 20" apart so the heat of the cooker does not reach cylinder. 4.
ADJUST Regulator Control Knob for Flame Height E IS W - C L O CK LY DO NOT light burner at air intake PE O O N 6 NOTE: The regulator control knob controls flame intensity only. It is not an ON/OFF valve. Practice rotating the regulator control knob to become familiar with flame adjustment.
PRE-COOKING CHECK LIST AND OPERATING INSTRUCTIONS WARNING DO NOT operate this cooker until you have read and understand ALL of the warnings and instructions in this manual. Property damage, bodily harm, severe burns and death could result from failure to follow these safety steps. These steps should be performed after the cooker has been assembled, stored, moved, cleaned, or repaired. 1. Insure that the cooker is properly assembled and connected to propane cylinder. 2.
PLACEMENT OF YOUR THERMOMETER Thermometer clipped to Basket 1. Make sure clip on thermometer is about 2" below the dial. 2. For frying, attach the thermometer clip on the inside of the basket 2-inches with the stem immersed in oil at least 1-inch. 3. DO NOT insert thermometer stem into food. This can cause incorrect thermometer reading. 1-inch 4. During frying, the thermometer dial indicator will continue to rise.
3. Add the determined amount of oil/grease into the cooking vessel. 4. Attach thermometer to the pot, making certain the stem is immersed into the oil at least 1-inch. CAUTION Thermometer shall be attached to the cooking vessel for heat-up period only. Later, attach thermometer to the basket for frying. 5. Light the burner on the cooker as described. NOTE: Spend a few moments to adjust the flame up and down to become familiar with flame adjustment process. 6.
COOKING OIL: Important Facts to Know Since early times when human civilization first developed pots and pans, people have used various forms of cooking oil for frying. Originally animal fat (grease/lard) was used for frying which now is mostly replaced by olive, vegetable and peanut oil. It is almost universal knowledge that over-heated cooking oil will catch fire and burn.
TROUBLE SHOOTING TIPS Sometimes the burner does not light or has a only a meager match flame. Other times, the flame blows out, burns yellow, or there is a flame inside the burner tube. These symptoms are common and easy to remedy. The following Trouble Shooting Tips cover most questions and problems associated with outdoor gas cooker appliances. Save this manual for future reference. 1. SYMPTOM: Burner lights but the flame remains very small and will not increase for heat-up and cooking.
TROUBLE SHOOTING GUIDE SYMPTOM CAUSE POSSIBLE SOLUTION Burner lights but the flame remains very small Repeated from page 19 Rapid gas flow from propane tank activates EXCESS FLOW safety device because regulator control knob is not in OFF position Repeat lighting instructions and be certain to S-L-O-W-L-Y open cylinder valve one full turn, then S-L-O-W-L-Y open regulator control knob to light burner.
GENERAL MAINTENANCE & STORAGE Intense heat from the cooker will burn away paint from parts of the frame and windscreen flashing. This is normal and will cause a slight 'odor' for a few minutes during the initial use. The exposed steel will rust. Occasional care must be taken to prolong the life of your cooker. 1. Store cooker in a dry place. Do not store outside exposed to weather. Storage of a gas cooker appliance indoors is permissible only if the cylinder is disconnected.
Stainless Steel and Aluminum Stockpots 24-Qt. - 162-Qt. Cast Iron Cookware Stainless Steel Stockpots with Spigot Dutch Ovens, Skillets, Griddles, and more 36-Qt. & 44-Qt. 7633 Propane "Y" Splitter 2-Hose Connector 5020 or 5025 5" or 12" Stainless Steel Thermometer Stainless Steel 6-PC. Brew Kettle Set 8, 10 & 16-Gallon 800-772 12" Brew Thermometer 2297 Bayou® Griddle Cooker SP2 Double Jet Cooker with Hose Guard Stainless Steel Bayou® Fryers KAB6 Bayou® Cooker with Hose Guard www.thebayou.