MODEL #2212 LP GAS COOKER OWNER’S MANUAL SAFETY ALERTS, ASSEMBLY & OPERATING INSTRUCTIONS GENERAL MAINTENANCE & STORAGE This Instruction Manual contains important information necessary for the proper assembly and safe use of this appliance. You must carefully read and follow all warnings and instructions in this manual before assembling and using this appliance.
CONTENTS Warnings & Dangers 1-8 Assembly Instructions 9 LP Gas Cylinder Specifications 10 - 11 Turning off Cooker and Disconnecting Hose 17 Operating Instructions 18 Test Your Thermometer and Placement 18 - 19 Regulator Hose Assembly 12 How to Determine Proper Amount of Oil Connecting Regulator Hose Assembly to Cooker 12 Frying Instructions Connecting Regulator Hose Assembly to LP Gas Cylinder 13 Cooking Oil: Important Facts to Know 22 Trouble Shooting Tips 23 Trouble Shooting Guide
NOTE TO CONSUMER This LP Gas Cooker is a specialized high pressure gas appliance having greater heat output than traditional kitchen stoves. It is referred to as cooker and appliance in this manual and on warning tags. Same as a kitchen stove, this cooker does not have automatic thermostat controls so must be attended and monitored at all times during use. This LP Gas Cooker is for OUTDOOR USE ONLY! Do not use a cooking vessel larger than 10-quart for frying on this cooker.
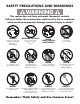
SAFETY PRECAUTIONS AND WARNINGS WARNING This cooker does not have automatic thermostat controls. Failure to follow these instructions could result in fire or explosion which could cause property damage, personal injury or death! ALWAYS operate in a open area a minimum of 10-ft from buildings, trees and overhangs. NEVER use on decks, boats or any combustible surface! NEVER! No barefeet or sandals when cooking.
WARNING • This cooker is a high pressure gas appliance for OUTDOOR USE ONLY. • This cooker does not have automatic thermostat controls so must be attended and monitored at all times during use. • If having any doubts or concerns about your ability to use this product call 800-864-6194. • Should you still have concerns about operating this product, then do not use. Contact your dealer for return and refund.
WARNING COOKING WITH OIL OR GREASE • This cooker does not have automatic thermostat controls so must be attended and monitored at all times during use. • For frying with this cooker, do not use a cooking vessel larger than 10-quart or smaller than 12 inches diameter. • Follow instructions contained in this manual for proper assembly and positioning of the cooker, gas leak and thermometer test, determining proper amount of oil to use, heat-up and frying operation, cleanup and storage.
DANGER IF OIL OR GREASE FIRE OCCURS In the event of an oil/grease fire, do not attempt to extinguish with water. Immediately call your local Fire Department. A Type BC or ABC dry chemical fire extinguisher may in some cases contain the fire. If a fire occurs INSIDE THE COOKING VESSEL follow these steps. • Turn off gas supply. • Wearing a protective glove, cover the pot with a lid. DO NOT re-open lid as the oil/grease fire could re-ignite. Allow cooking vessel to cool down to 115˚F (45˚C) before opening lid.
WARNING THERMOMETER & OIL TEMPERATURE • This gas appliance does not have automatic thermostat controls so must be attended and monitored at all times during use. • When cooking with oil or grease, a thermometer MUST be used for reasonable temperature reading. Follow instructions for proper testing, installation and use of a thermometer on pages 18 - 19 in this manual. • Test thermometer before each use.
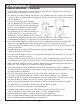
WARNING LP GAS CYLINDER • Use only a 20 pound LP Gas Cylinder or smaller with a protective collar. • LP (propane) gas is colorless, tasteless, heavier than air, and is both flammable and explosive. Combustion of propane consumes oxygen and produces carbon monoxide, a poisonous gas. Therefore, never operate an outdoor cooker appliance inside a building or confined area where ventilation may be restricted. Make sure the LP cylinder and the cooker are placed in an open area.
WARNING GENERAL OPERATING - CONTINUED • Keep children and pets away from the cooking area at all times. Carefully monitor all activity around cooker to avoid burns or other injuries. • This appliance will be hot during and after use. Use insulated oven mitts or gloves for protection from hot surfaces or splatter from cooking liquids. Always wear closed toe shoes while cooking with this appliance. • Use the 10-qt cooking vessel supplied with this appliance for frying with oil/grease.
ASSEMBLY INSTRUCTIONS READ ALL SAFETY WARNINGS & ASSEMBLY INSTRUCTIONS CAREFULLY BEFORE ASSEMBLING OR OPERATING YOUR COOKER. Inspect contents in the box to ensure all parts are included and undamaged. FOR MISSING PARTS OR ASSISTANCE, PLEASE CALL 1-800-864-6194 M-F 8am - 5pm CST. Proof of purchase will be required.
LP GAS CYLINDER SPECIFICATIONS DANGER CARBON MONOXIDE HAZARD This appliance can produce carbon monoxide which has no odor. Using it in an enclosed space can kill you. Never use this appliance in an enclosed space such as a camper, tent, car or home. WARNING LP GAS CYLINDER (NOT SUPPLIED WITH THIS COOKER) The LP (Liquid Propane) gas cylinder specifically designed to be used with this cooker must have a 20 lb (9.
WARNING • Turn off the cylinder valve when your cooker is not in use. • Handle the LP gas cylinder with care. • Always secure the LP gas cylinder in an upright position. • Never connect an unregulated LP gas cylinder to your cooker. • DO NOT expose LP gas cylinders to excessive heat or ignition sources. Cylinder Valve Store upright with Protective Cap CLOSED • DO NOT store a spare LP gas cylinder near your cooker.
REGULATOR HOSE ASSEMBLY Your cooker is equipped with a Type-1 connection device with the following features: Regulator Control Knob 1. The system will not allow gas flow from the cylinder until a positive connection to the cylinder valve has been made. NOTE: The cylinder valve must be turned off (clockwise) before any connection is made or removed. TYPE-1 Connector Coupling Nut For connection to LP Gas Cylinder Brass Orifice Connector 2.
WARNING Insure the cylinder valve is CLOSED (valve turned clockwise) prior to connecting the LP gas cylinder to your cooker. Turn the regulator control knob counter-clockwise to properly close the regulator valve. Read and follow all instructions and warnings on the supply hose safety tags. Read and follow all warnings in this manual concerning the safe use of LP gas cylinders and the regulator hose assembly, before connecting cylinder to cooker. Read and follow all warnings on the LP gas cylinder.
GAS LEAK TEST INSTRUCTIONS Note: The gas leak test must be performed in an area that has adequate lighting in order to see if bubbles are developing. DO NOT use a flashlight to check for bubbbles. 1. Create a mixture of 50% water and 50% liquid dishwashing soap. 2. Turn the gas cylinder valve to the OFF position (clockwise). Then turn regulator control knob to OFF position (counter-clockwise). 3. To turn ON the fuel supply, turn the cylinder valve knob one turn counter-clockwise.
PRE-COOKING CHECK LIST WARNING DO NOT operate this cooker until you have read and understand ALL of the warnings and instructions in this manual. Property damage, bodily harm, severe burns and death could result from failure to follow these safety steps. These steps should be performed after the cooker has been assembled, stored, moved, cleaned, or repaired. 1. Insure that the cooker is properly assembled and connected to propane cylinder. 2.
LIGHTING INSTRUCTIONS WARNING DO NOT stand with head, body or arms over the cooker when lighting. Loose clothing and hair can catch fire. Follow the instructions exactly. Read and follow all warnings and instructions in this manual before using your cooker. 1. Make sure the regulator control knob and cylinder valve are in the OFF positions. 2. Turn ON the fuel supply by S-L-O-W-L-Y rotating the cylinder valve counter-clockwise one full turn.
BURNER FLAME CHECK ORANGE Adjust flame height using regulator control knob. Rotate air control shutter BURNER BLUE FLAME to achieve mostly blue flame. The air control shutter mounted on the front of burner helps to control the amount of air that mixes with the LP gas. A blue flame with little or no yellow flame indicates a proper air/gas mixture and provides the best heat. Adjust the air control shutter until CORRECT INCORRECT the desired flame is achieved.
OPERATING INSTRUCTIONS WARNING Read, understand and follow all warnings and instructions contained in this manual. DO NOT skip any of the warnings and instructions contained in the preceding sections of this manual. • Do not use a cooking vessel larger than 10-quart for frying on this cooker. DO NOT use a cooking vessel smaller than 12" diameter on this cooker. • Make sure cooker is positioned at least 10-ft from all combustible materials including building overhangs and tree branches.
PLACEMENT OF YOUR THERMOMETER 1. Make sure clip on thermometer is about 2" below the dial. Thermometer clipped to Basket 2. For frying, attach the thermometer clip on the inside of the basket with the stem immersed in oil at least 1-inch. 3. DO NOT insert thermometer stem into food. This can cause incorrect thermometer reading. 2-inches 1-inch 4. During frying with oil, the thermometer dial indicator Oil Line will continue to rise.
FRYING INSTRUCTIONS (Read page 22 about Cooking Oil) WARNING This cooker does not have automatic thermostat controls so must be attended and monitored at all times during use. When cooking with oil/grease, a thermometer must be used to monitor temperature. Oil/grease heated above 400˚F (200˚C) will ignite and catch fire causing property damage, personal injury or death. NOTE: Optimum frying temperature range is 325˚F to 350˚F (163˚C to 177˚C). 1.
9. Leaving burner flame at lowest setting, and wearing a protective glove, carefully and S-L-O-W-L-Y lower the basket, with thermometer attached and food product, into the cooking oil. Inserting the food product into hot oil will cause a brief and furious spatter, and will quickly reduce oil temperature. 10. Frying time will be fast so NEVER LEAVE COOKING UNATTENDED and constantly monitor the thermometer.
COOKING OIL: Important Facts to Know Since early times when human civilization first developed pots and pans, people have used various forms of cooking oil for frying. Originally animal fat (grease/lard) was used for frying which now is mostly replaced by olive, vegetable and peanut oil. It is almost universal knowledge that over-heated cooking oil will catch fire and burn. Cooking oil has a flashpoint temperature ranging from 550˚F to 700˚F, depending on type of oil used, altitude and ambient temperature.
TROUBLE SHOOTING TIPS Sometimes the burner does not light or has a only a meager match flame. Other times, the flame blows out, burns yellow, or there is a flame inside the burner tube. These symptoms are common and easy to remedy. The following Trouble Shooting Tips cover most questions and problems associated with outdoor gas cooker appliances. Save this manual for future reference. 1. SYMPTOM: Burner lights but the flame remains very small and will not increase for heat-up and cooking.
TROUBLE SHOOTING GUIDE SYMPTOM CAUSE POSSIBLE SOLUTION Burner lights but the flame remains very small Repeated from page 23 Rapid gas flow from propane tank activates EXCESS FLOW safety device Repeat lighting instructions and be certain to S-L-O-W-L-Y open cylinder valve one full turn, then S-L-O-W-L-Y open regulator valve to light burner Burner will not light Repeated from page 23 Blockage in burner from spider webs, insects, dirt dobbers and debris Disconnect hose from burner.
GENERAL MAINTENANCE & STORAGE Intense heat from the cooker will burn away paint from parts of the frame and windscreen flashing. This is normal and will cause a slight 'odor' for a few minutes during the initial use. The exposed steel will rust. Occasional care must be taken to prolong the life of your cooker. 1. Store cooker in a dry place. Do not store outside exposed to weather. Storage of a gas cooker appliance indoors is permissible only if the cylinder is disconnected.
OTHER PRODUCTS BY BAYOU CLASSIC Stainless Steel and Aluminum Stockpots 24-Qt. - 162-Qt. Stainless Steel Stockpots with Spigot Cast Iron Cookware 36-Qt. & 44-Qt. Dutch Ovens, Skillets, Griddles, and more SP2 SP10 High Pressure Cooker 5020 Double Jet Cooker with Hose Guard 5" Stainless Steel Thermometer 10 PSI M5HPR High Pressure LPG Stainless Braided Hose SQ14 Outdoor Patio Stove™ KAB6 Bayou Cooker with Hose Guard Jambalaya Kits 4-Gal. to 30 Gal. DB375 Dual Burner Outdoor Patio Stove™ www.