® BZ1509E4 WARNING Read the assembly, installation, care, maintenance, and use instructions in this manual prior to assembling and using this trampoline/enclosure. Save this manual for future reference. USER’S MANUAL . . . . . . . . . . . . . 3 Assembly, Installation, Care, Maintenance, and Use Instructions. WARNING: The trampoline/enclosure is designed for users weighing 100 kg(220 lbs.) or less. This enclosure is to be used only in connection with certain trampiline YJ (USA) Corp.
® QUESTIONS? If you have questions after reading this manual, please call our toll-free Customer Hot Line. The trained technicians on our Customer Hot Line will provide immediate assistance. Customer Hot Line: 877-927-8777 Monday–Friday, 8 a.m.–5 p.m. REPLACEMENT PARTS CONTENTS IMPORTANT PRECAUTIONS . . . . . . . . . . . . . . . . . . . . . . . . . . . 4 WARNING PLACARD PLACEMENT . . . . . . . . . . . . . . . . . . . . . .5 www.jumppod.com BEFORE YOU BEGIN . . . . . . . . . . . . . . . . . . . . . . .
To reduce the risk of serious injury,read and follow all warnings,precautions,and instructions in this manual before assembling and using the trampoline. 1. The owner and supervisors of the trampoline are responsible to make sure all the users are aware of practices specified in this manual. 2. Place the trampoline on a level surface before use. 3. Adequate overhead clearance is essential. A minimum of 7.3 m (24 ft) from ground level is recommended.
24. Do not attempt to crawl under the netting. 21. Do not attach anything to the netting that is not a manufacturer approved accessory or part of the enclosure. 25. Do not attempt to jump over the netting. 22. Wear clothing free of drawstrings, hooks, loops, or anything that could get caught in the netting. 26. Do not intentionally rebound off the netting. 23. Enter and exit the trampoline enclosure only at the door designed for that purpose. 27.
BEFORE YOU BEGIN If you have questions after reading this manual, please call our toll-free Customer Hot Line at 877-92 7-8777,Monday through Friday,8 a.m. until 5 p.m. Central Time (excluding holidays). To help us assist you, please mention the name of the product when calling (Bazoongi Enclosure). Thank you for selecting a Bazoongi trampoline enclosure. The enclosure, when combined with a properly placed and maintained trampoline, will p rovide many years of backyard fun.
Hazards Associated with High Winds This trampoline enclosure is not recommended for use by children under 6 years of age or by anyone weighing more than 100 kg (220 lbs.). A trampoline with an enclosure can be moved or blown over by high winds, potentially injuring anyone in its path or anyone inside of the enclosure. If you anticipate high winds, take down the enclosure netting, and stake the trampoline frame to the ground (see page 13), or move the trampoline and enclosure to a sheltered location.
ASSEMBLY IMPORTANT ASSEMBLY INFORMATION TRAMPOLINE PLACEMENT • Assembly requires a 8/16” socket and ratchet (or a 8/16” open-end wrench) and a Philips screwdriver (not included). 1. Place the trampoline and enclosure on a level surface before use. 2. Adequate overhead clearance is essential. A minimum of 7.3 m (24 ft.) from ground level is recommended. Provide clearance for wires, tree limbs, and other possible hazards. Lateral clearance is also essential.
2. Lay a Enclosure bottom tube(6) and a Enclosure top tube(7) with Plastic Cap on the ground. 6 2 11 Make sure that the Enclosure bottom tube(6) is oriented so the small holes are in the position shown. Slide a Foam Sleeve (11) onto each of the tubes; note that the ends of the Enclosure bottom tube(6) should not be covered. 7 11 Small Hole Plastic Cap 9 Insert the Enclosure bottom tube(6) into the Enclosure top tube(7). Tighten a Self-tapping Screw (5) into the small hole in the Tube (6, 7).
5. Lay out Top G4 Pole (8),joint each section Connector to a 5 %/$&. %/8( %/8( %/8( %/8( %/$&. straight line as shown. Assemble the remaining Top G4 Pole (8) in the same way. Spread the Netting (10) on the trampoline bed, insert a Top G4 Pole (8) into the opening of Top Sleeve on the Netting (10). Insert the other Top G4 Pole (8) into the opposite opening of Top Sleeve on the Netting (10). Spread out G4 Pole and Joint each section to one straight line.
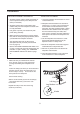
See insert drawing for attached of G4 Pole (8): Plastic Enclosure Cap (9) has been attached to the top of the Enclosure top tube(7). Attached Hanging Point : G4 Pole (8) Plastic Enclosure Cap 9 Top Tube (7) 7. Note: During steps 7 and 8, you will “sew”the lower edge of the Netting(10) to the V-rings on the bed using the Cords(12). 7 Door 10 Locate the V-ring closest to the door.
9. Using the included plastic tie,attach the Safety Placard(14)to the Netting(10)near the door as shown. 9 The trampoline/enclosure is now fully assembled. Make sure that all parts are securely attached. Familiarize yourself and all users of the trampoline/enclosure with the safety precautions, use and instructional materials, and care and maintenance instructions in this manual before using. 10 14 Disassembly To disassemble the trampoline/enclosure,follow assembly steps 1 through 8 in reverse order.
U-bolts V- 13
EXPLODED DRAWING AND PART LIST 9 10 7 6 13 1 14 4 3 2 8 11 14 Key No. Qty. 1 2 3 4 5* 6 7 16 8 8 4 8 4 4 Description Key No. Lock Nut U-Bolt Bracket U-Bolt Wedge Self-tapping Screw Enclosure bottom tube Enclosure top tube Qty. 8 9 2 4 10 11 12* 13 14 15* 1 8 8 16 2 4 * 1 Description G4 Pole Plastic Enclosure Cap (This part has been attached to the top of the Top Tube (7).
BZ1509E4 Part Number Lock Nut 1 *HWHS-S8 16 2 *HWHS-S8 8 U-Bolt Bracket 3 *HWHS-S8 8 U-Bolt 4 HWWEDGE-S4 4 WEDGE 5 HWSTS 8 Self-tapping Screws 6 ESP-UBOLT 4 Straight pole 7 ECP-UBOLT 4 Top curve pole 8 SETG4-15JP4 2 G4 pole (2 sets) 9 HWEPCAP-15/14 4 Plastic Enclosure Caps (Pre-assembled to Key#7) 10 NET15-JP4 1 Netting with attached Hardware 11 FSBLK44 8 Foam sleeve 12 HWROPE-S8 8 Cord 13 *HWHS-S8 16 14 1 BZ1509E4-Manual 15 HWSTSW *HWHS-S8: Set of 8 of