200W CM 1000W CM 850W CM 750W CM 650W CM 550W CM
INDEX Glinde, May 2015 ENGLISH » Introduction ����������������������������������������������������������������������������������������������������������������������������������������������������������5 Safety instructions ����������������������������������������������������������������������������������������������������������������������������������������������5 Benefits and technical advantages of your new power supply ����������������������������������������������������������������������������5 Compat
Instalacja nowego zasilacza �������������������������������������������������������������������������������������������������������������������������������24 Funkcje bezpieczeństwa ������������������������������������������������������������������������������������������������������������������������������������24 Usuwanie usterek �����������������������������������������������������������������������������������������������������������������������������������������������25 Częste problemy �����������������
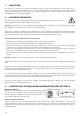
1. INTRODUCTION We are delighted that you have chosen to use a be quiet! power supply from our Dark Power Pro 11 series in your PC. Please read and follow all the information contained in these instructions carefully prior to installation. Should you have any further questions, please contact our customer service. See contact information in item Manufacturer's details. 2. SAFETY INSTRUCTIONS The power supply is only guaranteed to function properly if the instructions are followed.
Overclocking Key The Overclocking Key groups the individual 12V-rails to a single 12V-rail. You can enable the overclocking function permanently by setting the jumper provided directly at the power supply. Or you can enable the overclocking function by pressing the switch on the slot cover provided as needed. The overclocking key is connected to the power supply using the connector labeled accordingly. When you switch on the overclocking function at the slot, a LED lights on the slot cover switch.
∙∙ EPS12V Version 2.92 ∙∙ Intel C6/C7 Status for the new processor generation ∙∙ Energy Star 6.0 guidelines ∙∙ ErP guidelines 5. INSTALLING YOUR NEW POWER SUPPLY Please read „Safety instructions“ before you begin the installation. Note: You will need a screwdriver to fit the power supply in your PC. Only use the screws provided with the power supply because they have the correct thread. Caution: Only use the supplied cable set. Using cables that were not included (e.g.
OPP (overload protection) This safeguard is triggered if the total output of the power supply exceeds the specified maximum load. This can happen if the output of power supply is insufficient for the system (incorrectly dimensioned). 7. TROUBLESHOOTING Please note: If you have an ATX system, the power supply is enabled by the motherboard in order to boot the PC. For this reason, please refer to the motherboard or case manual to check whether the on/off switch is connected correctly.
wheels pictogram indicates the need to dispose of the device separately. Please help to protect the environment and make sure, once you have decided to stop using the device, that you dispose of it responsibly via the correct collection system. In Germany, you are legally** required to dispose of used devices separately, instead of as domestic waste.
1. EINLEITUNG Wir freuen uns, dass Sie sich dazu entschieden haben, ein be quiet! Netzteil der Dark Power Pro 11 Serie in Ihrem Rechner einzusetzen. Vor der ersten Inbetriebnahme befolgen Sie bitte alle Punkte dieser Anleitung. Falls Sie weitere Fragen haben, richten Sie diese gerne an unseren Kundenservice. Siehe hierzu Kontaktdaten unter „Herstellerangaben“. 2. SICHERHEITSHINWEISE Vor der ersten Inbetriebnahme befolgen Sie bitte alle Punkte dieser Anleitung.
Höchste Leistung und Stabilität für CPU und GPU Insbesondere geeignet für Overclocking durch vier unabhängige 12V-Leitungen. Der OverclockingKey ermöglicht den manuellen Wechsel zwischen vier unabhängigen 12V-Leitungen und einer massiven 12V-Leitung. Hochwertige 105°C Kondensatoren sichern Leistungsfähigkeit und Zuverlässigkeit. LLC- + DC/ DC-Technologie für einen sehr effizienten und stabilen Betrieb. Overclocking Key: Der Overclocking Key fasst die einzelnen 12V-Schienen zu einer 12V-Schiene zusammen.
4. KOMPATIBILITÄT Die be quiet! Netzteile der Dark Power Pro 11 Serie sind mit allen aktuell gängigen Netzteil- sowie MainboardSpezifikationen kompatibel wie u.a.: ∙∙ Intel ATX 12V Power Supply Design Guide Version 2.4 (Sowie abwärtskompatibel zu V2.31, V2.3, V2.2, V2.01, V2.0) ∙∙ ATX System Design Guide Version 2.2 und Version 2.1 ∙∙ BTX Version 1.0a ∙∙ E-ATX Server Dual Mainboards mittels 8-Pin-Connector ∙∙ EPS 12V Version 2.92 ∙∙ Intel C6/C7 Status der neuen Prozessorgeneration ∙∙ Energie Star 6.
UVP (Unterspannungsschutz) Diese Sicherung löst aus, sobald die Spannung auf den Leitungen unter ein bestimmtes Limit fällt. Das Netzteil wird in diesem Fall automatisch abgeschaltet. OVP (Überspannungsschutz) Die Überspannungssicherung löst bei zu hoher Spannung auf den Leitungen aus und schaltet das Netzteil ab. SCP (Kurzschlusssicherung) Die Sicherung bei Kurzschluss im Sekundärteil des Netzteils verhindert einen Defekt am Netzteil und an den am Netzteil angeschlossenen Komponenten.
Problem: Nach dem Einbau einer neuen Grafikkarte springt der PC nicht mehr an oder stürzt bei jeder Gelegenheit ab. Das Netzteil ist zu schwach für ihre Grafikkarte ausgelegt. Bitte schauen Sie vor dem Kauf in unserem WattKonfigurator unter www.bequiet.com nach. Hier wird Ihnen das richtige be quiet! Netzteil aus unserem Sortiment empfohlen.
12. HERSTELLERANGABEN Listan GmbH & Co. KG | Biedenkamp 3a | 21509 Glinde Deutschland Für weitere Unterstützung erreichen Sie uns innerhalb Deutschlands unter der unten stehenden kostenlosen Service-Hotline, montags bis freitags von 09:00 bis 17:30 Uhr. Kostenlose Hotline: 0800 – 0736736 Fax: 040-7367686-69 E-Mail: service@bequiet.com Webseite und Netzteil Kalkulator: www.bequiet.com 13.
1. INTRODUCTION Nous vous remercions d'avoir choisi un bloc Dark Power Pro 11 de be quiet!. Avant la première mise en service, nous vous recommandons de lire attentivement ce manuel et d’en observer les consignes. Si vous avez d’autres questions, nous vous invitons à prendre contact avec notre service après-vente, dont vous trouverez les coordonnées dans la rubrique « Informations constructeur ». 2.
Performance, stabilité et excellent taux de conversion : Particulièrement adapté à l’overclocking grâce aux quatre rails 12 V indépendants. Clef overclocking pour un fonctionnement au choix en mode multirail ou mono rail. Condensateurs 105°C de qualité supérieure pour une meilleure performance et fiabilité. Technologie LLC+DC/DC pour un rendement ultime et un fonctionnement ultra stable. Clef overclocking : La clef overclocking permet de basculer les différents rails 12 V vers un seul rail massif.
4. COMPATIBILITÉ Les blocs d’alimentation Dark Power Pro 11 sont compatibles avec la plupart des spécifications des cartes mères et des alimentations : ∙∙ Intel ATX 12V Power Supply Design Guide Version 2.4 (et rétro compatibles avec V2.31, V2.3, V2.2, V2.01, V2.0) ∙∙ ATX System Design Guide Version 2.2 et Version 2.1 ∙∙ BTX Version 1.0a ∙∙ E-ATX Server Dual Motherboards via 8-Pin Connector ∙∙ EPS 12V Version 2.
OVP (protection contre les surtensions) Cette sécurité se déclenche en cas de tension trop élevée sur les rails et met le bloc d‘alimentation hors tension. SCP (protection contre les courts-circuits) Le fusible qui protège les circuits secondaires du bloc d’alimentation permet de préserver l‘alimentation et les composants qui lui sont raccordés. OTP (protection contre la surchauffe) Si l‘intérieur de l‘alimentation atteint une température trop élevée, elle s‘éteint automatiquement.
Problème : après le montage d‘une nouvelle carte graphique, l‘ordinateur ne démarre plus ou plante inopinément Suite à l’installation d’une nouvelle carte graphique plus performante sur votre système, votre ordinateur ne démarre plus ou plante très régulièrement. Votre alimentation est très certainement sous dimensionnée. Avant votre achat, veuillez consulter notre configurateur sur www.bequiet.com, afin de vous assurer que votre bloc est suffisamment puissant.
interventions extérieures entraînent l’annulation de la garantie. Nous vous invitons à vous reporter à nos conditions générales de garantie, sur le site www.bequiet.com. Vous trouverez l’ensemble des coordonnées ci-dessous. 12. INFORMATIONS CONSTRUCTEUR be quiet! est une marque appartenant à Listan GmbH & Co. KG – Biedenkamp 3a – 21509 Glinde – Allemagne Si vous avez besoin de joindre notre service après-vente, vous pouvez contacter notre numéro vert, du lundi au vendredi, de 09h à 18h : Tél.
1. WPROWADZENIE Cieszymy się, że zdecydowali się Państwo na zamontowanie w swoim komputerze zasilacza be quiet! serii Dark Power Pro 11. Aby od razu odpowiedzieć na Państwa ewentualne pierwsze pytania, opisaliśmy zalety i cechy szczególne serii zasilaczy Dark Power Pro 11 w niniejszej instrukcji obsługi. Dalsze pytania prosimy kierować do pracowników Działu Obsługi Klienta – patrz dane kontaktowe, punkt Dane producenta. 2.
Przełącznik overclocking Przełącznik overclocking sumuje poszczególne linie 12 V w jedną linię 12 V. Istnieje możliwość uaktywnienia funkcji overclocking na stałe za pomocą dołączonego jumpera bezpośrednio na zasilaczu. Funkcję overclocking można również uaktywnić w miarę potrzeby za pomocą włącznika znajdującego się na dołączonej blaszce slotu. Przełącznik overclocking zostaje połączony z oznakowanym gniazdem w zasilaczu.
V2.01, V2.0). ∙∙ ATX System Design Guide wersja 2.2 i wersja 2.1 ∙∙ BTX wersja 1.0a ∙∙ płyty główne E-ATX Server Dual z 8-pinowym konektorem ∙∙ EPS12V wersja 2.92 ∙∙ nowa generacja procesorów Intel C6/C7 ∙∙ wytyczne Energy Star 6.0 ∙∙ dyrektywa ErP 5. INSTALACJA NOWEGO ZASILACZA Przed rozpoczęciem instalacji należy przeczytać punkt „Wskazówki bezpieczeństwa”. Uwaga: Do zamontowania zasilacza w komputerze potrzebny będzie śrubokręt.
SCP (Zabezpieczenie zwarciowe) Zabezpieczenie zwarciowe w części wtórnej zasilacza zapobiega uszkodzeniu zasilacza oraz podłączonych do niego komponentów. OTP (Zabezpieczenie temperaturowe) W przypadku wytwarzania zbyt dużego ciepła w zasilaczu wyłącza się on natychmiast automatycznie. Dopiero po schłodzeniu zasilacz może zostać ponownie włączony. Proszę się upewnić, czy Państwa komputer wyposażony jest w wystarczający system chłodzenia.
Ważna wskazówka: W przypadku gdy zasilacz nie działa, proszę przeczytać niniejszą instrukcję obsługi w całości i upewnić się, iż wymienione w niej ewentualne problemy mogą zostać wykluczone. Jeżeli problemy nie zniknęły, prosimy o niezwłoczny kontakt z naszym Działem Obsługi Klienta. 9.
13. PRAWA AUTORSKIE ∙∙ Zabronione jest powielanie, przekazywanie, rozpowszechnianie lub zapis treści tej dokumentacji w dowolnej formie w całości lub częściowo bez uprzedniego pisemnego zezwolenia frmy Listan. ∙∙ be quiet! jest zarejestrowaną marką frmy Listan GmbH & Co. KG. Inne wymienione w niniejszej dokumentacji produkty oraz nazwy firm mogą stanowić marki lub nazwy handlowe konkretnych właścicieli. ∙∙ Listan stale rozwija produkty zgodnie z polityką firmy.
1. INTRODUCCIÓN Gracias por haber escogido un bloque de alimentación be quiet! de la serie Dark Power Pro 11 para su ordenador. Antes de usar el dispositivo por primera vez, siga todos los puntos de este manual. Si tiene más dudas, consulte a nuestro servicio de atención al cliente. Para ello, vea los datos de contacto del punto Datos del fabricante. 2.
permite la conmutación manual entre el modo de cuatro raíles de 12 V y el funcionamiento con un solo rail. Los condensadores de alta calidad de 105 °C garantizan el rendimiento y la fiabilidad. Tecnología LLC + CC/ CC para un funcionamiento optimizado en cuanto a eficiencia y estabilidad. Overclocking Key: La Overclocking Key reúne los distintos rieles de 12 V en un riel de 12 V. Puede activar permanentemente la función Overclocking mediante el puente suministrado en el bloque de alimentación directamente.
V2.2, V2.01, V2.0) ∙∙ ATX System Design Guide, versión 2.2 y 2.1 ∙∙ BTX, versión 1.0a ∙∙ E-ATX Server Dual Mainboards con conector de 8 pines ∙∙ EPS12V, versión 2.92 ∙∙ Estado de Intel C6/C7 de la nueva generación de procesadores ∙∙ Directivas Energy Star 6.0 & Directiva ErP 5. INSTALACIÓN DE SU NUEVO BLOQUE DE ALIMENTACIÓN Lea el punto „Indicaciones de seguridad“ antes de comenzar con la instalación. Observación: para montar el bloque de alimentación en el PC, necesita un destornillador.
SCP (fusible contra cortocircuitos) El fusible evita, en caso de cortocircuito en la pieza secundaria del bloque de alimentación, un defecto en el bloque de alimentación y en los componentes conectados a este. OTP (fusible para la temperatura) Cuando se genera una temperatura demasiado alta en el bloque de alimentación, este se apaga solo de inmediato. Puede conectarlo de nuevo cuando se haya enfriado. Asegúrese de que el PC esté equipado con suficiente refrigeración.
9. ACCESORIOS En el pack de entrega del bloque de alimentación, se incluyen los siguientes accesorios: Juego de cables para gestión de cables, Placa de ranura con Overclocking Key, Puente para la activación permanente de la función Overclocking, Cable de alimentación, Instrucciones de uso, Abrazadera para cables, Tornillos para fijar el bloque de alimentación 10.
y empresas que se citen en el presente documento pueden ser marcas o nombres comerciales de sus respectivos propietarios. ∙∙ Listan, de acuerdo con su política, sigue avanzando en el desarrollo de sus productos. Por lo tanto, Listan se reserva el derecho de realizar modificaciones y mejoras, sin previo aviso, en los productos descritos en el presente documento.
1. ВВЕДЕНИЕ Мы рады, что вы выбрали блок питания Dark Power Pro 11 серии производства be quiet! для вашего ПК. Пожалуйста, прочтите и следуйте информации, представленной в данной инструкции. Если у вас возникнут дополнительные вопросы, пожалуйста, свяжитесь со службой поддержки пользователя. Контактную информацию вы найдете в разделе «Подробности о производителе». 2.
Overclocking Key Специальный ключ Overclocking Key объединяет независимые 12В-линии в одну 12В-линию. Вы можете включить функцию Overclocking Key для постоянного использования, установив перемычку непосредственно на блоке питания. Или вы можете включать функцию Overclocking Key нажатием переключателя на заглушке слота по мере необходимости. Переключатель подключается к блоку питания в разъем с соответствующей надписью.
5. УСТАНОВКА НОВОГО БЛОКА ПИТАНИЯ Пожалуйста, прочитайте раздел «Инструкция по безопасности» перед началом установки. Примечание: вам потребуется отвертка, чтобы установить блок питания в компьютер. Используйте винты из комплекта поставки блока питания. Внимание! Используйте только поставляемый комплект кабелей. Использование других кабелей питания (напр. кабели из предыдущих серий блоков питания) может привести к повреждениям! Сначала демонтируйте старый блок питания.
Предупреждение: Существует опасность для жизни при работе с источником питания. Если вы заметили следы дыма, поврежденные кабели или воздействие жидкостей, немедленно отсоедините питание от сети и не используйте блок питания снова. Никогда не открывайте корпус блока питания. Высоковольтные компоненты блока питания могут попрежнему быть под напряжением даже после длительного времени с момента отключения.
11. ГАРАНТИЯ ∙∙ 5-летняя гарантия производителя для потребителей (для оборудования, купленного только у авторизованных представителей be quiet!). ∙∙ Для гарантийного случая потребуется оригинальная квитанция, подтверждающая факт покупки. Пожалуйста, храните ее в надежном месте. ∙∙ Открытие корпуса устройства, манипуляции и/или технические изменения любого рода и повреждения из-за внешнего механического воздействия приведет к потере гарантии.
Limited Warranty Per the terms and conditions of this limited warranty as given below, be quiet! warrants its new products to be free of defects resulting from faulty materials and faulty manufacturing for the length of the warranty period. I. APPLICABILITY This non-transferable warranty is applicable to newly purchased, previously unopened be quiet! products and is enforceable by only the original consumer purchaser. Proof of purchase is required for warranty service, so should be retained.
TECHNICAL DATA Technische Daten, Données technique, Datos técnico, Dati tecnici, Dane technicze, Технические характеристики 1. LABEL AC Input DC Output P11-1200W 1200W Max. Current Max. Combined Power 110 - 240Vac 3.3V 25A 5V 25A 150W P11-1000W 1000W Max. Current Max. Combined Power P11-850W 850W Max. Current Max. Combined Power P11-750W 750W Max. Current Max. Combined Power 25A 5V 25A P11-650W 650W Max. Current Max. Combined Power P11-550W 550W 40 Max. Current Max.
2. VOLTAGE REGULATION DC Output 3.3V 5V 12V1 12V2 12V3 12V4 -12V 5VSB Tolerance +/- 3% +/- 3% +/- 3% +/- 3% +/- 3% +/- 3% +/- 10% +/- 3% Ripple/Noise (max.) 40mV 40mV 60mV 60mV 60mV 60mV 100mV 40mV 3. 4. OPERATING CONDITIONS Environment Temperature Rel. Humidity Operation 0 ~ 40°C up to 85% (non-condensing) Storage -20 ~ 80°C up to 95% (non-condensing) MINIMAL LOAD 1200W - 550W 5. 5V 12V1 12V2 12V3 12V4 -12V 5VSB 0A 0.5A 0.
7. DIMENSIONS 86mm 193mm / 180mm* 150mm *1200W, 1000W, 850W: 193mm / 750W, 650W, 550W: 180mm 8. DISTRIBUTION AND PIN ASSIGNMENT 24 PIN ATX power connector 42 Pin Color Signal Pin Color Signal 1 Orange +3.3VDC 13 Orange Brown +3.3VDC +3.3Vdef. sense 2 Orange +3.
+12V power connector EPS +12 V POWER CONNECTOR Signal Color Pin Color PinSignal Pin Color Signal Signal Yellow +12VDC 5 COM 1 Black Yellow +12VDC +12VDC 6 2 Black 1 Black COM 5 COM Yellow E P S + 1 2 V P O W E R C O N N E C T O3R COM 7 Yellow +12VDC Black 8 Pin Color Signal Pin COM COM 4 Color +12VDC Black 2 Black 6Signal Yellow 1 Yellow +12VDC 5 Pin 1 2 3 4 Black 3 Black Black 4 Black Color COM COM Black COM Black COM Yellow 5 Yellow 6 COM PCI EXPRESS 7 Pin Yellow Color 8 COM Yellow 1 Yellow 2 3 Ye
9.
850W / 750W 600mm 100mm 50 mm 150mm 150mm 150mm 4-Pin 24-Pin 20-Pin P8 connector P4 connector P4 connector S-ATA S-ATA S-ATA S-ATA S-ATA S-ATA HDD HDD HDD HDD P8 connector HDD HDD FDD S-ATA S-ATA HDD FDD MB connector PCIe 1 (6+2-Pin) PCIe 2 (6+2-Pin) PCIe 3 (6+2-Pin) PCIe 4 (6+2-Pin) PCIe 5 (6+2-Pin) PCIe 6 (6+2-Pin) PCIe 7 (6 Pin) External fan connectors OCK = Overclocking key OCK = Overclocking jumper 600mm 45
650W / 550W 600mm 100mm 50 mm 150mm 150mm 150mm 4-Pin 24-Pin 20-Pin P8 connector P4 connector P4 connector S-ATA S-ATA S-ATA S-ATA S-ATA S-ATA HDD HDD P8 connector HDD S-ATA S-ATA HDD MB connector PCIe 1 (6+2-Pin) PCIe 2 (6+2-Pin) PCIe 3 (6+2-Pin) PCIe 4 (6+2-Pin) PCIe 5 (6 Pin) External fan connectors OCK = Overclocking key OCK = Overclocking jumper 600mm 46 HDD FDD