VMware and BEA WebLogic Solutions Deployment Guide VMware and BEA WebLogic Solutions Deployment Guide Author: Gilbert Lau, Sr.
VMware and BEA WebLogic Solutions Deployment Guide Note from the Author This guide is primarily focused on helping three distinct types of audience: 1. Customers who are in the early stages of adopting VMware Infrastructure solutions. 2. Existing BEA WebLogic customers who are considering deploying VMware Infrastructure solutions. 3. Existing VMware customers who are considering implementing new BEA WebLogic application environments.
VMware and BEA WebLogic Solutions Deployment Guide Table of Contents 1.0 INTRODUCTION .................................................................................................................................. 5 1.1 BEA WEBLOGIC SERVER ..................................................................................................................... 5 1.2 BEA WEBLOGIC SERVER ARCHITECTURE............................................................................................ 6 1.
VMware and BEA WebLogic Solutions Deployment Guide 7.3.2 Customization on the remote managed servers........................................................................ 115 7.3.3 Starting the Upgraded BEA WLS Application Environment.................................................... 118 7.4 MIGRATING BEA 9.2 VM CLONE TO PRODUCTION .......................................................................... 119 7.4.1 Verification of Upgrade and BEA WLS functionality ......................................
VMware and BEA WebLogic Solutions Deployment Guide 1.0 Introduction BEA and VMware have been working on joint solution initiatives to provide customers with proven, scalable and optimized solutions of BEA software products on VMware Infrastructure. BEA WebLogic software platform is one of the most widely deployed application server in the IT industry today.
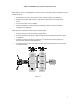
VMware and BEA WebLogic Solutions Deployment Guide 1.2 BEA WebLogic Server Architecture The WebLogic Server 9.2 is a complete implementation of the Sun Microsystems J2EE 1.4 specification that provides a standard set of APIs for creating distributed Java applications that can access a wide variety of services, such as databases, messaging services, and connections to external enterprise systems. End-user clients access these applications using Web browser clients or Java clients.
VMware and BEA WebLogic Solutions Deployment Guide A BEA WebLogic Server on WebLogic Server: TM J2EE application consists of one of the following modules or applications running Web application modules—HTML pages, servlets, JavaServer Pages, and related files. Enterprise Java Beans (EJB) modules—entity beans, session beans, and message-driven beans. Connector modules—resource adapters.
VMware and BEA WebLogic Solutions Deployment Guide Figure 1.1 Figure 1.2 BEA WebLogic Application Server is available in two unique packages that are designed to meet a wide range of client requirements. 1. 2. BEA WebLogic 9.0 Express BEA WebLogic 9.0 Server Our solution would focus on BEA WebLogic 9.2 Server environment with clustering and load balancing enabled. 1.
VMware and BEA WebLogic Solutions Deployment Guide VMware Infrastructure is the most widely deployed software suite for optimizing and managing IT environments through virtualization – from the desktop to the data center. The only production-ready virtualization suite, VMware Infrastructure is proven to deliver results at more than 20,000 customers of all sizes, used in a wide variety of environments and applications.
VMware and BEA WebLogic Solutions Deployment Guide VirtualCenter Management Server (VirtualCenter Server) – The central point for configuring, provisioning, and managing virtualized IT environments. Virtual Infrastructure Client (VI Client) – An interface that allows users to connect remotely to the VirtualCenter Server or individual ESX Servers from any Windows PC. Virtual Infrastructure Web Access (VI Web Access) – A Web interface that allows virtual machine management and access to remote consoles.
VMware and BEA WebLogic Solutions Deployment Guide Figure 1.4 1.4 BEA–VMware Solution Architecture This is a graphic representation of the architecture for running BEA WebLogic Applications on VMware Infrastructure. It demonstrates the ability to run several applications on same physical server by creating virtual machines containing the application, BEA WebLogic Platform and the operating system of choice.
VMware and BEA WebLogic Solutions Deployment Guide 1.5 BEA-VMware Solutions The BEA-VMware solutions delivers distinct value add to a BEA WebLogic application environment providing for high levels of server consolidation and rapid provisioning capabilities reducing the Total Cost of Ownership, cost and time to deployment of a BEA application environment.. 1.
VMware and BEA WebLogic Solutions Deployment Guide 8. 9. Rollback Development and test images using virtual machine snapshots during problem resolution. Rapid provisioning of additional BEA WebLogic Server instances during peak loads. 3. Change Management Patching and upgrading existing applications is high on the list of IT challenges facing any BEA customer.
VMware and BEA WebLogic Solutions Deployment Guide 7. 8. Automate physical server maintenance by dynamically relocating BEA WebLogic Server virtual machines without disruption to end users. Optimize the service level of distributed applications by controlling the aggregate allocation of resources for the entire set of virtual machines running the distributed BEA WebLogic and non-BEA WebLogic application environments. 5.
VMware and BEA WebLogic Solutions Deployment Guide 1.6 Deployment Approach Summary The deployment approach for implementing a BEA WebLogic Application server environment on VMware infrastructure has been summarized in the following steps. 1. 2. 3. 4. 5. 6. Install and configure your VMware Infrastructure 3 environment including ESX Server, VirtualCenter and VMware Infrastructure client to manage ESX Server hosts.
VMware and BEA WebLogic Solutions Deployment Guide 7. If you need to relocate virtual machines from one ESX Server host to another ESX Server, consider: Cold migration of the virtual machines to move the VM files to a different storage location or ESX Server host. Live migration (with VMware VMotion) to move online VMs to other ESX Server hosts. 1.7 Lab Environment Find below a summary of our lab setup.
VMware and BEA WebLogic Solutions Deployment Guide 2.0 Installation of VMware Infrastructure 3 Environment This section will focus on the installation of the following VMware Infrastructure 3 components: 1. VMware VirtualCenter 2 and license server 2. Virtual Infrastructure Client 3. VMware ESX Server 3 Prior to installing VirtualCenter you will have to decide between host based or server based licensing. ESX Server hosts have the option of having local license files (host based) or server based licensing.
VMware and BEA WebLogic Solutions Deployment Guide The VMware VirtualCenter version 2 default installation includes the following components: VirtualCenter Server – A windows service to manage ESX Server hosts .Net Framework – Software used by the VirtualCenter server and VI client. Web Access – Web Server to allow browser-based virtual machine management. Web Service – Software Development kit (SDK) for VMware products.
VMware and BEA WebLogic Solutions Deployment Guide Take the default folder offered or provide the appropriate folder in which you want to install the VirtualCenter server. Select typical install.
VMware and BEA WebLogic Solutions Deployment Guide VirtualCenter server requires a database to store and organize server data. VirtualCenter 2 supports Oracle, SQL server and Microsoft MSDE. The VirtualCenter Management Server requires administration credentials (ID and password) to log on to the database. Pls. refer to the VMware documentation for configuring your production database for VirtualCenter 2. The lab installation used a MSDE database for VirtualCenter installation.
VMware and BEA WebLogic Solutions Deployment Guide The license file can be downloaded from VMware or sent to the customers by email. Save the file and provide the file location information. Accept the default ports unless you want to specifically assign you own port information.
VMware and BEA WebLogic Solutions Deployment Guide Take the default. You can optionally set them to start automatically. This Web server provides web browser access to Virtual Center server. Note: these ports might need to be opened if you need to access Virtual Center server through the firewall. Once you click “ install”, the installer will install the VirtualCenter 2 server, license server, install and configure MSDE database .net Framework 1.1, VirtualCenter Repository etc. 2.
VMware and BEA WebLogic Solutions Deployment Guide Click on Virtual Infrastructure Client.
VMware and BEA WebLogic Solutions Deployment Guide Take the default directory or provide the appropriate folder for VI client installation.
VMware and BEA WebLogic Solutions Deployment Guide Exit the installer at this point. You have installed VirtualCenter 2 Management Server, Database, license server and VI client. The license server will be used to support the ESX Server hosts. It is recommended to install the license server on the same box as the VirtualCenter server. 2.3 Configuring VirtualCenter for Server Based Licensing Start the VI client from your start menu or from the desktop icon. Pls. provide the virtual server hostname or IP.
VMware and BEA WebLogic Solutions Deployment Guide Specify if the license server is on another system (note: 27000 is the default port used by license server) or on the same host as VirtualCenter. The lab installation had the license server (with licenses) on the same host as VirtualCenter. Check “change host license server settings….” option. This will help override the host’s license settings and will force the ESX Server hosts to use the license (server based) settings used by VirtualCenter.
VMware and BEA WebLogic Solutions Deployment Guide Take the “default” partitioning information for the disk partitions. For ESX Server boot specification, Take the default (from a drive – install on the MBR of the drive). Provide the network interface to be used and configure the network address and host name. You can use DHCP or provide the network information manually. Note: initially ESX Server as well as the Virtual machines (VM) created will share this network interface.
VMware and BEA WebLogic Solutions Deployment Guide 3.0 VMware ESX Server Management with VirtualCenter In this section, we will focus on the following steps: 1. Add ESX Server host to VirtualCenter 2. Configure ESX Server host for server based licensing 3. Create a virtual machine (VM) 4. Install the guest operating system on the VM 3.1 Adding ESX Server host to VirtualCenter Go to VI client and login in to VirtualCenter.
VMware and BEA WebLogic Solutions Deployment Guide The host is identified (there is a VirtualCenter host agent that is installed along with ESX Server). This location selection adds all the virtual machines from this host under BEAVMDC data center in the VirtualCenter inventory list and the default ESX Server host datastore “storage1”.
VMware and BEA WebLogic Solutions Deployment Guide This will add the standalone ESX Server host to the VirtualCenter inventory list. 3.
VMware and BEA WebLogic Solutions Deployment Guide Click on the “Edit” button (on the right top corner) for License sources. Provide the license server hostname or IP.
VMware and BEA WebLogic Solutions Deployment Guide Select “ESX Server Standard” (or the license type you are eligible for). The window will now show all your license features for the host. We are now ready to create the virtual machine for our BEA WLS Deployment. 3.3 Creating a Virtual Machine Login into VI Client and connect to VirtualCenter. Right click on <> and click “new virtual machine”. Create a typical virtual machine (VM) with the default device and configuration options.
VMware and BEA WebLogic Solutions Deployment Guide Inventory Location = BEAVMDC Make sure you have enough storage to support the VMs being created. Take the default datastore “storage1”. You can create additional storage (local or SAN) later if needed. Select the operating system you want to install. In our case, it is “MS Windows” and version is “2003 Enterprise Edition” Select the number of (virtual) processors you want to use for this VM. We picked 1VCPU.
VMware and BEA WebLogic Solutions Deployment Guide Set your memory size appropriately depending on the OS and application requirements. BEA recommendation is to have at least 1GB memory allocated to the BEA environment. Since we had a demo environment we picked 384MB and later increased it to 750MB. Note: The memory settings can be changed later by editing the VM settings. You can pick the appropriate memory size for your VM based on your BEA WLS application sizing considerations.
VMware and BEA WebLogic Solutions Deployment Guide Provide size of virtual disk (storage) to host the VM. We picked 4GB for OS + Applications. Enter the disk size in megabytes (MB) or gigabytes (GB). The default is 4GB. The available space on the selected VMFS volume is listed. You can configure a disk from as small as 1MB to as large as 2TB (2048GB). The virtual disk should be large enough to hold the guest operating system and all of the software that you intend to install with room for data and growth.
VMware and BEA WebLogic Solutions Deployment Guide Review the summary of parameters for the VM to be created. Click ‘Finish” to create the Virtual Machine. The “Recent Tasks” window will show the status. Wait till it shows completed.
VMware and BEA WebLogic Solutions Deployment Guide Right click on BEAVMBase and “edit settings”.
VMware and BEA WebLogic Solutions Deployment Guide Here you can edit, remove or add different components. Click on “CD/DVD Drive 1”. This usually shows client device as the default device. You can load the OS using client or host (ESX Server) device or using an existing .iso image in the VM datastores. We used the VI client CD/DVD device as we installed the OS remotely. So select “client device”. Now you are ready to insert the Windows OS CD in the host system drive and start the guest OS install.
VMware and BEA WebLogic Solutions Deployment Guide Proceed through the regular OS setup (follow standard installation procedure for windows server 2003 EE SP1). Note that disk size presented to you is the same as what you had provided as the disk size during “new VM” setup. Format using NTFS file system.
VMware and BEA WebLogic Solutions Deployment Guide Windows setup status screens After the installation, system boots up and comes up as follows 40
VMware and BEA WebLogic Solutions Deployment Guide 41
VMware and BEA WebLogic Solutions Deployment Guide Pick “custom” or “typical” network settings. We picked “custom”. If you want to provide static IP information, please choose custom settings.
VMware and BEA WebLogic Solutions Deployment Guide Right click on BEAVMBase and select “send Ctrl+Alt+Del”. If you do this manually even though your cursor might point to the VM console window, the VI client system will also execute a “Ctrl+Alt+Del”. Your display and mouse movement would be a little painful because VMware tools have not been installed. You can use “Cltrl+Alt” to move in and out of the console window of VM and external host (VI client) windows.
VMware and BEA WebLogic Solutions Deployment Guide 4.0 BEA WebLogic Software Installation on Virtual Machines Now that a basic Virtual Machine has been built with Windows Server 2003 EE SP1 operating system environment, we will be installing the BEA WebLogic Application Server (BEA WLS) as part of the base image. Optional: Any other custom application (including OS patches, security, anti-virus, system tools etc.) that should be deployed across the BEA application environment. 4.
VMware and BEA WebLogic Solutions Deployment Guide Accept License Agreement.
VMware and BEA WebLogic Solutions Deployment Guide Provide the path name to BEA Home directory. Select “Complete” as Installation type.
VMware and BEA WebLogic Solutions Deployment Guide Unselect “Mercury Tools” unless you are deploying for a development environment. Select the product installation directory. Every version of the BEA product will use its own directory under “BEA HOME”.
VMware and BEA WebLogic Solutions Deployment Guide 48
VMware and BEA WebLogic Solutions Deployment Guide This will complete install of the base image. You can also install all other relevant software that is needed as part of a BEA standard distribution in your environment. 4.2 Installation of Node Manager as Windows Service We also installed the Weblogic Node Manager as a Windows service.
VMware and BEA WebLogic Solutions Deployment Guide 5.0 Deployment of BEA WebLogic Server Virtual Machines This section discusses how the BEA virtual machine base image can be used for deployment in Development, Test or Production environments. We have created a base image consisting of the OS and BEA WLS environment. We will now create a template out of this virtual machine image.
VMware and BEA WebLogic Solutions Deployment Guide Provide the name of the template (BEAVM_Template) and also select the data center location where you want it to be stored (in this case: BEAVMDC) Select the “host” on which to store the template.
VMware and BEA WebLogic Solutions Deployment Guide Provide a datastore. Select “Normal”.
VMware and BEA WebLogic Solutions Deployment Guide Click “Finish” to create the template. The task bar below will show you progress. Progress can be seen in “recent tasks” window. Click on inventory and pick “virtual machines & templates” to see the newly created template.
VMware and BEA WebLogic Solutions Deployment Guide We have successfully created the template for BEA WLS Virtual Machines which now will be used as a generic Windows Server 2003 EE SP1 / BEA WLS 9.2 Image. We will use this template to create our BEA WLS application server nodes (VMs) in later sections. 5.3 Provisioning BEA WebLogic Application Server Virtual Machine Node from Templates The BEAVMBase image and template that were created are generic images.
VMware and BEA WebLogic Solutions Deployment Guide 5.3.1 Preparing for Guest Operating System Customization When you deploy a new virtual machine from a template or clone an existing virtual machine, you have the opportunity to customize the new guest operating system. The Guest Customization wizard guides you through the configuration options. Guest Optimization wizard will be invoked as part of the VM cloning process.
VMware and BEA WebLogic Solutions Deployment Guide 4. Repeat this procedure to extract sysprep files for each of the Windows guest operating systems (Windows 2000/XP/2003) you plan to customize using VirtualCenter. We are now ready to customize a new virtual machine during the cloning process. Start the “cloning” process using the template (BEAVM_Template). 5.3.2 Cloning a New BEA WLS Virtual Machine from Template Right click on BEAVM_Template and select “deploy virtual machine from this template”.
VMware and BEA WebLogic Solutions Deployment Guide Enter the name of the new VM: BEAVM1, location: BEAVMDC Select ESX Server host on which the VM will be created (we select 10.16.27.
VMware and BEA WebLogic Solutions Deployment Guide Select where the VM will be stored. (“Storage1”). If you have completed your “preparation steps” for Windows OS on the VirtualCenter system successfully, you should see the screen “select guest customization option”. If there are problems in your “sysprep” setup, you will get “do not customize” as the only option. Click on “customize using the customization wizard”.
VMware and BEA WebLogic Solutions Deployment Guide Specify a hostname for the computer or use the VM name (we selected to use VM name). Leave the license key information blank. We can provide the keys during the system boot after cloning.
VMware and BEA WebLogic Solutions Deployment Guide Enter the password for the Windows Administrator account. Enter your default time zone.
VMware and BEA WebLogic Solutions Deployment Guide Enter scripts and commands you would like to run when the system comes up and user logs in the first time. These scripts can be customization scripts for BEA or for other software applications in your WLS node.
VMware and BEA WebLogic Solutions Deployment Guide If you want to use DHCP to automatically assign network information, select “typical” settings. We picked customer settings to provide static IP address.
VMware and BEA WebLogic Solutions Deployment Guide Click on the drop box next to IP address. Prompt the user for the address during the cloning process. This option will help you provide static IP to your BEA WLS virtual machines during the cloning process.
VMware and BEA WebLogic Solutions Deployment Guide Fill in the rest of the network information. Click Ok to return to the previous screen and click “next”. Provide your domain name. We used “workgroup” in the lab.
VMware and BEA WebLogic Solutions Deployment Guide Check “Generate New Security ID” box. This will generate new and unique SID for the BEA WLS Windows environment. Save all the customization parameters as a custom specification (BEAVM_Specification). Customization specifications help set up standard (parameters) information for guest OS and application customizations.
VMware and BEA WebLogic Solutions Deployment Guide Click “Finish”. A customization specification by name “BEAVM_Specification” will be created as part of the cloning process and can be used for future cloning from the template. Now prior to the start of the new VM cloning process, you are prompted for the IP address of this VM.
VMware and BEA WebLogic Solutions Deployment Guide Click “Finish” to start the cloning process. The “recent tasks” bar will show you the status.
VMware and BEA WebLogic Solutions Deployment Guide Enter the license key when prompted. The system should configure and reboot again to come to the login prompt. You should now be able to use Windows’s Remote Desktop Connection to remotely log into the system. Login and check network settings. This should be the IP address and network information you provided during the cloning process. You computer name should be set to the “VM name”.
VMware and BEA WebLogic Solutions Deployment Guide Just follow the steps as outlined in the earlier section. When you get to “Guest Customization Option”, select “Customize using an existing specification” (remember, in the last cloning we selected “customize using customization wizard”).
VMware and BEA WebLogic Solutions Deployment Guide Select the specification (BEAVM_Specification was the specification we created in the last cloning process) to be used. Check the “Use Customization Wizard to temporarily adjust specification before deployment” box below to make adjustments to the specification prior to deployment, if you want to change some of the specification parameter values. We took the default (unchecked). This will take you directly to the cloning process.
VMware and BEA WebLogic Solutions Deployment Guide Click “finish” to start the cloning process. Once the cloning is completed, “power on” BEAVM2. The system should come up and ask for the licensing keys. Once the keys are entered the system should configure itself and come up to login prompt. Login to verify that the configurations worked correctly and nd made the 2 BEA WLS VM clone unique. We created another VM (BEAVM3) on the 2nd host (10.16.27.17).
VMware and BEA WebLogic Solutions Deployment Guide 6.0 BEA WebLogic Server Virtual Machine Application Customization In this section, we will go through the steps to configure the three VM nodes we have created into a functional BEA WLS environment. The following steps will be performed as part of the customization. 1. A WebLogic Domain will be created a. BEAVM1 will be configured as the admin server node i. BEAVM1 will also be configured as managed server 1 node running HTTP Proxy for a BEA cluster b.
VMware and BEA WebLogic Solutions Deployment Guide Take the default settings and clieck “Next”. Provide the username and password for the WebLogic administrator.
VMware and BEA WebLogic Solutions Deployment Guide Select appropriate “Startup Mode”. ( We selected “Development Mode”) Select “BEA supplied JDKs” Æ “ JRockit SDK Select “default” (yes).
VMware and BEA WebLogic Solutions Deployment Guide Provide the admin server configuration information (name, listen address and port). We took the “default”. Click “Add” to add the managed servers.
VMware and BEA WebLogic Solutions Deployment Guide We created 3 managed servers (one on the admin server BEAVM1 and two more on BEAVM2 and BEAVM3). Note that the “Listen port” for managed_server1 is 8001 as Admin server uses 7001 on BEAVM1. Click “Next”. Click “Add” to create a new cluster.
VMware and BEA WebLogic Solutions Deployment Guide We added (the IP address of) BEAVM2 and BEAVM3 (:7001, : 7001) to be part of cluster “new_Cluster_1”.’s cluster address. We picked “new_ManagedServer_2” and “new_ManagedServer_3” to be part of the cluster.
VMware and BEA WebLogic Solutions Deployment Guide We picked new_managed_server_1(on BEAVM1) to be the HTTP proxy for the cluster. This proxy server would receive requests from the clients and forward to the managed servers in the cluster. We configured the proxy server to be on the same box as the admin server. However, you could have them on separate VMs or systems. Click “Add” to add the node manager machine addresses (BEAVM1, BEAVM2 and BEAVM3).
VMware and BEA WebLogic Solutions Deployment Guide Assign the managed servers to the respective virtual machines. Review the information and click “next”.
VMware and BEA WebLogic Solutions Deployment Guide Enter the “domain name” and “domain location”. We used domain name: base_domain domain location: c:\bea\user_projects\domains Click “create” to create the domain. Click “done” once the domain creation is complete. 6.2 Packaging the BEA domain environment Packing and unpacking can be used to quickly create domain directory structures from the admin server (BEAVM1) on managed servers (BEAVM2 & BEAVM3) that would be part of this domain.
VMware and BEA WebLogic Solutions Deployment Guide Run the “pack” command from c:\bea\weblogic92\common\bin as follows: Pack –domain=c:\bea\user_projects\domains\base_domain –managed=true -template=base_domain.jar –template_name=”base_domain” “Pack” creates a package file called base_domain.jar which needs to be transferred to the other VMs (shared or ftp’ed) BEAVM2 and BEAVM3 to unpack.
VMware and BEA WebLogic Solutions Deployment Guide 6.3 Configuring and Starting the BEA Domain Environment BEAVM1 is our admin server.
VMware and BEA WebLogic Solutions Deployment Guide 6.3.1 Configuring security (host verification) prior to server startup On the browser, Go to environment Æ servers Select one of the servers (new_Managed_Server_1) Select “SSL” tab. Click “advanced” at the bottom of page.
VMware and BEA WebLogic Solutions Deployment Guide Click on “lock & edit”. Select “none” against hostname verification. This will disable hostname verification for SSL certificates. If you do not perform this action, you will encounter a “hostname verification error” while the admin server communicates with the node managers.
VMware and BEA WebLogic Solutions Deployment Guide Repeat this step for the admin server and the rest of the managed servers. 6.3.
VMware and BEA WebLogic Solutions Deployment Guide Click “yes” This will start all the managed servers in the BEA WebLogic domain.
VMware and BEA WebLogic Solutions Deployment Guide 6.4 Installing Applications on the WLS environment Login to admin server through the browser Click “lock & edit”. Go to Æ deployments.
VMware and BEA WebLogic Solutions Deployment Guide Click “upload your file(s)” Provide the application file name (*.war) (we used a sample application called ExamplesWebApp.
VMware and BEA WebLogic Solutions Deployment Guide Select “file” and click “next” Select “install deployment as an application” 89
VMware and BEA WebLogic Solutions Deployment Guide Select “new_Cluster_1” (cluster name). This will install the application across the managed servers (BEAVM2, BEAVM3) in the cluster new_Cluster_1. Select your optional security settings. We selected default values.
VMware and BEA WebLogic Solutions Deployment Guide Click “next” Click “finish” 91
VMware and BEA WebLogic Solutions Deployment Guide Click “save”. Now click “activate changes”. At this point, your application is installed and activated in the cluster.
VMware and BEA WebLogic Solutions Deployment Guide Go to Deployments. You should see the newly installed application.
VMware and BEA WebLogic Solutions Deployment Guide While choosing “Start”, please select “Serving all requests” 94
VMware and BEA WebLogic Solutions Deployment Guide Click “Yes” 95
VMware and BEA WebLogic Solutions Deployment Guide State of the application finally changes to “Active”. The application is now deployed successfully in the cluster. 6.4.1 Testing the application Go to browser and type in the application URL http://10.16.27.19:8001/examplesWebApp/HelloWorldServlet. You should see the application request being load balanced across the two managed servers in the cluster.
VMware and BEA WebLogic Solutions Deployment Guide This validates the BEA domain environment and load balancing.
VMware and BEA WebLogic Solutions Deployment Guide 7.0 Upgrading BEA WebLogic Application Server Environments on Virtual Machines There are 2 distinct VMware Infrastructure 3 features that can simplify the upgrade (or patching) of BEA WebLogic Application Server environments. 1. 2. Snapshots: Create a snapshot prior to upgrade. If the upgrade or patching fails, you can revert back to snapshot instantly. This provides for quick problem resolution in case of challenges during patching or upgrades.
VMware and BEA WebLogic Solutions Deployment Guide 7.1.1 Taking a BEA WebLogic Server Virtual Machine Snapshot Go to VirtualCenter, click on “BEAVM1” virtual machine. Right click on BEAVM1 Æ Snapshot Æ “take snapshot”. Enter the name for the snapshot that makes logical sense so that you can rollback to this BEA WebLogic system state when needed.
VMware and BEA WebLogic Solutions Deployment Guide The “recent tasks” window shows the status of the snapshot. Right click on BEAVM1 Æ snapshot Æ snapshot manager This shows you the snapshots available for the VM. Take a snapshot of all the BEA WLS VM instances to have a consistent image before upgrade. You can take snapshots either online (running VM) or offline (powered off). It is recommended to take snapshot on the offline VM to get a time consistent image especially in high volume environment.
VMware and BEA WebLogic Solutions Deployment Guide 7.2 Upgrading Production BEA WebLogic Application Server using VM Cloning We will create an exact clone of the current production VMs running 8.1 and move into an isolated (test) network environment. Create a second virtual network switch (private – not exposed to the public) on the ESX Server host. Do not associate this virtual switch with any physical NIC.
VMware and BEA WebLogic Solutions Deployment Guide Click on “add networking” on the right hand corner (top) Select “virtual machine” 102
VMware and BEA WebLogic Solutions Deployment Guide Check “create a virtual switch” but make sure to uncheck vmnic1. Remember, we are creating a virtual switch without associating with any physical network interface. You can always associate with a physical NIC as long as the NIC and virtual switch or configured to be a separate network and will not co-exist with the original VM on the production network.
VMware and BEA WebLogic Solutions Deployment Guide Click “finish” This will create the new virtual switch and virtual interface that can be used for our upgrade VMs that will be cloned from production VM (BEAVM1/2/3).
VMware and BEA WebLogic Solutions Deployment Guide 7.2.2 Creating a clone for upgrade Shutdown all your BEA WLS VM nodes to prepare for cloning. We will clone all of the BEA WLS VM nodes into the test environment at the same time. Then we will bring up the production instances back up for production use while we perform upgrade and testing on the replicated test VMs. On the VI client, right click BEAVM1 Æ clone Provide a new VM name (BEAVM1Test).
VMware and BEA WebLogic Solutions Deployment Guide Select datastore (storage1). Select “do not customize”. Remember, we want to keep the clone an exact mirror of our production (original) VM – BEAVM1. This will help us to make sure that all the OS and application settings are retained during upgrade and help quickly re-provision this system as the new production VM (post upgrade). Say “Finish” to start the cloning. Repeat the above steps for all the other BEA WebLogic nodes on the domain.
VMware and BEA WebLogic Solutions Deployment Guide Once the cloning is completed, Edit the network settings for the new clone.
VMware and BEA WebLogic Solutions Deployment Guide Click “add” to add a new network interface Select “Ethernet adapter” 108
VMware and BEA WebLogic Solutions Deployment Guide Select “named network with specific label” and select “Virtual Machine Network 2” that we had created. Click “finish”.
VMware and BEA WebLogic Solutions Deployment Guide Go to network adapter 1 (VM Network) and click “remove”. Click “ok”. This will delete the VM network for the new clone while making VM Network 2 the new virtual switch network for BEAVM1Clone. Repeat these steps for the other cloned BEA WLS VM (BEAVM2Test, BEAVM3Test) nodes. Now we have successfully configured all the BEA WLS VM clones on a network isolated from production. “Power on” the cloned VMs (BEAVM1Test, BEAVM2Test, BEAVM3Test).
VMware and BEA WebLogic Solutions Deployment Guide 7.3 Upgrading BEA WebLogic 8.1 to 9.2 In this section, we will illustrate a migration path for the test VM node(s) running BEA domain. Stop all the BEA WebLogic services before upgrade. Then install 9.2 as shown in chapter 4 onto a separate directory on the test nodes. We recommend that you follow upgrade procedure as outlined in BEA documentation. We have provided an example scenario of the upgrade process for illustration purposes. 7.3.
VMware and BEA WebLogic Solutions Deployment Guide Select the domain you want to upgrade (8.1 domain directory under /user_projects). Select “adminserver” to be the new “adminserver” post upgrade.
VMware and BEA WebLogic Solutions Deployment Guide Enter the credentials for the node manager (username: weblogic password: ****) It is recommended to back up the domain that is being upgraded.
VMware and BEA WebLogic Solutions Deployment Guide The wizard will create a 9.2 directory layout and move files to appropriate locations.
VMware and BEA WebLogic Solutions Deployment Guide Note: We only need to perform this domain upgrade procedure on BEAVM. BEAVM2 and BEAVM3 are kept intact. 7.3.2 Customization on the remote managed servers Note: The way node manager is configured in WLS 9.x is different from the 8.x versions. 1. Share the admin server’s directory on BEAVM1 For example, open the shared folder from BEAVM3 to copy the required files mentioned above. 2. On managed server node (BEAVM3) go to your WLS 9.
VMware and BEA WebLogic Solutions Deployment Guide Create a new folder called “security” under /common/nodemanager: Copy the Serializedsystemini.dat from 10.16.27.19\my816domain\security to /common/nodemanager/security folder. 3. Create a folder named “config” under /common/nodemanager folder.
VMware and BEA WebLogic Solutions Deployment Guide Create another folder named “nodemanager” under the newly created /common/nodemanager/config folder. Copy the file named “nm_password.properties” from 10.16.27.19/my816domain/config/nodemanager to the newly created /common/nodemanager/config/nodemanager folder.
VMware and BEA WebLogic Solutions Deployment Guide 4. Now install the 9.2 node manager (after the 9.2 software installation) as Windows service (refer to chapter 4.0 on how to install node manager) on all the nodes. At the end of this, the current 8.1.6 directory structure is upgraded to 9.2. You will need to perform the same procedure above on BEAVM2 and other BEA WLS nodes as well. 7.3.3 Starting the Upgraded BEA WLS Application Environment Now go to the original 8.
VMware and BEA WebLogic Solutions Deployment Guide You are ready to test and run your applications in the upgraded environment. We tested our sample application, “examplesWebApp” in our upgraded “my816domain” in 9.2 WebLogic environment. Please follow BEA documentation to upgrade your custom WLS environment. 7.4 Migrating BEA 9.2 VM Clone to Production Shutdown the production VMs and make the clones (BEAVM1Test, BEAVM2Test, BEAVM3Test) as the new BEA production environment.
VMware and BEA WebLogic Solutions Deployment Guide Change VM Network 2 to VM network. Make sure the original production VMs are offline before doing this. Repeat the step for other VM clones. Now your upgraded VM environment is online and your user traffic can be directed to the upgraded BEA WebLogic application. 7.4.1 Verification of Upgrade and BEA WLS functionality Go to any browser on the public network, http://10.16.27.19:8001/examplesWebApp/HelloWorldServlet Pls. refer to http://edocs.bea.
VMware and BEA WebLogic Solutions Deployment Guide 8.0 Converting Physical BEA WebLogic Server Instance to a Virtual Machine Instance VMware P2V Assistant is an enterprise-class migration tool that transforms an image of an existing physical system into a VMware virtual machine.
VMware and BEA WebLogic Solutions Deployment Guide machine retains the identity and settings of the original physical machine. These include: machine name, SID, hard disks (partitions), data files, application and user settings. This process does not require the P2V Assistant or a helper machine (physical or virtual). It does require that the cloned disk be detached from the helper virtual machine, if that was used.
VMware and BEA WebLogic Solutions Deployment Guide 123
VMware and BEA WebLogic Solutions Deployment Guide Click “install” to begin installation process.
VMware and BEA WebLogic Solutions Deployment Guide We will now create a VM which will eventually host the migrated virtual BEA WLS environment (virtual disk) 8.2 Creating a Target Virtual Machine Go to VirtualCenter console and right click on the ESX Server host. Click on “new Virtual Machines”.
VMware and BEA WebLogic Solutions Deployment Guide We will create a new virtual machine named BEAP2VVM to host our BEA instance (post P2V).
VMware and BEA WebLogic Solutions Deployment Guide Select storage . We selected “raj1” which was on SAN. Select the right guest operating system and version for the virtual machine. This needs to match with the source system OS and version.
VMware and BEA WebLogic Solutions Deployment Guide 128
VMware and BEA WebLogic Solutions Deployment Guide Size of disk should be equal to source disk size (here we took 8GB). Note that P2V cloning copies only the files (actual data) and not the entire disk. But it is a recommended best practice to keep the size of the target disk(s) the same as the source disk(s). Note down the path of the blank virtual disk created during the VM creation above.
VMware and BEA WebLogic Solutions Deployment Guide 8.3 Adding Target Virtual Disk to Helper VM Add the blank virtual disk created to the helper VM (in our case, BEAVMBase) as a second virtual disk. Shutdown helper VM (BEAVMBase). Right click on BEAVMBase Æ edit settings Æ Hard Disk1 Click “Add” to add a new virtual disk to the VM.
VMware and BEA WebLogic Solutions Deployment Guide Select “use an existing virtual disk” and browse to the datastore directory where the BEAP2VVM disk is located.
VMware and BEA WebLogic Solutions Deployment Guide 132
VMware and BEA WebLogic Solutions Deployment Guide Select “independent” mode with persistence. Click ok. Power on the helper VM.
VMware and BEA WebLogic Solutions Deployment Guide 8.4 Source System Preparation Shutdown the physical system hosting the BEA WLS managed server and reboot the system using the P2V Assistant 2.1.2 boot CD. You should see the boot prompt. Press “enter”. Press “ok” on the welcome screen. Select the source disk(s) involved and the network interface used to access the system. If the disks are connected by Fibre Channel, select “yes” when prompted for loading FC drivers.
VMware and BEA WebLogic Solutions Deployment Guide Give the IP address you just configured on the source machine. Select the hard disk that needs to be cloned (we were using only c:\).
VMware and BEA WebLogic Solutions Deployment Guide We will perform “reconfiguration” later.
VMware and BEA WebLogic Solutions Deployment Guide We want to use the 2nd virtual disk of 8GB we attached to the helper VM as our target disk. So select “use a direct disk device”. Then click “select” to choose the disk drive.
VMware and BEA WebLogic Solutions Deployment Guide nd We select the 2 disk (disk number 1). Click “No”. Note: it is recommended to create a virtual disk of the same size as the physical disk that is being cloned even though only the data is copied over during P2V clone process.
VMware and BEA WebLogic Solutions Deployment Guide 139
VMware and BEA WebLogic Solutions Deployment Guide 8.6 Reconfiguration of Cloned Virtual Disk Use the VMware P2V Assistant to reconfigure a cloned disk so it can be used as a bootable system disk in a virtual machine. Start P2V Assistant on the helper VM. Select “perform a system reconfiguration of existing virtual disk”.
VMware and BEA WebLogic Solutions Deployment Guide Select the direct disk device that has the cloned physical image. Select “ESX 2.1.x, 2.5.x or 3.x (2VCPUs) “.
VMware and BEA WebLogic Solutions Deployment Guide Click “next”. This will update the registry and reconfigure the operating system on the virtual disk.
VMware and BEA WebLogic Solutions Deployment Guide You have completed reconfiguring a system on the cloned virtual disk using VMware P2V Assistant 8.7 Booting Target VM with Cloned Virtual Disk Shutdown the helper virtual machine from the VI client.
VMware and BEA WebLogic Solutions Deployment Guide Make sure to select “remove disk from virtual machine” Go to the target virtual machine (BEAP2VVM) that was already created earlier in the P2V exercise. Right Click to select “Edit settings” to confirm that hard disk 1 is pointing to the right disk file. “Power On” the target (BEAP2VVM) virtual machine. Note: make sure your physical system that was cloned is not on the network, else you will have a network address clash.
VMware and BEA WebLogic Solutions Deployment Guide Appendix A: VMware Migration for a BEA WebLogic Application Server Virtual Machine Moving a virtual machine from one host to another is called migration. Migrating a powered-on virtual machine is called “Live migration with VMotion”. Migration with VMotion, designed to be used between compatible systems, allows you to migrate virtual machines with no downtime and zero disruption to end users but requires VMotion licensing and specific configuration.
VMware and BEA WebLogic Solutions Deployment Guide processors must come from the same vendor class (Intel or AMD) and same processor family (P3 or P4) to be compatible for migration with VMotion. Networking Requirements VMotion requires a Gigabit ethernet network to ensure rapid migration. A dedicated network is recommended to keep VM memory state secure. VMs must have access to the same subnets on the source and destination ESX Servers.
VMware and BEA WebLogic Solutions Deployment Guide Select “create a virtual switch” to define a new switch for VMKernel. If the lab, we selected “Use vSwitch0” as VMnic0 was the only network configured between the ESX Server hosts. Note: It is always recommended to keep the VMKernel network on a dedicated Gigabit network connection between the ESX Server hosts. Provide the IP information (this will be different from the ESX Server service console IP and will be used by VMKernel for VMotion).
VMware and BEA WebLogic Solutions Deployment Guide This will create the VMKernel network switch port. Repeat the steps above to create the VMKernel configuration on the other ESX Server. Ensure that the physical interfaces on which the vswitch for VMKernel sits are configured to see each other. In our case, we are using the same NIC for VMotion (demo purposes). Cold Migration Shutdown the VM (we used BEAVM3) Right click on VM Æ Migrate to move it from one storage location (storage 1) on 10.16.27.
VMware and BEA WebLogic Solutions Deployment Guide Select “destination resource pool” (we did not create a separate resource pool).
VMware and BEA WebLogic Solutions Deployment Guide This VM was on a local storage and we moved it to SAN (raj1) (to be used later for our live migration test). Click “finish” to start the migration of files from one location to another. You can follow progress on “recent tasks” window. Live Migration with VMotion To showcase live migration, we “migrated” BEAVM3 from 10.16.27.17 to 10.16.27.16. We brought BEAVM3 online with the VM disks on SAN.
VMware and BEA WebLogic Solutions Deployment Guide Make sure to disable access to the CD/DVD drive (uncheck “connected” and “connect at power on”). Right Click on “BEAVM3” Æ Migrate Select Destination host.
VMware and BEA WebLogic Solutions Deployment Guide Select “High Priority”.
VMware and BEA WebLogic Solutions Deployment Guide Click “Finish”. Monitor progress in the “recent tasks” window. This should successfully migrate the running VM to the destination. All the applications and processes should continue to run as it was prior to the migration. You should see zero disruption to end users.
VMware and BEA WebLogic Solutions Deployment Guide 154
VMware and BEA WebLogic Solutions Deployment Guide APPENDIX B: References VMware Infrastructure 3 Documentation http://www.vmware.com/support/pubs/vi_pubs.html BEA WebLogic 9.2 Documentation http://edocs.bea.com/wls/docs92/index.html BEA WebLogic 8.1 Documentation http://edocs.bea.com/wls/docs81/index.html BEA-VMware Alliance Website http://www.vmware.com/partners/alliances/ VMware Official Site www.vmware.com BEA Official Site www.bea.com VMware Technology Network http://www.vmware.
VMware and BEA WebLogic Solutions Deployment Guide VMware, Inc. 3145 Porter Drive Palo Alto CA 94304 USA Tel 650-475-5000 Fax 650475-5001 www.vmware.com © 2007 VMware, Inc. All rights reserved. Protected by one or more of U.S. Patent Nos. 6,397,242, 6,496,847, 6,704,925, 6,711,672, 6,725,289, 6,735,601, 6,785,886, 6,789,156, 6,795,966, 6,880,022, 6,961,941, 6,961,806, 6,944,699, 7,069,413; 7,082,598 and 7,089,377; patents pending.