Contents Contents Contents GSafety Instructions GInformation regarding general road safety Arrangement of Controls Anti-theft Device Entering the Code Number General Operating Instructions Switching On/ Off Adjusting Volume Activate Tone Adjustment Menu Adjusting the Bass Adjusting the Treble Adjusting the Fader Adjusting the Balance Linear Setting Loudness On/ Off Adjusting the Volume of the Subwoofer or Centre Speaker Navigation Operation What is Navigation? Safety Instructions Navigation CDs General Ins
Contents Traffic Programme (TP) TP - Activating/ Exiting the TP Menu Switching TP On/ Off Selecting Automatic Tracking Selecting / Deleting Direct Programming Switching Mute Function On / Off Interrupting TP Announcements TP Announcement Volume Switching TMC On/ Off Display for receivable TMC stations Telephone Mute Function CD Operation Instructions for Compact Discs (CD) Inserting/ Ejecting CDs Track Skip - Forwards/ Backwards Scan Search Fast Forward/ Rewind Random Play Title Repeat Number of Titles and
GSafety Instructions Operation of the unit is permitted only if the traffic conditions are suitable and you are absolutely sure that you, your passengers or other motorists are not endangered, obstructed or inconvenienced. In all cases, valid road traffic regulations apply. The destination must only be entered when the vehicle is stationary. The navigation system is only an aid. Errors may occur in individual data items/entries.
Information regarding general road safety This car radio device is intended and approved for installation and operation in passenger cars, commercial vehicles and buses (vehicle classes M, N and O) whose electric system has a rated voltage of 12V. Installation and maintenance should only be carried out by specialists. Faulty installation or maintenance can result in the malfunctioning of the motor vehicle’s electronic systems. The vehicle manufacturer’s safety instructions must be observed.
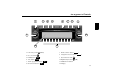
Arrangement of Controls Arrangement of Controls 1 Left rotary control (INFO) 7 Radio selection button ( 8 Navigation selection button ( 2 On / off switch ( 21 ) 3 DTM button ( 4 Tone button '70 ) 6281' 73 5 Traffic programme button ( 6 CD selection button ( 5$' &' ) ) 9 Eject button for CD ( ) 10 Right Rotary Control (OK) ) 1$9 ) 11 Multifunction buttons 12 Display 83
Anti-theft Device Anti-theft Device Entering the Code Number If the auto radio is disconnected from the electrical supply source, the anti-theft device prevents it from being reconnected. After turning on the unit via the 21 button, the prompt 5;,9 6+, <4),9 is displayed. If an incorrect code number is entered, the prompt will be displayed once again. If an incorrect code number is entered three times in a row, the unit will display $ ! , and the unit will be blocked for approximately 60 minutes.
General Operation General Operating Instructions Switching On/ Off Press the 21 button. Alternatively, switch on/ off: via the vehicle ignition. To switch the unit on via the ignition, the unit must have previously been turned off via the ignition. After turning off the vehicle ignition, the unit can be kept on by pressing the 21 button within 3 seconds Note: The unit can also be turned on without the vehicle ignition by pressing the 21 button, however will shut off automatically after one hour.
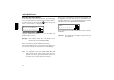
General Operation Adjusting the Fader Press the (+ . 6281' button. Then press the multifunction button Linear Setting Press the 6281' button briefly. , + " # ) 1 ? !"/ V (:!9) (+ (3 3; <) +5 (:!9) (+ (3 3; <) +5 Adjust the fader setting to the desired level by pressing the right rotary control . Press the multifunction button 3; briefly - !65, -3(; will be displayed.
General Operation Adjusting the Volume of the Subwoofer or Centre Speaker Press the <) . 6281' button. Then press the multifunction button 2 4 , , # " / V (:!9) (+ (3 3; <) +5 Using the right rotary control , adjust the subwoofer volume setting to the desired level.
Navigation Operation Navigation Operation What is Navigation? The term "navigation" (lat. navigare = to travel by sea) is generally understood to mean the location of a vehicle, the determination of the direction and distance from the desired destination and the required route. As navigation aids, stars, prominent landmarks, compass and satellites are used. With OnlinePro, location is determined by the GPS receiver (GPS = Global Positioning System).
Navigation Operation Navigation CDs Two navigation CDs are supplied with the navigation unit. These CDs contain a digitised street map. One CD for Northern Europe (CD no. 1) and one CD for Southern Europe (CD no. 2) are supplied. The complete trunk road network and all destination centres in the digitised area of Northern and Southern Europe are available on the CDs. All digitised roads of the northern countries are also included on the Northern Europe CD.
Navigation Operation For example, if you wish to navigate from a town on the Southern Europe CD (D) to a town on the Northern Europe CD (B), enter your destination address as usual. After entering the town, you will be prompted to insert navigation CD No. 1 by the display ! # ! D . After inserting the relevant CD, enter the road and, if required, the house number or the town centre. The required map data is loaded and stored internally after route calculation has started.
Navigation Operation • The route is recalculated by the system if a deviation is made from the route. • Briefly press the left rotary control navigation message. • During a navigation message, the volume can be adjusted by pressing the left rotary control , and the tone by pushing the 6281' button for more than 2 seconds (see page 85).
Navigation Operation • Main Navigation Menu A list of the last 50 destinations driven to is displayed. With the right rotary control , the desired destination can be selected. By pressing the left rotary control , information on the destination can be called up before confirming by pressing the right rotary control . Stopovers are not stored as last destinations.
Navigation Operation Entering Destination Entering Destination In the Main Navigation menu, select ! ! with the right rotary control and press to confirm. Selecting Country & If your destination is in a country other than the one currently shown, select " ! & with the right rotary control and press to confirm. The last location entered is displayed. If you wish to select a destination within the area shown, you can immediately select or ! .
Navigation Operation ! $ P YYY YY YYYY YYYYYYYYYYYYYY YYYYYYYYYYYYYYYYYYYYYYYY Letters that have already been entered are displayed inversely. For the purpose of support, the name of the location closest to the previous entry is displayed. The unit offers only the possible remaining letters for selection. If no other entries are available, the unit completes the place-name automatically.
Navigation Operation Selecting destination via post code The destination can also be selected via the town’s post code. ! mentioned list. In that case, the location name is to be entered as described in ”Entering Destination” on page 93. The program returns to road or centre entry. If there are no streets in the selected town or only the centre can be selected, the unit will switch directly to the route menu.
Navigation Operation P YYY YYYYYYYYY YYYYYYYYYY YYYYYYYYYYYYYYYYYYYYY Letters that have already been entered are displayed inversely. For the purpose of support, the existing entry is displayed at the next road to be reached. The unit offers only the possible remaining letters for selection. If no other entries are available, the unit completes the roadname.
Navigation Operation Entering the Destination Centre With the multifunction button , the last letter confirmed is deleted. The complete entry can be deleted by pressing the multifunction button for more than 2 seconds. ! With the right rotary control , select ! and press to confirm. If the previously selected location has only one centre, the program immediately switches to the Route menu. If the number of centres is less than 10, the centre list is displayed.
Navigation Operation The centre nearest to the entry appears in capital letters in the centre list. The scroll marks indicate that other centres in alphabetical order can be selected. Select the centre by turning the right rotary control and press to confirm. Program switches to the Route menu. Destination input via coordinates If the geographical coordinates (latitude and longitude) of a destination are known, these can be entered and route guidance to the destination started.
Navigation Operation To confirm the entry, press and hold the right-hand rotary control for more than 2 seconds. To confirm, the small tick can also be selected and the right-hand rotary control pressed briefly. Route Menu # ! ! D F " Y Note: If the coordinates entered are located beyond the boundaries of the digital map, a message will appear notifying you of this. The system cannot navigate to a position beyond the boundaries of the digital map.
Navigation Operation • Here a cross-street can be entered as a destination. This function is only possible if the information is contained on the Navigation CD • "! !! Here criteria such as Fast Route, Short Route, Dynamic Route, Motorways, Ferries and Tolls can be selected. Entering House Number in the Destination Road In the Route menu, select with the right rotary control " Y and press to confirm.
Navigation Operation Adjusting Route Settings Select house number area by turning the right rotary control "! !! and press to confirm. Further information under ”Dynamic Route Guidance” on page 124. • ! ! Provides options for avoiding bridges, ferries, tunnels or toll roads ! "! F ! "! • ! "! This selection calculates the shortest possible journey time. • ! "! This selection calculates the shortest possible distance to the destination.
Navigation Operation Entering a Destination in the Destination Memory It is not mandatory for navigation to store a destinations in the destination memory. It saves repeated manual entry, if the destination occurs again at a later date. In the Route menu, select # ! ! by turning the right rotary control and press to confirm.
Navigation Operation Route Guidance Calculation Stopover Stopover offers the possibility of entering a stopover destination during the active route guidance. Entering a Stopover The message "Calculating route" indicates that the distance is being calculated, which may take several seconds. After the first route guidance announcement, the prompt will continue to blink on the display until the route has been completely calculated.
Navigation Operation • Y Y Y Deleting a Stopover (see page 111) allows selection of special destinations (Points of Interest) as a stopover via , ! ! and ! $ F " ! & ; such as petrol stations or airports. Start Route Guidance to a Stopover Press the multifunction button QFV O . ! ! # K J # To start route guidance to the stopover, press the right rotary control . The route is calculated and route guidance begins.
Navigation Operation Traffic Jam (Block) Function This function allows you to block the approaching route sections as of the next junction and calculate a detour route when a traffic jam or road block is directly ahead. Delete Block QFV O Entering Length of Traffic Jam Press the multifunction button . QFV O Press the multifunction button . ! K J # To delete a block, press the right rotary control 8 seconds.
Navigation Operation Notes on Route Guidance After entering the destination (address), the system calculates the route and announces: “Ready to drive off”. The driving recommendations are given via voice messages and displays on the screen. By pressing the left rotary control the current driving recommendation can be heard again. If the route to be travelled is not clear, e.g.
Navigation Operation • "Please turn right after 300 metres". " ! ! Note: • The arrow indicator " points to the next street into which you should turn. The progress bar on the right illustrates the distance and the black part decreases as you approach the intersection. • This display shows you which exit (marked with the arrow) you must take at the roundabout. • O "Prepare to turn left" or ”Please merge into left lane”. "Now drive straight ahead".
Navigation Operation • "Keep right after 2 kilometres". Information during Route Guidance NFV O Keep right means that the street will split and that you should follow the corresponding direction of travel. • "You have reached your destination". The destination specified has been reached and route guidance is terminated. 108 ! QVV ! O Press the left rotary control .
Navigation Operation Displaying Route Settings ! QVV MNEOM Y ! O During route guidance, press the left rotary control the multifunction button . Y The current time is displayed. After 8 seconds, the system returns to the route guidance display. . Press Requesting Current Position During route guidance, the current position can be requested. "! O ! ! O ! $ &O $ ! The route settings are displayed.
Navigation Operation If Route Guidance is not activated, call up the Position menu by pressing the left rotary control . Calling up Street List During Route guidance, the list of streets for the planned route can be called up. QFV ° n ° n ! The current position, with street name (if available), latitude and longitude, elevation above sea level (in 50 m increments) and the number of satellites received will be displayed.
Navigation Operation Destination Memory P.O.I. (Points of Interest) Using the right rotary control , select ! ! in the main Navigation menu and press to confirm. Menu for the selection of POIs from a list. POIs are for example petrol stations, airports or hospitals. & ! ! ! ! ! F F F F ! ! ! ! ! The destination memory contains personally stored destinations.
Navigation Operation • MFN $ ! ! Y A list of destinations is shown based on distance. The kilometres shown are the distance (straight-line) between the POI and the current location. The arrows behind the distance indicate the direction to the particular POI (i.e. POI is in the direction of travel, or POI is in the opposite direction of travel). Select the desired destination with the right rotary control .
Navigation Operation Selecting ! $ ! The POIs for the selected town are displayed. Select a category using the right rotary control and press to confirm. A list of POIs is displayed or, if there are more than 9 POIs in the list, you will be prompted to enter text Select a category using the right rotary control and press to confirm.
Navigation Operation Points of interest (P.O.I.) CD These instructions contain the general description of the points of interest (or P.O.I.) CD accompanying the unit. There are two methods of selecting a point of interest from a points of interest (P.O.I.) CD: - During active navigation, a point of interest in the vicinity of the current position or near to the entered destination can be selected. - If navigation is not active, points of interest in the vicinity of the current position can be selected.
Navigation Operation est lies in the direction of travel, point of interest lies in the opposite direction to that of travel). Then, by turning the right rotary control , select the desired point of interest. The point of interest is accepted by pressing the rotary control . Before confirming the point of interest, press 1$9 to return to selection of categories in order to select a different point of interest, if required. Press the left rotary control to display information on the point of interest.
Navigation Operation • System Settings Press the button in the Main Navigation menu. The System Settings menu is called up. • • " P • • ! . ! The system’s internal clock can be set to the local time. # ! The current position can be saved and stored in the Destination Memory. " P Language setting for the navigation system. 116 ! Display of speed limits can be switched on/off.
Navigation Operation Setting Time In order to achieve correct navigation on routes with time-dependent traffic guidance, and to calculate the estimated time of arrival, it is necessary to set the GMT time transmitted from satellites to the current time zone. Save Position ! " P Select and confirm menu. ! # ! # ! in the System Settings O Y O Y In the System Settings menu, select ! and confirm.
Navigation Operation Calling up Position Call up Destination Memory (see page 111) and select destination with the right rotary control . M If the position is outside a digitised area, the driver is guided along the digitised route nearest to the destination. The message ”The destination is nearby” will follow. To reach the destination, follow the direction arrows. Setting Language # ! @ ! Select the voice using the right rotary control .
Navigation Operation Switching Announcement of Arrival Time On/ Off: Animation " P " " ! F " " ! ! " ! Select and confirm ! in the System Setting menu. ! Select and confirm " ! ! in the System Settings menu. ETA stands for Estimated Time of Arrival. F By pressing the right rotary control selection can be made between Animation or .
Navigation Operation • Influencing the Calculation of ETA Calculation of the ETA can be influenced. This setting is the default setting. It offers sufficiently accurate calculation of ETA for most drivers. " ! ! • ! Select and confirm ! " ! in the System Settings menu. ETA stands for Estimated Time of Arrival. With this setting the unit adjusts for drivers who may take longer for the planned journey.
Navigation Operation Switching the speed limits display on/off If the speed limits display is ON, the system will inform you of the maximum permissible speed limit for the route along which you are travelling during route guidance, insofar as this information is available. ! " ! ! Set and confirm ! ! in the System Settings menu.
Navigation Operation GWarning Accident hazard Road traffic regulations always take priority when a vehicle is being driven in traffic. Road signs en-route should always be heeded. In some cases, the speed limit indicated by the navigation system may be incorrect. At all times, the driver must decide whether or not to heed the speed limit indicated. We do not accept liability for erroneous data provided by the navigation system.
DTM - Dynamic Traffic Management DTM-Dynamic Traffic Management DTM Functions With the DTM function, all traffic announcements and those traffic announcements that pertain to the calculated route are displayed. A route calculator will search for and direct you to fuel stations along the calculated route. Calling up DTM Functions Press the '70 button. */5,3:,5 69+ <08)695 %05. 0+,3:;,+; ! OFM Y The fuel stations are listed based on distance.
DTM - Dynamic Traffic Management Call up Duration of Journey and Kilometres Driven To call up the DTM menu, press the '70 button. */5,3:,5 69+ <08)695 %05. 0+,3:;,+; Press the multifunction button Dynamic Route Guidance Note: Dynamic route guidance is not possible in all countries. When Dynamic Route Guidance is active, the navigation system may request the Navigation CD for possible route calculation (if the Navigation CD is not inserted). .
DTM - Dynamic Traffic Management Dynamic Route Guidance In the Route menu, Dynamic Route Guidance can be started by selecting ! ! & Y Y If dynamic route guidance has been activated, a continuous check is made for the presence of relevant announcements for the selected route. The route is then calculated using the "fast route" option, while taking into account current traffic announcements.
DTM - Dynamic Traffic Management */5,3:,5 69+ <08)695 S 5&1 1%* /0 %"+ %05. 0+,3:;,+; The scroll marks at the right edge of the display indicate that additional traffic information is available. A selection can be made by turning the right rotary control and pressing to confirm. After confirming the traffic information desired, the information is shown in its entirety. A typical traffic announcement is shown as follows.
Radio Mode Radio Mode Switching on Radio Mode Press the 5$' button. The last selected waveband is set. Switching on Radio Menu Mode Press the 5$' button in radio mode. By pressing repeatedly, selection can be made between the levels ,,2 <(3Y , ,,2 (4, , ;(;065: and ;(;065: 0? . • , , 2 < (3 Y • , , 2 ( 4 , (see (see also page 152) also page 152) • ;(;065: (see also page 152) • ;(;065: 0? (see also page 152) ,,2 (4, 4 4 ;@ 0: ,.
Radio Mode Dynamic Autostore (FM-DAS) In the Radio Menu Mode, press the multifunction button until ,,2 <(3Y or ,,2 (4, is 4 displayed. ,,2 <(3Y 4 4 ;@ 0: ,.!?; In the mode, the receivable stations are displayed via the multifunction buttons depending on the settings. P Y 5; +; ,.
Radio Mode Scan Search In the desired waveband ( , $ , $ or rotary control , will be displayed. P Y 5; +; ,. 79 >9 LS $ ), press the right 207 (Programme filtered out). To switch the filter function on or off, repeated press the multifunction button 03 to switch the filter function on ( 03 65 ) or off ( 6 03 ). MOT P An automatic station search is started. The first run is performed on an insensitive plane, all further runs on a sensitive plane.
Radio Mode Swirching PTY Display On/ Off Select radio menu mode. & 0 - F !& Calling up a stored station: Press the multifunction button or - . The stored transmitter is called up. Calling up/ Storing MW, LW, SW Stations 4 4 ;@ 0: ,.!?; 03 With the multifunction button 0: , select either !& (PTY Display On) or 9,8<,5*@ (PTY Display Off). Storing: Up to 12 stations can be stored under the station buttons.
Radio Mode Tuning will take place in increments of 100 kHz. The currently active manual tuning is indicated by in the display. If the right rotary control is not turned after a short time, will disappear from the display and the manual tuning is switched off. Autostore MW, LW Press the 5$' button. <;6:;69, 65 4 4 : (5 Manual Tuning MW, LW, KW Press the multifunction button : until <;6:;69, 65 is displayed. Press the multifunction button : until ,,2 <;6 p :;69, is displayed.
Radio Mode Regionalisation The RDS diversity function is independent of region. In this mode it can occur that, through the RDS diversity function, the radio will switch between various regional programmes with differing programme formats. If this occurs, the special regional programming must be selected directly. If several regional programmes are transmitted by one station, this can only be seen when the station is selected. Stations with additional regional stations are indicated with a star (e.g. Q ).
Radio Mode Switching Radio Text On/ Off Traffic Programme (TP) Select FM radio menu mode. With the multifunction button !?; switch on Radio Text. If an RDS Diversity station broadcasts TP announcements, it is possible to interrupt CD, MP3, CDC/AUX, MW, LW, KW play or the mute mode and switch the TP announcements through. Moreover, you can listen to one FM station while having TP announcements switched through that are transmitted by another FM station.
Radio Mode TP - Activating/ Exiting the TP Menu Activating: Press the cannot be transmitted). 73 button (traffic announcements Switching off: To switch off TP in the TP Menu, repeatedly press the multifunction button !7 until ! 6-- appears. ,## ,+ !7 !7 ;( #63 !4* ;( #63 !4* TP is switched off after returning to normal display. Press the multifunction button !7 .
Radio Mode Selecting / Deleting Direct Programming Activate the TP menu. Selecting: Repeatedly press the multifunction button Switching Mute Function On / Off . ;( After selection of a TP or EON transmitter, the mute function can be activated by pressing the 73 button briefly. 1 1 E $ +#, D O !7 ;( #63 !4* !7 Using the right rotary control , select the desired TP station and press to confirm. After a short delay and without actuation, the selected station is accepted.
Radio Mode TP Announcement Volume Activate the TP menu. Press the multifunction button Switching TMC On/ Off #63 . Note: Further information on TMC can be found under ”Dynamic Route Guidance” on Page 124. E M !7 ;( #63 !4* With the right rotary control , four different settings ( - ) can be selected. This means that the volume can be raised to a fixed value according to the setting.
Radio Mode Display for receivable TMC stations ! O Y 5; +; ,. 79 >9 SM MOT P If the system is able to receive a TMC station and TMC has been activated as described in ”Switching TMC On/ Off” on Page 136, this is indicated on the display by the abbreviation ! . TMC information can be received and analysed by the navigation system. The reception of these traffic announcements is free of charge.
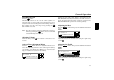
CD Operation CD Operation Instructions for Compact Discs (CD) Inserting/ Ejecting CDs Sound interruptions may occur if the CD is dirty. To ensure optimum sound quality, please ensure the following: Inserting a CD: Insert the disc into the CD slot with the printed side upwards. The unit pulls in the CD automatically and begins to play the disc from the first track. After the last track has finished playing, the unit will automatically repeat the CD from the first track.
CD Operation Track Skip - Forwards/ Backwards Press the multifunction button (backwards) M L M (forwards) or L MOT / ( U P 5+ 7; L M Fast Forward/ Rewind P +* By pressing the multifunction button repeatedly, several tracks can be skipped over in forward or reverse directions. Once the last track has been reached in the forward direction, the unit switches back to the first track. Analogously, it switches from the first track to the last track when going backward.
CD Operation Title Repeat Temperature Protection Circuit By pressing the multifunction button 7; the ”Title Repeat” is switched on. The prompt 7; is displayed inversely. To protect the laser diode from excessive heat, a temperature protection circuit has been implemented into the unit. On activation of the temperature protection circuit, !,47 will appear for 8 seconds and the unit will be switched back to the radio or other audio source.
CD Changer Operation CD Changer Operation Operational Readiness of CD Changer If a CD changer is connected to the car radio, the CD changer is ready for operation as soon as the filled CD magazine is loaded. Close the sliding tray after loading. Further operation is performed via the car radio control panel. Loaded CDs can be selected by turning the right rotary control . During the selection time, 6(+05. % is displayed.
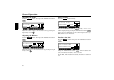
CD Changer Operation Naming a CD Press the (4 . &' button. Then, press the multifunction button (4,P !92 !;3 (4 +; 03 ,3 To give a name or change an existing name, press the multifunction button +; . Using the right rotary control , select the desired letters and press to confirm. Press the right rotary control to move one position further. A maximum of 8 characters can be entered After exiting the CDC menu, the name is stored.
CD Changer Operation CD Filter Function Press the 03 . &' button. Then, press the multifunction button 02 54 !92 S 3(@ !92 !;3 (4 +; 03 For the Silverstone 2660 CD changer, the individual tracks of the current CD can be selected using the right rotary control . By pressing the right rotary control selection can be made between 3(@ (Title unfiltered) and 2 07 (Title filtered out).
User Menu User Menu Call Up / Exit User Settings Menu Setting the GAL (Gal) After calling up the User Menu, the following Basic Settings can be set up in two levels according to your personal preference. First level: The GAL is a car radio control circuit, which automatically adjusts the car radio volume according to vehicle speed. This results in compensation of the driving noise produced at higher speeds. Call up User Menu. Press the multifunction button (3 .
User Menu Telephone Mute Function (Tel) Adjusting Reception Optimisation (M/S) If a telephone system with hands-free unit is installed in the vehicle, the telephone conversation can be conducted via the car radio system. As such, there is no need to install an additional loudspeaker. However, the signal leads (AF – Telephone input and Earth – Telephone input) must be connected to the car radio (see page 154). To display compass, call up User Menu.
User Menu Adjusting the Led With this function, the flashing of the LED (flashes when unit is switched off) can be switched on or off. Call up User Menu. By pressing the multifunction button ,+ select either 305205. (LED On) or 6-- (LED Off). To set, call up User Menu. Using the multifunction button (= select from 5 3 @ , 0?, + and 5+,7,5+ . E *&5"! (3 !,3 ,+ F (=
User Menu Display Compass Signal Tone Volume When the Route Guidance is not active, a compass can be shown on the right side of the display. To set, call up User Menu. By pressing the multifunction button SM , call up the 2nd level of the User Menu. Using the multifunction button 47 select either :/6> *647(:: (Compass is displayed) and /0+, *647(:: (Compass is not displayed).
Service Menu Call Up / Exit Service Menu To set the Service Menu, simultaneously press the button The following information can be called up in the Service Menu. tion. Service Menu • - Display of the model number 6+,3S 6YP • ,90(3S 6YP - Display of the serial number • - Reset for CDC (if available). For Reset, press the multifunction button ,: . • • (+06 6-;>(9, • (+06 636 • (=0 64 • (=0 3(:/ • ! #(3<, /(5.
Connection Instructions C1 C2 C3 B Antenna socket Warning! Terminal 30 and Terminal 15 must always be connected separately, otherwise increased power consumption will occur when the unit is switched off. Connection socket A is not the same for all vehicle types. Therefore, always measure voltages before installation.
Installation and Removal Instructions A universal bracket for DIN installation slots is integrated into this car radio. An installation frame is not required. The unit is inserted into the installation slot and secured with the slides supplied. To install, complete all electrical connections. Then push the unit into the installation slot. Afterwards, insert slides into the openings on the front of the unit until the first detent position is reached (Figure A).
Installation and Removal Instructions To remove the unit, it must first be unlocked. To do this, push in both slides to the second detent position as shown in Figure A. Subsequently, withdraw the unit using both slides (Figure C). Then remove the slides by pressing the springs on the right and left sides of the unit. If the unit was previously installed in another vehicle, it may be necessary to adjust the springs on the unit before installation.
General Instructions General Instructions RDS SYSTEM RDS Stations Level This car radio is capable of receiving RDS signals (RDS = Radio Data System) in the VHF range. RDS is a technique which enables the transmission of inaudible additional information in the VHF broadcasting range. This means that the transmitting station sends information capable of being analysed by the car radio. At the level ;(;065: only identified RDS stations can be stored.
General Instructions PTY (Program Type) With the PTY function, it is possible to select specific types of programming, such as sport, pop music, classical music etc.The PTY is transmitted by the RDS station, provided this function is installed at the station facility. The selected transmitter programme type can be displayed or a search for a specific PTY transmitter can be performed.
Technical Data Technical Data Wavebands : FM 87.5 MHz - 108 MHz MW 531 kHz - 1620 kHz LW 153 kHz - 282 kHz SW 5800 kHz - 6250 kHz Frequency range : 20 Hz - 20 kHz for CD operations 30 Hz - 15 kHz for FM 50 Hz - 2.5 kHz for MW, LW, SW Output power : 4 x 18 Watt Line cross section : min. 0.75 mm² Loudspeaker impedance : min.
127,&( Dear Listener, In conformance with current EC guidelines, any person may operate this radio receiver. This unit conforms to the current valid European or harmonised national standards. This designation is your guarantee that the unit conforms to the applicable specifications concerning electromagnetic compatibility.