,QGH[ 6DIHW\ LQIRUPDWLRQ ,QIRUPDWLRQ DERXW JHQHUDO URDG VDIHW\ 7KH 7UDIILF $VVLVW Use Navigation Music Pictures Unpacking the Traffic Assist Checking the delivery Complaints procedure Handling the packaging Description of unit Traffic Assist - basic unit Mains section socket Cable for power supply from cigarette lighter Battery Memory card USB connection cable Unit bracket Accessories ([WHUQDO DQWHQQD Headset Information about documentation Quick start guide Operating instructions Maintenance and care R
,QGH[ 5DSLG DFFHVV 1DYLJDWLRQ PHQX 0DS GLVSOD\ Rapid access Structure of rapid access 1DYLJDWLRQ PHQX DQG PDS GLVSOD\ 7KH OLVW RI GHVWLQDWLRQV ,FRQV XVHG Operating rapid access 6WDUWLQJ XVLQJ DQ H[LVWLQJ GHVWLQDWLRQ 6FUROOLQJ LQ WKH GHVWLQDWLRQV PHPRU\ 'LVSOD\LQJ RU HGLWLQJ GHVWLQDWLRQ &KDQJH WR PDS GLVSOD\ 'LVSOD\LQJ FXUUHQW SRVLWLRQ &DOOLQJ XS 1DYLJDWLRQ PHQX TheNavigation menu Structure of the navigation menu 1DYLJDWLRQ 5RXWH SODQQLQJ 6HWWLQJV 6WDWXV /RDG PDS +RPH Navigation menu: Navigation 'HVWLQDW
,QGH[ 3LFWXUHV PRGH Selecting pictures display The Picture Viewer Operating the Picture Viewer 6FUROOLQJ 6OLGHVKRZ )XOO VFUHHQ 6KXWWLQJ GRZQ WKH 3LFWXUH 9LHZHU Folder viewing mode Operating folder viewing mode 6FUROOLQJ 6HOHFWLQJ D SLFWXUH &KDQJLQJ IROGHU OHYHOV &ORVLQJ IROGHU YLHZLQJ PRGH 6HWWLQJV Selecting the settings The setting menu 61 61 61 62 63 64 The individual menu points 64 4 6SHFLDOLVW ZRUGV 66 67 .
G6DIHW\ LQIRUPDWLRQ 7KH XQLW PD\ RQO\ EH RSHUDWHG LI WKH WUDIILF VLWXDWLRQ DOORZV IRU WKLV DQG LI \RX DUH DEVROXWHO\ FHUWDLQ WKDW \RX \RXUVHOI \RXU IHOORZ SDVVHQJHUV RU RWKHU URDG XVHUV ZLOO QRW EH SXW DW ULVN HQFXPEHUHG RU GLVWXUEHG E\ WKLV 7KH UXOHV RI DSSOLFDEOH URDG WUDIILF DFWV PXVW EH REVHUYHG DW DOO WLPHV 'HVWLQDWLRQV PD\ RQO\ EH LQSXW ZKHQ WKH YHKLFOH LV VWDWLRQDU\ 7KH QDYLJDWLRQDO V\VWHP LV RQO\ DQ DLG 7KH GDWD GHWDLOV SURYLGHG PD\ LQ VRPH FDVHV EH LQFRUUHFW 7KH GULYHU PXVW DOZD\V GHFLGH ZKH
,QIRUPDWLRQ DERXW JHQHUDO URDG VDIHW\ 7KLV 1DYLJDWLRQDO DLG LV LQWHQGHG DQG OLFHQVHG IRU XVH LQ FDUV FRPPHUFLDO YHKLFOHV DQG EXVHV YHKLFOH FODVVHV 0 1 DQG 2 ZLWK QRPLQDO YROWDJH VXSSO\ RI YROWV 7KH XQLW PRXQWLQJ VKRXOG EH VHOHFWHG VR WKDW D FRUUHFW PRXQWLQJ LV HQVXUHG DQG WKHUH LV QR ULVN RI LQMXU\ VKRXOG WKH YHKLFOH EH LQYROYHG LQ D FROOLVLRQ 'R QRW PRXQW WKH EUDFNHW IRU WKH 7UDIILF $VVLVW LQ WKH IXQFWLRQDO DUHD RI WKH DLUEDJ 7KH XQLW PXVW QRW UHVWULFW WKH GULYHU V YLHZ RXW RI WKH YHKLFOH 7KH SRZ
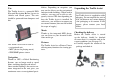
8VH 7KH 7UDIILF $VVLVW The Traffic Assist is a powerful PND (3ersonal 1avigation 'evice) for use in vehicles and closed spaces. The unit should be protected from dampness and dirt. 3012 bilities. Depending on reception, you may not be able to use the navigational function inside buildings. When used in vehicles, you may not be able to adequately receive GPS data depending on how the Traffic Assist is installed.
&RPSODLQWV SURFHGXUH Please contact your local stockist if you have any complaints. The unit can also be sent directly to Harman/Becker in its original packaging. +DQGOLQJ WKH SDFNDJLQJ Keep the original packaging in a dry place, at least for the warranty period. 1RWH The packaging should be disposed of correctly in accordance with national disposal guidelines. The packaging must not be burnt.
%DWWHU\ The batteries supplied can be used for short periods of operation when the mains section is not used. Once flat, the batteries supplied can be recharged by connecting the Traffic Assist to the power supply or by using a standard device approved by the battery manufacturer. Check the condition of the battery in the slide-in compartment on the rear of the unit. Remove flat batteries immediately and have the unit checked over by your local stockist.
86% FRQQHFWLRQ FDEOH The USB connection cable can be used to connect the unit to a standard personal computer by means of the USB port. However, to use the data on the PC, you will first have to install the free "Active Sync" software from Microsoft®.
5HSDLUV (PLVVLRQV The unit must not be opened if damaged. Please contact your local stockist. You will find details of emissions and electromagnetic compatibility in "FACT SHEET" on page 74. 'LVSRVDO 1RWH The unit, including the parts supplied with it and the batteries and accessories, must be disposed of correctly in accordance with national regulations for electrical / electronic devices. Depending on the country to which the unit is supplied, your local stockist may be able to accept units.
2YHUYLHZ7UDIILF $VVLVW 4010 6FRSH RI VXSSO\ 1 Traffic Assist - PND (3ersonal 1avigation 'evice) 2 Batteries 3 Memory card (containing navigational data) 4 USB connection cable 5 Mains section for socket (220 volts) 6 Cable for power supply from car’s cigarette lighter (12 volts) 7 Unit bracket 2YHUYLHZ 7UDIILF $VVLVW 12
2YHUYLHZ 7UDIILF $VVLVW 4001 )URQW RI XQLW ZLWK FRQWUROV DQG GLVSOD\V 1 Touch screen showing the main menu selected 2 Touch screen key Press = activates the corresponding key command 3 Back key Press = returns to numerous applications Press for longer = switches the Traffic Assist on and off 4 Mood light 13
2YHUYLHZ7UDIILF $VVLVW 4005 4003 5HDU RI XQLW 1 Antenna which can be unfolded 2 Memory card slot 3 Sound piece for loudspeaker 4 Unit bracket connection 5 Connection for voltage supply 6 Slot compartment for single-use batteries or rechargeable batteries 7 Point for connecting up an external antenna (external antenna not included in the scope of supply) 8 Type plate 14
2YHUYLHZ 7UDIILF $VVLVW 4002 %RWWRP RI XQLW 1 Serial connection (is not needed) 2 Mini USB connection 3 3.
*HQHUDO RSHUDWLRQV 6WDUW XS 0HPRU\ FDUG Once the Traffic Assist has been unpacked and checked for damage, the unit can be started up. The individual start-up stages are: • insert memory card • connect to power supply • unfold antenna (if navigation required) • switch on unit Map data will have already been pre-installed on the memory card supplied (the memory card is virtually full). Another SD memory card should be used to save pictures and MP3 files. This is not however included in the scope of supply.
*HQHUDO RSHUDWLRQV ,QVHUWLQJ PHPRU\ FDUG 4007 X Exert a little pressure and slide the memory card into the card slot until it snaps in. (MHFWLQJ PHPRU\ FDUG Take the memory card out of its packaging without touching the contact strip or dirtying it. X Hold the memory card so that the contact strip is facing towards the unit front. X Guide the memory card into the card slot. X The card slot ejects the card so that you can pull it out with two fingers.
*HQHUDO RSHUDWLRQV 2SHQLQJ VOLGH LQ FRPSDUWPHQW X Place your finger on the corrugated surface of the cover. X Carefully slide the cover away from the antenna until the stop is reached (around 10 mm). X Lift the cover out of the housing. &ORVLQJ WKH VOLGH LQ FRPSDUWPHQW X Place the sliding cover back on the housing so that the slide-in compartment remains around 10 mm open. X Place your finger on the corrugated surface of the cover and slide towards the antenna until it snaps in.
*HQHUDO RSHUDWLRQV &RQQHFWLQJ WR WKH FLJDUHWWH OLJKWHU Power supplies using a vehicle battery are connected up as follows using the cable supplied for the cigarette lighter. X Grip the phone jack in its corrugated grip area and slide this into the connection socket without exerting too much force until the stop is reached. $QWHQQD 8QLW DQWHQQD The antenna is linked to the unit by a hinge and can be folded in and out.
*HQHUDO RSHUDWLRQV 6ZLWFKLQJ WKH 7UDIILF $VVLVW RQ RII The following question appears shortly thereafter: Comply with highway code The unit is switched on and off using the back key. 5002 5014 X 6ZLWFKLQJ RQ X Press the back key for a few seconds. The unit is switched on. The manufacturer’s logo appears on the touch screen. 5003 If you agree with this request, press the OK key.
*HQHUDO RSHUDWLRQV )LWWLQJ WKH XQLW EUDFNHW The unit bracket can be secured directly to the inside of the windscreen or to the dashboard. 1RWH Mount the unit bracket such that this and the fitted Traffic Assist do not restrict your view and are not in the functional area of the airbag. Ensure that the electrical connection cable does not hamper you from accessing the vehicle’s controls. Also ensure that there is enough space to easily slide the Traffic Assist back out of the bracket.
*HQHUDO RSHUDWLRQV $GMXVWLQJ WKH XQLW EUDFNHW The support plate (7) can be swung in two directions (horizontally and vertically). It can thereby be set at virtually every angle of vision to the driver. 1RWH Do not swing the support plate in both directions at the same time! Before moving, always take the Traffic Assist off the unit bracket. 9HUWLFDO PRYHPHQWV X Loosen the locking screw (2) until the support plate (7) can be swung from top to bottom without too much effort.
*HQHUDO RSHUDWLRQV %DVLF LQIRUPDWLRQ DERXW WKH WRXFK VFUHHQ The Traffic Assist is fitted with a touch screen. 4001 1RWH To ensure that the display’s surface is not damaged, you may only touch it with your fingers or a blunt, non-smearing object. &DOLEUDWLRQ If the touch screen starts responding imprecisely and e.g. buttons have to be touched off-centre in order to be actuated, calibration should be undertaken. The calibration function is started from the Settings menu (see also page 65).
*HQHUDO RSHUDWLRQV (QWHULQJ FKDUDFWHUV Characters are entered by pressing the keys in the central area. 6007 6007 6007 X Once the entry is complete, the process is concluded by pressing the 5020 key and the entry passed on to the Traffic Assist for processing. $GRSWLQJ VXJJHVWLRQV When a navigation destination is entered, the Traffic Assist compares the entry with the set of data on the memory card.
*HQHUDO RSHUDWLRQV If e. g. you are searching for the town of "Würzburg, then simply press "WUERZBURG". Special characters can be useful when naming destinations and routes. X (QWHULQJ QXPEHUV You have to change to the numerical keypad to enter numbers. X Press the 5023 key. The numerical keypad is displayed. 6007 To change to the special character keypad, press the 502key. The special character keypad is displayed. X 5004 5024 X To return to entering letters, press "ABC".
*HQHUDO RSHUDWLRQV 7KH EDFN NH\ The back key is integrated in the bottom left hand corner of the casing. 5014 0RUH PDSV X When supplied, a set of maps is already installed on the memory card. If this is insufficient for the current location, there are two others on the DVD supplied. These should be loaded on to the memory card. 7UDQVIHUULQJ ILOHV 0DS ORDGHG It has various functions: • if pressed and held down, the Traffic Assist is switched on or off.
*HQHUDO RSHUDWLRQV 7UDQVIHUULQJ XVLQJ WKH 86% SRUW The USB port is used to link the Traffic Assist directly to a personal computer. For transfers, the Microsoft® Active Sync program must be installed on the computer. This is available freeof-charge from the manufacturer. 5017 The link then involves several steps: switch off Traffic Assist. X link the Traffic Assist and computer using the USB cable. X switch the Traffic Assist back on. ActiveSync automatically sets up a link to the Traffic Assist.
*HQHUDO RSHUDWLRQV )DXOWV If unit faults relating to the operating system occur, messages to this effect will be displayed. These should be acknowledged. If the activated function cannot be executed afterwards, the Traffic Assist will have to be restarted. If the messages reappear or the unit does not function correctly for any other reason, please contact your local stockist.
1DYLJDWLRQDO PRGH :KDW LV QDYLJDWLRQ" 1DYLJDWLRQDO PRGH Navigation (Latin navigare = to travel by sea) is generally understood to mean finding the position of a vehicle, determining the direction of and distance from the desired destination and establishing and following a route to this destination. Navigational aids include the stars, distinct objects, a compass and satellites. The Traffic Assist uses its GPS receiver to find the vehicle’s position.
1DYLJDWLRQDO PRGH 6HOHFWLQJ QDYLJDWLRQ Navigational mode is called up from the main menu. 3001 1DYLJDWLRQ PHQX If necessary, the navigation menu can be called up from rapid access, e.g. to enter a new destination not yet provided. 0DS GLVSOD\ The map display can also be called up. This doesn’t just display the current position but also allows a new destination to be selected. 5DSLG DFFHVV Rapid access allows you to select from the key functions to quickly start navigation.
1DYLJDWLRQDO PRGH 7KH OLVW RI GHVWLQDWLRQV The list of destinations displays all the destinations available for quick selection line-by-line. Each line is split into two boxes. Each list box is depicted as a key. The destination is named on the righthand key and its characteristics shown in the left-hand icon. 1RWH The last 50 destinations are saved in the destinations memory. Once the memory’s capacity has been fully used up, the oldest destination is automatically deleted whenever a new one is entered.
1DYLJDWLRQDO PRGH 'LVSOD\LQJ RU HGLWLQJ GHVWLQDWLRQ Each destination in the destinations memory can be displayed or edited. X Press the icon to the left of the destination required. X A selection menu appears. 6HOHFWLRQ 0HDQLQJ Display de- All the data relating tails to the destination is displayed. Map The map display and toolbar are called up and the destination displayed. Protect entry The destination is protected against automatic deletion. Name entry The destination can be renamed.
1DYLJDWLRQDO PRGH 7KH1DYLJDWLRQ PHQX If you do not want to select a destination quickly or if the planned destination is not yet available in the destinations memory, you can use the navigation menu to determine a new destination. 6001 In rapid access, press the 1DYLJDWLRQ PHQX key at the upper edge of the screen. The navigation menu appears.
1DYLJDWLRQDO PRGH 1DYLJDWLRQ PHQX 1DYLJDWLRQ A selection window for specifying the destination is opened from the Navigation menu by pressing the 1DYLJDWLRQ key. 6002 6003 In the navigation menu, press the (Q WHU GHVWLQDWLRQ button. The destination selection window opens. X 6004 'HVWLQDWLRQ VHOHFWLRQ ZLQGRZ A destination can be specified in the following ways from the selection window. The various stages and options are described below.
1DYLJDWLRQDO PRGH The address window appears. 6005 The following details can be entered in the address window: • Town • Postcode • Street and building number • Intersecting roads as an aid to orientation You can also: • display the destination on the map • define options of the drive profile • save the destination in the destinations memory • start directions to the destination immediately. 6HOHFWLQJ WKH WRZQ The destination town can be entered using its name or postcode.
1DYLJDWLRQDO PRGH 8VLQJ WKH OLVW RI WRZQV If you have already entered some of the letters of the town you want, you can use the /LVW function to display all the towns containing the combination of letters in question. 6047 Press the 5021 key on the bottom edge of the screen to call up the list of towns. X A town is selected by pressing the corresponding button.
1DYLJDWLRQDO PRGH 6HOHFWLQJ WKH ,QWHUVHFWLRQ Once you have entered your destination town and street, in the ,QWHUVHFWLRQ menu you can display all the streets around your destination as an aid to orientation. X Press the ,QWHUVHFWLRQ key to display all the Intersections in the vicinity of your destination. X Press a Intersection to transfer this to the route calculation menu. 'LVSOD\LQJ GHVWLQDWLRQ RQ WKH PDS Once the destination has been entered, you can display it in the map of the surrounding area.
1DYLJDWLRQDO PRGH 6DYLQJ GHVWLQDWLRQ The 6DYH button opens an entry menu for entering a name for the destination entered. If a name has been entered and adopted using 2., the destination is transferred to rapid access and protected there. The entry menu allows you to change between upper and lower case letters. 6WDUWLQJ QDYLJDWLRQ The 6WDUW button can be used to start navigation straight away. All the data entered so far is processed in the route calculation. 6058 Press the 6WDUW key to start navigation.
1DYLJDWLRQDO PRGH The search area selection window appears. 6011 You can now use the buttons to select the search area you want. 3RLQW RI LQWHUHVW QHDUE\ 6062 The following specifications are possible for searches in this point of interest window. X In the top button, enter the radius (in kilometres) in which a point of interest should be searched for. X From the $OO FDWHJRULHV box, select a main category (e.g. car hire). Only those points of interest currently nearby are displayed.
1DYLJDWLRQDO PRGH You will find information about scrolling in lists in the "Scrolling through the lists" on page 24 chapter. 1RWH The &DWHJRU\ box does not have to be completed. It is only used to restrict the list of points of interest. Depending on the map currently being used, this list may be very extensive. 3RLQW RI LQWHUHVW LQ D WRZQ X Touch the ,Q D WRZQ button. 6054 In the 7RZQ RU 3RVWFRGH box (top button) enter the town in which you want to search for a point of interest.
1DYLJDWLRQDO PRGH 'HVWLQDWLRQ VHOHFWLQJ IURP WKH PDS If the destination required cannot yet or can no longer be found in the destinations memory, the 6HOHFW RQ PDS button allows you to select it directly. No address details are asked for in this case. 6004 Press the 6HOHFW RQ PDS key to make a direct selection. The map display appears. X 1RWH You may have to use the zoom keys to increase the area displayed to find the street required.
1DYLJDWLRQDO PRGH 1DYLJDWLRQ PHQX 5RXWH SODQ QLQJ The route planning menu allows you to create and select individual routes. In addition to selecting and setting a wide range of details, you can also define legs of the journey. 6002 6013 In 1DYLJDWLRQ PHQX, press the 5RXWH SODQQLQJ key to access the route menu. In the route menu, you will see the map symbol in the top right. The last route used is shown in the top left. The individual legs of this route can be seen underneath.
1DYLJDWLRQDO PRGH You can use the 6083 keys to move the individual entries. X Once all the entries have been made in the route planning window, close the destination specifications by pressing the 2. key. The entry menu appears. X Give the route a meaningful name. X Press 2.. Route planning is complete. The route menu appears along with the new route. X 6013 7KH (GLW NH\ Existing routes can be changed in the (GLW menu. 6013 Press the (GLW key to change existing routes. The route planning window appears.
1DYLJDWLRQDO PRGH Press the button to have the total distance and probable length of the journey calculated for this route. The 5RXWLQJ RSWLRQV entry window is opened. Define the settings you want. X Press the &DOFXODWH button. The route is calculated. A window informs you of the progress of the calculation.
1DYLJDWLRQDO PRGH Press the 5059 or 5060 button to change into the other mode. Info about Displays ETA, distance main destina- remaining, time until artion rival at the main destination. Info on leg Displays ETA, distance remaining, time until arrival at the part-way destination. X For the option buttons, press 5059 or 5060 to activate or deactivate the requirements. X Confirm your selection by pressing the OK key.
1DYLJDWLRQDO PRGH 6HWWLQJ Allowed 0HDQLQJ With this option, the corresponding road type 6059 is included in the route calculation. Avoid With this option, wherever possible, the corre6061 sponding road type is avoided. Not permitted With this option, the corresponding road type 6060 is not included in the route calculation. X Confirm your selection by pressing the 2. key. 7KH 9ROXPH NH\ Use the Volume configuration window to set the volume of all voice prompts every time the Traffic Assist is started.
1DYLJDWLRQDO PRGH 7KH $XWRPRGH NH\ You can choose the following settings in the $XWRPRGH configuration window: 6HWWLQJ Start setting 0HDQLQJ Decide whether you wish to have a ' GLV SOD\ or ' GLVSOD\ of the map as the default setting. 3D autozoom Decide whether you wish to work with $XWR]RRP or 1R DXWR ]RRP as the default setting while navigating in the 3D display. With the Autozoom option, the zoom range varies according to your speed: When you drive slowly, the scale is decreased.
1DYLJDWLRQDO PRGH • If you have deactivated automatic route calculation, you can navigate to the next point by briefly selecting any point on the map and then choosing the 1H[W GHVWLQDWLRQ option. 7KH )RUPDW NH\ Using the )RUPDW configuration window, you can specify which units of measurement to use for time and distance. 7KH 6SHHGNH\ Use the 6SHHG configuration window to choose whether or not you wish to have speed limits displayed during navigation.
1DYLJDWLRQDO PRGH Warning out- The :DUQLQJ RXWVLGH side built-up EXLOW XS DUHDV button inareas dicates the speed limit above which you will receive an acoustic warning when driving outside built-up areas. Warning The :DUQLQJ button indicates the speed limit above which you will receive an acoustic warning when particular conditions apply: during rain or snowfalls, or at certain specific times of the day. Press a button and choose the setting you require. X Confirm your selection by pressing the 2. key.
1DYLJDWLRQDO PRGH 7KH )DFWRU\ VHWWLQJV NH\ You can use the )DFWRU\ VHWWLQJV configuration window to cancel all new settings and reset the system to the factory settings. 6001 To go to the RESET menu, press the )DFWRU\ VHWWLQJV button. X To revert the Traffic Assist to factory settings, press the
1DYLJDWLRQDO PRGH 1DYLJDWLRQ PHQX +RPH If you have entered a home address, the system automatically starts route planning to this address. Once planning is complete, the map is displayed with active driving guidance. 0DS GLVSOD\ You can call the map display from various applications using the miniature map icon. 6001 If the navigation function has not been activated, the map display will cover virtually all of the touchscreen.
1DYLJDWLRQDO PRGH The following function keys appear in the toolbar: 6033 ,FRQ A preview screen with information is also displayed in the bottom left-hand corner whenever a driving manoeuvre is coming up. 6032 The distance remaining is indicated by means of the number of kilometres (or miles) below an arrow. If there are two impending driving manoeuvres in quick succession, a small arrow appears over the first manoeuvre to indicate that another one is coming up.
1DYLJDWLRQDO PRGH 8VLQJ WKH PDS GLVSOD\ 5HSHDW WKH ODVW YRLFH SURPSW While you are receiving driving directions, voice prompts give you important information such as details of the next driving manoeuvre. You can repeat the last voice prompt if necessary. While driving guidance is activated and the preview screen is displayed, press on the volume icon in the top right-hand corner. (If the preview screen is not displayed, wait until the voice prompt for the next driving manoeuvre.
1DYLJDWLRQDO PRGH 6033 X Select your information rows in the Settings menu using the Route info button, page 49. =RRPLQJ DQG WKH PDS WRROEDU You can gradually zoom in and out of the map display using the zoom keys in the top two corners of the touchscreen. 6084 6085 Press Zoom in 6084: to expand or "zoom in on the map" and view individual features more closely. X Press Zoom out 6085 : to "zoom out from the map" and get a broader overview of the area.
1DYLJDWLRQDO PRGH 'D\WLPH 1LJKW WLPH GHVLJQ WRROEDU You can choose between daytime or night-time design to adapt the touchscreen to the current light conditions. If you select the night-time design, the key is displayed as activated (depressed). 6034 6035 The display is adjusted using the daytime/night-time key. 6042 X Press the daytime/night-time key. The design is changed. Press the key again to return to the previous design.
1DYLJDWLRQDO PRGH To activate move mode, select the key with the hand icon. X Press on your chosen point in the map and move this point in the direction required. The map follows this point immediately afterwards. %ORFN URDG X 1RWH If you wait too long after touching the map, the Options menu is displayed &DOO 2SWLRQV PHQX The Options menu offers a range of useful functions. X Press on the map briefly. The Options menu is displayed. To close this menu again, use the Back key or press on the map icon.
1DYLJDWLRQDO PRGH 0XWH PRGH 6HWWLQJV 6WDWXV The voice prompt for driving manoeuvres can be activated or deactivated. • See "Navigation menu: Settings" on page 44. • See "Navigation menu: Status" on page 50. 3RVLWLRQ LQIRUPDWLRQ WRROEDU You can call up the information window if you require information on a particular point on the map display.
0XVLF RSHUDWLRQV 0XVLF RSHUDWLRQV 6HOHFWLQJ PXVLF SOD\EDFN 7KH 03 SOD\HU Music playback is called up from the main menu. You can use the MP3 player to call up and play MP3 tracks saved on a memory card or in the internal memory of the Traffic Assist. 3001 X Press the 0XVLF key in the main menu. &DOOLQJ XS ZLWKRXW DFWLYH QDYLJDWLRQ The MP3 player is called up and appears with its main screen. • If playback of a track has previously been stopped, e.g.
0XVLF RSHUDWLRQV The corresponding track and its number are displayed next to the keys. X Press one of the arrow keys. The track is loaded in the track line. • If the play button is not pressed, the track is not yet played. • If a piece of music is being played at present, this is stopped and playback of the new track started. 3OD\ The pieces of music starting from the track displayed in the track line are played when the following key is pressed.
0XVLF RSHUDWLRQV 5HSHDW FXUUHQW WUDFN The piece of music currently being played is repeated continuously when the following key is pressed. 6HWWLQJ YROXPH The control bar for volume is displayed in the lower part of the MP3 player by pressing this key. To reduce the volume, press the lefthand arrow key. X To increase the volume, press the right-hand arrow key. X G :DUQLQJ 7009 X Press the key featuring the repeat icon. Playback of the piece of music is repeated continuously.
3LFWXUHV PRGH 3LFWXUHV PRGH 6HOHFWLQJ SLFWXUHV GLVSOD\ 7KH 3LFWXUH 9LHZHU The pictures display is called up from the main menu. You can use the Picture Viewer to call up and display the pictures (JPG or BMP) saved on the memory card or in the internal memory of the Traffic Assist. The Picture Viewer is shown below along with its standard display and a sample picture. 3001 Press the 3LFWXUHV key in the main menu. The Picture Viewer is called up and appears with its main screen.
3LFWXUHV PRGH The screen changes to full screen and starts the presentation with the first picture from the current folder level. 8014 8006 The screen changes to full screen and starts the presentation with the first picture from the current folder level. 8002 )ROGHU YLHZLQJ PRGH Under the picture displayed in the Picture Viewer, the picture’s folder level is displayed in a key panel. 8003 Press the key panel. Folder viewing mode appears.
3LFWXUHV PRGH 2SHUDWLQJ IROGHU YLHZLQJ PRGH 6FUROOLQJ You can use the 8010+1keys to scroll through the list display in the direction indicated by the arrow. The current list page and the total number of its contents appear between the keys. 6HOHFWLQJ D SLFWXUH You can load a picture from the list straight into the Picture Viewer. X Press the button of the picture you want. Folder viewing mode is closed and the Picture Viewer appears along without the picture requested.
6HWWLQJV 6HOHFWLQJ WKH VHWWLQJV 2SHUDWLRQ You can pre-select various basic settings for all applications of the Traffic Assist. 6HOHFWLRQ SRVVLELOLWLHV The desired selection is chosen by pushing the desired button. The funtionality of the buttons varies according to the selection and is described under "The individual menu points" on page 64. 6HWWLQJV 3001 Push the button 6HWWLQJV in the main menu. This calls up the setting menu for the further selections.
6HWWLQJV &DOLEUDWLRQ If the touch-screen reacts incorrectly to the touching of the screen in specific areas, calibration is required. 6WDUWLQJ FDOLEUDWLRQ The calibration can be started using the following button. 9025 Push the button &DOLEUDWLRQ. The calibration process is started. Various positions on the screen are indicated in sequence by cross-hairs. Touch this position as accurately as possible. After all the positions have been touched the calibration process finishes automatically.
6HWWLQJV 6HOHFWLQJ WKH ODQJXDJH If you change the language the software restarts. X Push the contact area of the desired language. For safety reasons, the selection is called up again using the signal 6HW ODQ JXDJH WR . In order to accept the selected language, push the button 5059. X In order QRW to accept the selected language, push the button 5060. X &DQFHOOLQJ WKH ODQJXDJH VHOHFWLRQ The language selection is closed by pushing the back button, and the setting menu then appears.
6HWWLQJV 0RRGOLJKW This button allows switching on and off of the side light bars. 9029 9028 X Push the button 0RRG OLJKW. The bars are switched accordingly.
6SHFLDOLVW ZRUGV 6SHFLDOLVW ZRUGV $FWLYH 6\QF Active Sync is a Microsoft product. This is the standard synchronisation software for Windows mobile units such as your Traffic Assist. The programme can be downloaded free-of-charge from the internet. running time differences and thus evaluates its actual current position in terms of geographical length and width. In order to determine the position, signals from at least three satellites are required, and the fourth one allows the height to be determined.
6SHFLDOLVW ZRUGV 6W\OXV A stylus is an input pointer which is used for the operation of touch-screens, mobile phones or PDAs. The stylus consists basically of a plastic pointer with a softer plastic core. The sleeve is hard and can be gripped and the softer core emerges at the tip and is designed to touch the screen as softly as possible (i.e. without the danger of scratching the screen). The stylus is more accurate than operation using the fingers, since only the thin tip touches the screen.
.H\ZRUGV .H\ZRUGV $ & Destinations memory . . . . . . . . . . . .31 changing . . . . . . . . . . . . . . 31, 32 Points of interest . . . . . . . . . . . .40 scrolling . . . . . . . . . . . . . . . . . . .31 Display . . . . . . . . . . . . . . . . . . . . . . .47 Display street names . . . . . . . . . . . . .44 Displaying current position . . . . . . . .32 Displaying current street . . . . . . . . . .44 Distance to destination . . . . . . . . . . .45 Drive profile . . . . . . . . . . . . . . . . . . .
.H\ZRUGV 0 2 6 Main menu . . . . . . . . . . . . . . . . . . . .23 Map display . . . . . . . . . . . . . . . . . . .30 2D, 3D . . . . . . . . . . . . . . . . . . . .47 changing from rapid access . . . .32 Current position . . . . . . . . . . . . .30 Destination displays . . . . . . . . . .37 Points of interest . . . . . . . . . . . .40 Map material . . . . . . . . . . . . . . . . . . .33 Map symbol key . . . . . . . . . . . . . . . .32 Memory Card . . . . . . . . . . . . . . . . . .68 Memory card . . . .
.H\ZRUGV 7 Time format . . . . . . . . . . . . . . . . . . .48 Time of arrival . . . . . . . . . . . . . . . . .45 Time zone . . . . . . . . . . . . . . . . . . . . .47 Toll road . . . . . . . . . . . . . . . . . . 37, 45 Traffic signs . . . . . . . . . . . . . . . . . . .45 Travel time . . . . . . . . . . . . . . . . . . . .45 Travel time remaining . . . . . . . . . . . .45 Type of route . . . . . . . . . . . . . . . 37, 45 Type of routing . . . . . . . . . . . . . . . . .45 8 Units of measurement . . . .
7HFKQLFDO 'DWD • 'LPHQVLRQV (W x H x D) in mm 127 x 81.2 x 49.4 • 3URFHVVRU 200 MHz Processor CISC-architecture • 6FUHHQ 3.5 Inch Touch-Screen with 16 Bit colour depth 65536 Colours Low reflection values • 6WRUDJH 128 MB Flash Storage 64 MB SD-RAM • 6' &DUG 5HDGHU Support up to 2 GB • 86% ,QWHUIDFH USB 1.1 MINI USB • +HDGSKRQH RXWSXW 3.5 mm Stereo Socket • ,QWHUQDO ORXGVSHDNHU: 2 Watt max. • 3RZHU VXSSO\ YROWDJH 12 Volt DC 7HFKQLFDO 'DWD • $& $GDSWHU: 100 - 240 Volt 0.
)$&7 6+((7 In accordance with current EU guidelines, this unit can be operated by any person. This unit conforms with the currently applicable European and harmonised national standards. The marking of the unit gives you the guarantee that the electromagnetic compatibility specification applicable to the unit is maintained.