Dishwasher User’s Manual DDT38532XIH DDT38532X DIT38532 17 8554 01 00_BEKO_E9_USA/ 05-10-21.
To prevent accidents, which could cause serious injury or death, as well as machine damage read these instructions before installation and / or use. CONTENTS 1. IMPORTANT SAFETY INSTRUCTIONS 1 3. GETTING TO KNOW YOUR DISHWASHER 4. LOADING THE DISHWASHER 5 6 2. RECYCLING 4 4.1 UPPER RACK ADJUSTING THE HEIGHT OF THE UPPER BASKET 4.2 LOWER RACK 4.3 PROPER AND IMPROPER LOADING OF DISHWARE 8 10 12 18 5. WHAT SHOULD NOT BE WASHED IN YOUR DISHWASHER 6. OPERATING THE PRODUCT 19 20 6.
A INTRODUCTION Please read this user manual and particularly the safety instructions completely and carefully. They will save you time and effort and help to ensure optimum dishwasher performance. Be sure to observe all listed warnings and cautions. Look particularly for the icons with exclamation marks inside. The information icon will also provide important references. A A C WARNING: Indicates a potentially hazardous situation which, if not avoided, could result in death or serious injury.
• • • • • • • • • • • This equipment complies with FCC radiation exposure limits set forth for an uncontrolled environment in accordance with FCC rule part 2.1093 and KDB 447498. Use the dishwasher only for its intended purpose as described in this user manual. This appliance is intended for normal household use only. The manufacturer disclaims responsibility for damage or injury caused by improper use of this appliance.
• A • • • A This appliance comes with a three prong NEMA 5-15P 15A power cord. It must be connected to a Grounded and Polarized wall receptacle that has been installed and tested by an licensed electrician and that it has been installed based on all Local, State and Federal Electrical codes. For more information go to www.P65Warnings.ca.gov WARNING:Improper connection of the equipmentgrounding conductor can result in a risk of electric shock.
• • • • • Service should be performed by a qualified installer. Work by unqualified persons could be dangerous and may void the warranty. Do not operate the appliance if damaged, malfunctioning, partially disassembled or if it has missing or broken parts. Before installation or service, disconnect the power supply to the work area by unplugging the unit, “tripping” the circuit breaker or removing the fuse. For safety reasons, dishwasher must be secured to adjacent cabinetry using the brackets provided.
3. GETTING TO KNOW YOUR DISHWASHER 1. Upper basket 2. Upper impeller 3. Lower impeller 4. Cutlery basket 5. Door 6. Model and Serial Tag 7. Control panel 8. Detergent and rinse aid dispenser 9. Lower basket 10. Filters 11. Salt container (Select Models) 12. Upper basket rail 13. Upper cutlery basket (Select Models) 14. Tabletop (Select Models) 15.
4. LOADING THE DISHWASHER 1. 2. 3. Upper rack (International Pattern) Pull the handle to open the door. If the door is opened during operation, the dishwasher will stop running. Once the door is closed the program will continue. Remove coarse food leftovers from tableware. Now you can load the dishwasher.
Upper cutlery basket (Select Lower rack (Select Models) Models) Additional Loading Pattern – Bottom rack (10 place settings) International Loading Pattern – Upper cutlery basket (12 place settings) Upper cutlery basket (Select Upper rack (Select Models) Models) Upper cutlery basket (MODEL DEPENDING) Additional Loading Pattern – Top rack (10 place settings) International Loading Pattern – Upper cutlery basket (10 place settings) 7 USA
A A A C • • • • • • Do not overload your dishwasher and pay attention to manufacturer instructions regarding dishes which are appropriate for use in for a dishwasher. Only with suitable dishes (mentioned in section 5) will you obtain optimal washing results with a sensible use of energy. CAUTION:Large knives and other utensils with sharp tips and edges must be placed horizontally into the upper rack due to risk of injury.
UPPER BASKET MULTIPURPOSE SERVICE RACK (Select Models) This accessory located at the upper basket of your machine allows you to easily wash pieces such as extra long ladles and bread knives. COLLAPSIBLE UPPER BASKET WIRES (Select Models) You can use collapsible wires when you need a larger space for your dishes in the upper basket of your machine. To bring the collapsible wires into horizontal position, grab the wire from the middle position and push them in the direction of arrow in the figure.
ADJUSTING THE HEIGHT OF THE UPPER BASKET 1. (Select Models) Upper basket height adjustment mechanism is designed so that you can create wide spaces on the upper or lower compartment of the machine by adjusting the basket upwards or downwards either while it is empty or full. Thanks to this mechanism, you may use your basket in three different positions, namely lower, center or upper positions. To lower the basket, perform the following while the basket is at uppermost position; 1.
ADJUSTING THE HEIGHT OF THE UPPER BASKET (Select Models) The upper basket height adjustment mechanism has been designed for you to create large spaces in the lower or upper sections of your machine depending on your needs by adjusting the height in the upper or lower direction while your basket is empty or loaded. Thanks to this mechanism, you can use your basket in three different positions, namely lower, middle and upper positions (1, 2, 3). 1.
HEIGHT SETTING (Select Models) In certain models, the height setting of the upper rack may be changed using the wheels which are present at two height levels. A 1. 2. CAUTION:Make sure that the rack is empty. Changing the height setting while the rack contains tableware could cause the contents to dislodge, causing personal injury or damage to the tableware. 3. Place the rack into the tracks again at the desired height C. 4. Push the latches back into the correct position. 4.
COLLAPSIBLE LOWER BASKET TINES (Select Models) There are foldable tines (A) located at the lower basket of the machine are designed for an easier placement of large pieces such as pans, bowls, etc. You can create larger spaces by folding each tines individually or all of them at once. COLLAPSIBLE LOWER BASKET TINES (Select Models) There are foldable tines (A) located at the lower basket of the machine are designed for an easier placement of large pieces such as pans, bowls, etc.
SILVERWARE BASKET (Select Models) Silverware basket is designed to wash your dishes such as knife, fork, spoon, etc. in a cleaner manner. Since the cutlery basket can be moved (A, B), you can create a wider space while placing your dishes to the lower basket and free up space for your dishes in different sizes. C SILVERWARE BASKET (Select Models) Silverware basket is designed to wash your dishes such as knife, fork, spoon, etc. in an efficient manner.
TRAY WASH SUPPORTS (Select Models) Use the supports to wash trays in the bottom basket. See the Auxiliary functions section for appropriate program and function selection. SOFTTOUCH ACCESSORY (Select Models) The SoftTouch Accessory found in the lower basket of your machine enables a safe washing for your fragile glasses. LOWER BASKET GLASS HOLDER (Select Models) Lower Basket Glass Holder found in the lower basket of your machine enables a safe washing for your oversized and tall glasses.
LOWER BASKET MULTIPURPOSE / HEIGHT ADJUSTABLE SERVICE RACK (Select Models) This accessory located at the lower basket of your machine allows you to easily wash pieces such as extra glasses, long ladles and bread knives. BOTTLE AND DISH HOLDER ON THE LOWER BASKET (Select Models) Bottle and dish holder (A) on the lower basket is designed to facilitate washing dirty kitchenware with narrow openings and with greater height.
CEILING CUTLERY BASKET (Select Models) Ceiling cutlery basket is designed to wash your cutlery items such as forks, spoons and etc. by placing them between the bars on the basket. When the central tray is in the lower position, you can load long/high items such as coffee cups, ladles, etc. on the tray. When the side trays lean on two side walls, the handle can be pulled to allow the central tray to rise and the system to be locked.
4.
5. WHAT SHOULD NOT BE WASHED IN YOUR DISHWASHER • • • • • • • • • Do not wash sponges or dish cloths in dishwasher. Do not wash art and craft articles in dishwasher. Disposable plastics and disposable aluminum cannot withstand high temperatures; do not wash them in the dishwasher. • • Rust-sensitive steel parts like iron and cast iron that can rust and stain other utensils and damage the interior stainless steel liner of the dishwasher and void the warranty.
6. OPERATING THE PRODUCT 1 8 7. 4 5 6 Function Selection Keys F1 Deep Wash function F2 Fast+ Function F3 SteamGloss Function F4 Sanitize Function 8. Programme Selection Keys 10 11 19 18 9. 10. 11. 12. 13. 14. 15. 16. 17. 18. 19. 3 7 1. On / Off Key 2. Menu Key 3. Time Delay Selection / Menu Direction Selection Keys 4. Selection / Confirmation Key 5. Display 6.
PROGRAMME SELECTION / PROGRAMME CANCEL KEY Select the desired programme using the “programme selection keys” and press the button. To cancel the running programme, open the door of the machine and press and hold the Programme Start/Pause/Cancel key for 3 seconds. After the 3 - 2 - 1 countdown, 0:01 is displayed, close the door of the product and wait for the draining process complete. Draining is completed in 2 minutes and the machine gives an audible warning when it is completed. 3.
22 USA 151 40 8 122-131 25-40 5-8 (°F) ml tsp + + 182 19,2 5,02 + + + 100-135 8,8-21,2 2,32-5,60 Main wash Dry Sanitize Duration (minutes) Water (liters) Water (gallons) 5,34 20,2 122 + + + + 5-8 25-40 8 40 8 40 162 72 158 70 High Suitable for very heavily soiled dishes, pots and pans stayed dirty for a time. Cleans at high temperature with higher pressures.
6.4 AUXILIARY FUNCTIONS Washing programs of your dishwasher are designed to obtain the best cleaning effect, considering the type of the soiling, soiling degree and properties of the dishes to be washed. Auxiliary functions allow you save from time, water and power. Auxiliary functions may cause changes in the program duration. C C Auxiliary functions are not suitable for all washing programs. Indicator of the auxiliary function that is not compatible with the program will not be active.
Submenu Functions: (depends on the model) Doormatic Function Off/On Changing Warning Sound Volume 1. After switching on your machine, press the Menu key for 3 second. 2. Press <- and +> to proceed to “S:” on the display. 3. Each pressing on the Selection key will change the warning sound volume as “S:0” off, “S:1” medium and “S:2” high. 4. Press the Menu key to exit the settings menu. Your setting will be saved automatically.
6.5 SCHEDULING THE WASHING TIME C C You can select and start a new program following the cancellation of Time Delay function. Time Delay If an economical electricity tariff is applied in your region, you can use the Time Time Delay function cannot be Delay function to wash your dishes during set after the program starts. appropriate hours. You can delay the start of the selected program until 24 hours. 6.6 STARTING THE 1.
C C After the door has been opened, if any button is pressed within 5 seconds and the door is closed, the selected program resumes; otherwise, the machine will be switched off. Open the door after the machine has been switched off, press On/Off button and close the door within 5 seconds. The program will resume washing.
6.10 END OF PROGRAM C When the program you have selected comes to an end, an audible warning signal will warn you to turn off your machine. This audible signal will warn you with certain intervals before it turns off. End of Program indicator will light up when the washing program is over. 1. Open the door of the machine. 2. Press On/Off key to turn off your machine. 3. Close the tap. 4. Unplug the machine from the socket. C C 6.
7. DETERGENT You can use powder, liquid/gel or tablet detergents in the machine. Only use in the machine the detergents produced particularly for use with dishwashers. We recommend you not to use detergents that contain chlorine and phosphate as they are harmful for the environment. A C 7.1 ADDING DETERGENT C A Pay attention to the warnings on the detergent packaging to get better washing and drying results. Contact the manufacturer of the detergent for further questions.
3. Push the lid of the detergent dispenser to close it. A "click" will be heard when the lid is closed. 1 if the water hardness level is above the mentioned level. The best washing performance in dishwashers is obtained by using detergent, rinse aid and water softening salt individually. C 2 3 C C C Use powder or liquid/gel detergent in short programs without prewash since the solubility of the tablet detergent changes depending on the temperature and time.
7.3 RINSE AID C 1. 4. If there are stains on tableware items after washing, level must be increased and if there is a blue trace after wiping them by hand, it must be decreased. This is set to position 3 as factory default. The rinse aid used in dishwashers is a special combination that aims to increase drying efficiency and prevent water or lime stains on the washed items.
8. ADJUSTING THE WATER SOFTENING SYSTEM (Select Models) Cleaning, rinsing and drying performance of your dishwasher will increase when water softening system is adjusted properly. Adjust the new water hardness level according to the Water hardness level instruction in this booklet. Use the test strip supplied with the product according to the steps given below to determine hardness level of your supply water. a b 1 min. c d e f 1 Second 1 Minute Remove the test strip from the packet.
If the water hardness level adjustment is set to level 1, the “No salt warning indicator” will illuminate continuously although it is not necessary to use salt. If you use salt under this condition, salt will not be consumed and the Salt indicator will not illuminate. If you move your house, it is necessary to readjust water hardness level of your machine by considering the information given above according to the hardness level of the supply water in your new location.
10. CARE AND MAINTENANCE 4. Fill the salt reservoir with salt by using the salt funnel (D). To speed up dissolution rate of salt in water, stir it with a spoon. A A C You can put about 4.4 Pounds of softening salt into the salt reservoir. C You need to add salt right before starting the machine. Thus, the overflowing salty water will be flushed immediately, preventing the risk of corrosion in machine.
10.1 CARING FOR YOUR DISHWASHER EXTERIOR A 10.2 CARING FOR YOUR DISHWASHER INTERIOR CAUTION :Possible dishwasher damage: Abrasive cleaners, scouring pads, abrasive cloths (paper towels) can damage the dishwasher decorative door. Cleaning the control panel: Use only soft cloth that is lightly dampened with mild detergent. Clean the control panel only with a moist cloth and clear water.
10.3 CLEANING THE FILTERS Clean the filters at least once a week in order for the machine operates efficiently. Check if food residues are left on the filters. If there are food residues on filters, take them out and clean well under running water. 1. Turn the micro filter (1) and coarse filter (2) assembly counterclockwise and pull it out from its seating. 4. Clean all three filters under tap water by means of a brush. 5. Replace the metal/plastic filter. 6. Place the coarse filter into the microfilter.
10.4 CLEANING THE HOSE FILTER Damages on the machine that may be caused by impurities coming from the urban supply water or your own water installation (such as sand, dirt, rust, etc.) can be prevented by means of the filter attached to the water inlet hose. Check the filter and the hose regularly and clean them if necessary. 1. Turn off the tap and remove the hose. 2. After taking out the filter, clean it under running tap water. 3. Place the cleaned filter back to its seat in the hose. 4.
11. TROUBLESHOOTING Machine does not start. • Power cable is unplugged. >>> Check if the power cable is plugged in. • Cicuit Breaker is blown. >>> Check the Cicuit Breaker in your house. • Water is cut. >>> Make sure that the water inlet tap is open. • Door of the machine is open. >>> Make sure that you have closed the door of the machine. • On / Off button is not pressed. >>> Make sure that you have turned on the machine by pressing the On / Off button.
• • • Machine is unloaded right after the program is over. >>> Do not unload your machine right after washing process is completed. Slightly open the door and wait for evacuation of the steam inside for a while. Unload the dishes after the pieces cool down to a touchable level. Start unloading process from the lower basket. Thus, dropping of water remained on a piece at upper basket onto the pieces at lower basket is prevented. Selected program is unsuitable.
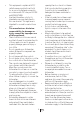
There is a different odor in the machine C A new machine has a peculiar odor. It will fade out after a couple of washing. Filters are clogged. >>> Check if the filter system is clean. Clean the filter system regularly as illustrated in section “Cleaning and Care”. • Dirty dishes are kept in dishwasher for 2-3 days. >>> If you are not going to start the machine right after you have put the dishes into it, remove the remnants on the dishes and run the Prewash program without detergent every 2 days.
Opening of the detergent dispenser lid is prevented during washing. >>> Place the dishes in a way that will not prevent the detergent dispenser lid from opening and the water going into the machine from impellers. • Detergent is stored under unsuitable conditions. >>> If you are using powder detergent, do not store the detergent package in humid places. Keep it in a closed container if possible. For ease-of-storing, we recommend you to use tablet detergents. • Wash Arm holes are clogged.
Foam forms in the machine. • Dishes are washed with hand-wash detergent by hand but not rinsed before placing them into the machine. >>> Hand-wash detergents do not contain antifoam. There is no need to hand-wash the dishes before placing them into the machine. Removing the coarse soil on the dishes under tap water, with a sponge or towel. • Rinse aid has spilled into the machine when adding rinse aid. >>> Take care that rinse aid is not spilled in the machine when you are filling it.
12. TECHNICAL FEATURES Load capacity Permissible water pressure Electrical connection Total power Heater power C 16 place settings 4.35 - 145 psi (0.3 - 10 bars) 120 V (volts), 12 A (amps), 60Hz (hertz) 1400 W (watts) 1100 W (watts) NOTICE: Because we continually strive to improve our products, we may change our specifications and design without prior notice. This device corresponds to the following directives: UL 749 Household Dishwasher directive.
13. WARRANTY STATEMENT FOR THE BEKO DISHWASHERS The warranties provided by Beko in these statements only apply to Beko dishwashers sold to the original purchaser or homeowner in the US and Canada. The warranty is not transferable. To obtain warranty service, please contact our nearest distributor as listed by state and province. You will need your dishwasher model number, serial number, retailer name and address, where purchased and purchase date / installation date.
to product failure, unauthorized service work or work. This product is fully tested and went through official quality assurance inspections before leaving the original manufacturing site. Warranty terms for this Beko household appliance is not valid if the product is altered, tampered, modifed, additional parts assembled, fixed and re-packed by an authorized distributor, servicer, a third party retailer, reseller or by any other unauthorized person(s).