LAVE-VAISSELLE
Veuillez commencer par lire ce manuel! Cher client, Nous espérons que vous obtiendrez les meilleurs résultats de ce produit fabriqué dans des usines de pointe et passé par une procédure de contrôle de qualité stricte. Veuillez donc lire la totalité du manuel de l’utilisateur attentivement avant d’utiliser le produit, et gardez-le comme référence pour une usage à venir. Si vous transférez le produit à quelqu’un d’autre, donnez également le manuel.
TABLE DES MATIERES 1. Lave-vaisselle 3 2. Consignes importantes de sécurité 5 3. Installation 7 Sécurité générale Utilisation prévue Sécurité des enfants 5 5 6 Emplacement d’installation approprié Raccordement de l’arrivée d’eau Raccordement du conduit d’évacuation Réglage des pieds Branchement électrique Première utilisation Comment se débarasser des matériaux d’emballage Transport de l’appareil Comment se débarasser de l’ancien appareil 7 7 8 9 9 10 10 4.
1 Lave-vaisselle Vue d’ensemble � �� �� �� � �� � � � � � � � �� 1.Tabletop (varie selon le modèle) 2.Hélice supérieure 3.Panier inférieur 4.Hélice inférieure 5.Filtres 6.Panneau de commande 7.Porte 8.Distributeur de détergent 9.Fente de l’hélice inférieure 10.Panier à couverts 11. Couvercle de l’indicateur de sel 12.Rail du panier supérieur 13.Panier supérieur avec support 14.
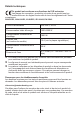
Détails techniques Ce produit est conforme aux directives de l’UE suivantes: Les étapes de conception, production et vente de ce produit sont en conformité avec les règles de sécurité de tous les réglements de l’Union européenne.
2 Consignes importantes de sécurité Cette section contient des consignes de sécurité qui vous aideront à vous protéger des risques de blessures physiques ou d’endommagement de l’appareil. Le non respect de ces consignes annulera toutes les garanties. Sécurité générale • N’installez jamais l’appareil sur • • • • • • • un sol couvert de moquette ou sur un tapis. Sinon, l’absence de circulation d’air en-dessous de votre appareil entraînera la surchauffe des pièces électriques.
• • • • • • les clients d’hôtels, de motels et d’autres environnements de type residentiel ; les environnements du type lit et petit déjeuner. Seuls des détergents sûrs pour lave-vaisselles, produits de rinçage et additifs peuvent être utilisés. Le fabricant décline toute responsabilité face à un éventuel problème survenu à cause de l’utilisation ou du transport incorrect de l’appareil. La durée de service de votre produit est de 10 ans.
3 Installation Consultez l’agent de service agréé le plus proche pour l’installation de votre produit. Pour rendre votre machine prête à l’emploi, veuillez vérifier que le système d’électricité, de drainage et d’approvisionnement en eau soient adaptés avant de faire appel à un service agréé. Si ce n’est pas le cas, contactez un technicien et un plombier qualifiés pour que les dispositions nécessaires soient effectuées.
Raccordement du conduit d’évacuation ������� ��� �� �� �� �� �� � �� �� 1011 �� ��������� �� ���� ���������� ��� Le tuyau d’évacuation de l’eau peut être directement raccordé au tuyau de vidange ou à la vidange de l’évier. La longueur de ce raccordement doit être au minimum à 50 cm et au maximum à 100 cm du sol.
Réglage des pieds Si la porte de l’appareil ne peut pas être bien fermée ou si le produit se balance quand vous le poussez légèrement, vous devez ajuster ses pieds. Ajustez les pieds du produit comme illustré sur le manuel d’installation fourni avec le produit. Aquasafe+ (varie selon le modèle) Protégez le système Aquasafe+ contre les fuites d’eau qui peuvent survenir à l’arrivée du tuyau. Le contact de l’eau avec le boîtier de la vanne du système doit être évité.
Première utilisation Avant de commencer à utiliser votre appareil, assurez-vous que toutes les préparations ont été effectuées conformément aux consignes indiquées dans les sections “Consignes importantes de sécurité” et “Installation”. ● Pour préparer l’appareil à effectuer des lavages, faites le fonctionner une première fois à vide sur le programme le plus court avec du détergent. Pour la première utilisation, remplissez le réservoir de sel avec 1 litre d’eau avant de le remplir de sel.
4 Prélavage Astuces pour économiser de l’énergie Les informations suivantes vous aideront à utiliser le produit d’une manière écologique et rentable en énergie. • Eliminez tous les restes de nourriture restant sur la vaisselle avant de les mettre dans l’appareil. • Faites fonctionner le produit après l’avoir rempli complètement. • Quand vous sélectionnez un programme, référez-vous au “Tableau des programmes”. • Ne mettez pas plus de détergent que suggéré sur le paquet de détergent.
Ajout du sel Le système d’adoucissement de l’eau a besoin d’être régénéré pour que le produit fonctionne en permanence avec les mêmes performances. Le sel du lave-vaisselle est utilisé à cette fin. C N'utilisez dans votre appareil que les sels spéciaux d'adoucissant destinés aux lave-vaisselle. C Nous vous recommandons d'utiliser des sels adoucissants en granules ou poudre. N'utilisez pas de sels contenant des substances insolubles comme des sels de table ou du gros sel dans l'appareil.
5. Si vous ne démarrez pas le programme de lavage immédiatement après l’ajout de sel, faites fonctionner la machine vide avec le programme le plus court pour dissoudre et laver le sel éparpillé dans la machine. C Les différentes marques de sel sur le marché ont différentes tailles de particule et la dureté de l'eau peut varier. La dissolution du sel dans l'eau peut donc prendre plusieurs heures. Le voyant sel peut rester allumer un moment après l'ajout de sel dans l'appareil.
3. Fermez le couvercle du distributeur de détergent en appuyant légèrement dessus. Vous entendrez un clic quand le couvercle sera fermé. C Dans les programmes avec prélavage et à haute température, avec lesquels vous utilisez des détergents en tablettes, assurezvous que le distributeur de détergent est correctement fermé. C Utilisez le détergent en poudre � dans des programmes courts sans prélavage, car la solvabilité du détergent en tablettes change en fonction de la température et de la durée.
� Produit de rinçage C Le produit de rinçage utilisé dans les lave-vaisselle est une formule spéciale utilisée pour améliorer l'efficacité de séchage et empêcher les traces de calcaire sur les éléments lavés. C'est pourquoi, il faut prendre soin d'utiliser un produit de rinçage dans le réservoir pour produits de rinçage et utiliser des produits de rinçage conçus spéciallement pour des lavevaisselle.
ternir avec le temps. Nous vous recommandons fortement de vérifier si la vaisselle que vous allez acheter convient au lavage au lave-vaisselle. Disposition de la vaisselle dans le lave-vaisselle Vous ne pouvez utiliser votre lavevaisselle de la manière optimale du point de vue de la consommation d’énergie et des performances de lavage et de séchage que si vous disposez la vaisselle de manière ordonnée. • Eliminez tous les restes de nourriture restant sur la vaisselle (os, miettes, etc.
Exemples pour des emplacements de paniers alternatifs Erreurs d’emplacement Panier inférieur Panier supérieur Erreurs d’emplacement 17 FR
Panier à couverts Panier à couverts amovible (varie selon le modèle) Le panier à couverts est conçu pour nettoyer vos couverts tels que les fourchettes, cuillers, etc. de manière plus propre. (varie selon le modèle) Comme le panier à couverts est amovible (A, B), vous pouvez créer un espace plus large quand vous placez vos plats dans le panier inférieur, et libérer de l’espace pour vos plats de différentes tailles.
Tiges du panier inférieur rétractables (2 pièces) (varie selon le modèle) Les deux tiges pliables situées dans le panier inférieur de la machine sont conçues pour un rangement plus facile d’éléments volumineux comme les casseroles, les saladiers, etc. (1, 2). � 4). Vous pouvez créer des espaces plus grands en repliant chacune des tiges séparément ou toutes à la fois. Abaissez les tiges pliantes en appuyant sur le loquet (A).
Support multifonction / à hauteur ajustable du panier inférieur � (varie selon le modèle) Cet accessoir situé dans le panier inférieur de l’appareil vous autorise à laver facilement des éléments tels que des verres supplémentaires, de grandes louches et des couteaux à pain. � � � � � � Pour ajuster�la taille � des supports: 1. Plier le support (E).� 2. Faites glisser le support vers � le haut (F) � 3. Ouvrir le � support au niveau désiré � (G).
Tiroir du panier supérieur relâchez le loquet du support à verres de la tige du panier supérieur à laquelle il est fixé. Vous pouvez ainsi � obtenir un espace plus large. (varie selon le modèle) Vous pouvez aisément placer des cuillères à dessert, petites fourchettes et couteaux supplémentaires dans le tiroir fixé au panier supérieur de votre appareil.
Tiges du panier supérieur rétractables la hauteur du panier chargé dans les directions supérieures et inférieures, sans l’enlever de la machine. (varie selon le modèle) Pour mettre les tiges rétractables du panier supérieur de la machine en position horizontale, appuyez sur le Pour élever le panier: 1. Tenez l’une des tiges du panier supérieure (droite ou gauche) et soulevez-la (A). 1021 eps � � loquet (1). Placez vos plats volumineux dans l’espace dégagé (2).
� 2. Répétez la même manoeuvre pour abaisser l’autre côté du panier. 3. Veillez à ce que le mécanisme d’ajustement de la hauteur des deux côtés du panier soit réglé au même niveau (bas ou haut). Pour abaisser le panier: 1. Appuyez sur le loquet du mécanisme de réglage du panier (droit ou gauche) pour abaisser le panier (B).
Ajuster la hauteur du panier supérieur vide (varie selon le modèle) Vous pouvez ajuster la hauteur du panier supérieur en fonction de la taille des plats à laver. Utilisez les roulettes du paniers pour changer la hauteur du panier. 1. Tournez les taquets au bout des rails du panier supérieur sur les côtés (A). 2. Sortez le panier (B). 3. Changez la position des roues, placez le panier sur les rails et fermez les taquets (C).
5 Entretien et nettoyage La durée de vie du produit est allongée et les problèmes rencontrés fréquemment diminuent s’il est nettoyé régulièrement. A Débranchez le produit et fermez le robinet avant de commencer les procédures de nettoyage. C N'utilisez pas de substances abrasives pour le nettoyage. C Lavez les filtres et les hélices au moins une fois par semaine. 1.
Nettoyage des hélices 3. Pressez les deux cliquets du gros filtre vers l’intérieur et séparez le gros filtre de l’assemblage (C). Nettoyez les hélices au moins une fois par semaine pour que l’appareil fonctionne correctement. Hélice inférieure Contrôlez si les trous de l’hélice inférieure (1) sont bouchés. S’ils le sont, retirez les saletés et nettoyez l’hélice. Soulevez l’hélice inférieure pour l’enlever (A, B). � � � 4. Nettoyez tous les trois filtres sous le robinet à l’aide d’une brosse. 5.
� Hélice supérieure Contrôlez si les trous de l’hélice supérieure (2) sont bouchés. S’ils le sont, retirez les saletés et nettoyez l’hélice. Tournez son écrou vers la gauche pour retirer l’hélice supérieure (C, D). Assurez-vous que l’écrou est bien serré quand vous installez l’hélice supérieure.
6 Recherche et résolution des pannes L'appareil ne démarre pas. • Le cable électrique est débranché >>> Vérifiez si le cable électrique est branché. • Le fusible a sauté. >>> Vérifiez les fusibles de votre maison. • L'eau est coupée. >>> Vérifiez que le robinet d'arrivée d'eau est ouvert. • La porte de l'appareil est ouverte. >>> Vérifiez que vous avez fermé la porte de l'appareil. • Le bouton Marche / Arrêt n'est pas enclenché.
La vaisselle n'est pas sèche à la fin du cycle • La vaisselle n'est pas disposée en ordre dans l'appareil. >>> Disposez votre vaisselle de manière à ce que l'eau ne s'accumule pas à l'intérieur. • Il n'y a pas suffisamment de produit de rinçage. >>> Vérifiez le voyant du produit de rinçage et ajoutez du produit de rinçage si nécessaire. Augmentez le réglage du produit de rinçage s'il y a assez de produit de rinçage dans la machine. • La machine est déchargée juste après la fin du programme.
Des traces de calcaire restent sur la vaisselle et le verre a une apparence terne • Il n'y a pas suffisamment de produit de rinçage. >>> Vérifiez le voyant du produit de rinçage et ajoutez du produit de rinçage si nécessaire. Augmentez le réglage du produit de rinçage s'il y a assez de produit de rinçage dans la machine. • Le réglage de dureté de l'eau est bas ou le niveau de sel est insuffisant>>> Mesurez la dureté de l'eau d'approvisionnement et vérifiez le réglage de dureté de l'eau.
De la rouille, décoloration ou détérioration de surface endommagent la vaisselle • Il y a des traces de sel. >>> Le sel peut entraîner la détérioration et l'oxydation des surfaces métalliques. Veillez à ne pas éparpiller du sel autour de l'orifice de remplissage de sel quand vous ajoutez du sel. Assurez-vous toujours que le couvercle du réservoir à sel est correctement fermé après le remplissage. Faitez fonctionnez le programme prélavage pour enlever le sel éparpillé dans l'appareil.
Du détergent reste dans le distributeur de détergent. • Le distributeur de détergent était humide quand le détergent a été ajouté. >>> Assurez-vous que le tiroir de détergent est bien sec avant de le remplir. • Le détergent est ajouté longtemps avant le lavage. >>> Veillez à ajouter le détergent peut avant le démarrage du lavage. • Le couvercle du distributeur de détergent ne peut pas s'ouvrir durant le lavage.
Un voile semblable à une tache de lait reste sur les verres et ne disparaît pas quand il est essuyé avec la main. On distingue un aspect bleuté / arcen-ciel quand le verre est tourné vers la lumière. • Trop de produit de rinçage est utilisé. >>>Réduisez le réglage du produit de rinçage. Nettoyez le produit de rinçage qui déborder quand vous ajoutez le produit de rinçage. • De la corrosion se produit sur le verre en raison de la douceur de l'eau.
FR 17 7944 03 00_AG