Condenser Sensor Dryer DRCS 76 W DRCS 76 S
Please read this manual first! Dear Customer, We hope that your product which has been manufactured in modern facilities and passed through a strict quality control procedure will give you the best results. Therefore, we advise you to read through this manual carefully before using your product and keep it for future reference. This operation manual will... …help you use your machine in a fast and safe way. • Please read the Operation Manual before installing and starting your machine.
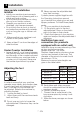
TABLE OF CONTENTS 1 Your Dryer 4 Overview..............................................4 2 Important Safety Instructions 5 3 Installation 7 Appropriate installation location ...........7 Adjusting the feet..................................7 Ventilation hose and connection (for products equipped with an outlet vent)............................................7 Connection to a water drain (for products equipped with a condenser ).. 8 Destroying the packaging material........
1 Your Dryer Overview 4 7 1 2 3 5 6 1- Type label 5- Condenser and water tank cover 2- Control Panel 6- Adjustable Feet 3- Lint filter 7- Water tank 4- Power Cord Specifications of this appliance may change without notice to improve the quality of the product. Figures in this manual are schematic and may not match your product exactly. Values stated on the machine labels or in the documentation accompanying it are obtained in laboratory in accordance with the relevant standards.
2 Important Safety Instructions • Read all instructions before using the appliance. Otherwise, there may be the risk of personal injury or material damage. Moreover, any warranty and reliability commitment will become void. • This appliance must be grounded. In the event of malfunction or breakdown, grounding will reduce the risk of electric shock by providing a path of least resistance for electric current.
• Do not dry articles that have been previously cleaned in, washed in, soaked in or spotted with petrol/ gasoline, dry-cleaning solvents or other flammable or explosive substances as they give off vapors that could ignite or explode. • Do not use the tumble dryer if industrial chemicals have been used for cleaning. • Do not dry unwashed items in the tumble dryer.
3 Installation Appropriate installation location • Install your machine in environments which have no risk of freezing and in a stable and level position. • Do not place your machine on a long pile rug or on similar surfaces. • Operate your machine in a well ventilated, dust-free environment. • Do not block the air ducts in front of and under the machine with materials such as long pile rugs or kitchen unit plinths. B Make sure that your machine is not placed on the power cable.
C Exhaust of humid air from the dryer into the room is inconvenient. It may damage the walls and furniture in the room. C The ventilation hose can be routed outdoors via a window or it can be connected to an air outlet in the wall (see diagram below). C Air outlet hose must be extended directly to the outdoors. There must be a small number of elbows as not to hinder air ventilation. C To prevent water accumulation in the hose, make sure that it is not folded on the floor.
Destroying the packaging material Packaging material can be dangerous to children. Keep the packaging materials out of the reach of children or dispose of them accordingly. Do not dispose them together with normal domestic wastes. Packaging materials of your machine are manufactured from recyclable materials. Disposing of the old machine Dispose of your old appliance in an environmental friendly manner.
4 Electrical Connection Built-under installation This appliance can be installed under a worktop. A Only authorised specialists are permitted to carry out a built-under installation. Risk of electric shock! A Important Make sure that you have an earthed power outlet socket rated at 13 amps (minimum). Attention! If you use your dryer as built-in, the socket must be reachable after installation, or a separate switch (which can disconnect the two poles) must be used in the installation.
5 Initial preparations for drying Garments suitable for drying in the machine Always follow the advice on the garment labels. With this dryer, dry only the laundry having a label stating that they are suitable for drying in a dryer by selecting the appropriate programme. A B C D • Garments made of foam or rubber may be deformed. • Do not dry clothes containing rubber in the machine.
C Place your garments into the drum loosely so that they will not get tangled.. C Large pieces (E.g.: bed sheets, quilt covers, large tablecloths) may bunchup. Stop the machine 1-2 times during drying process to separate bunched-up laundry. Following weights are given as examples.
6 Selecting a Programme and Operating Your Machine Control panel Figure 2 13 15 12 8 11 14 9 10 8. On/Off button 9. Programme selection knob 10. Start/Pause/Cancel button 11. Cancel Audio Warning 12. Programme follow-up indicator 13. Filter cleaning warning LED 14. Water tank full warning LED* 15. Time Delaying Selection Button* * It may change according to the specifications of your dryer Turning the machine on Prepare machine for programme selection by pressing the “On/Off” button.
C Always select the highest temperature required for drying. High temperature will ensure energy and time saving. C For further programme details, see, “Programme Selection Table” Main programmes Depending on the type of textile, the following main programmes are available: •Cottons You can dry your durable clothes with this programme. Dries at a higher temperature. It is recommended to use for your cotton items (such as bed sheets, quilt cover, underclothing, etc.).
Programme selection and consumption table EN Programmes 2 Capacity (kg) Washing machine spin Approximate amount speed (rpm) of remaining humidity Drying time (minutes) Cottons / Coloreds 7 A Cupboard Dry 3.5 7 A Ready to Wear 3.5 7 B Ready to Iron 3.5 1200-1000 60% 157 900-800 70% 180 1200-1000 60% 90 900-800 70% 110 1200-1000 60% 170 900-800 70% 190 1200-1000 60% 100 900-800 70% 120 1200-1000 60% 115 900-800 70% 130 1200-1000 60% 70 900-800 70% 90 Rapid Dry 1.
Auxiliary function Cancel Audio Warning Your machine will send out an audio warning when the programme comes to an end. If you do not want to hear this sound, you need to press the “Cancel Audio Warning” button. The relevant LED will light up when this button is pressed and an audio warning will not be given when the programme comes to an end. C You can select this function either before or after the programme starts.
“Ready to wear”: - Starts to illuminate when the drying degree reaches “Ready to wear” step and remains illuminated until the next step. “Final / Anti-creasing”: - Illuminates when the programme comes to an end and anti-creasing function is activated. start the programme. C Any laundry added after the drying process has started may cause the already dried clothes in the machine to intermingle with wet clothes and the drying result will not be as good.
activated in order to change the drying programme. To cancel any selected programme; • Press “Start/Pause/Cancel” button for about a duration of 3 seconds. The “Filter cleaning”, “Water tank” and “End/ Anticreasing” warning LEDs will light up at the end of this period for reminding purposes. A As the inside of the machine will be excessively hot when you cancel the programme while the machine is running, activate the ventilation programme to cool it down.
7 Quick instructions for daily use Preparation and starting 1. Press the “On/Off” button. 2. Place the laundry in the machine. 3. Select the programme. 4. Close the loading door. 5. Press “Start/Pause/Cancel” button. Cancelling a programme A new programme can be selected and started after “Programme cancel” is activated in order to change the drying programme. In order to cancel the selected programme, press “Start/Pause/Cancel” button for about 3 seconds.
8 Maintenance and cleaning Cover filter Lint and fibres released from the laundry to the air during the drying cycle are collected in the “Cover Filter”. C Such fibre and lint are generally formed during wearing and washing. C Always clean the filter after each Drying process. C You can clean the filter and filter area by vacuum cleaner. For Filter cleaning; 1 Take out the cover 2 Remove the cover filter by pulling it up and open the filter.
For the condenser (products equipped with a condenser); Hot and humid air in the condenser is cooled with the cold air from the room. Thus, the humid air circulating in your machine is condensed and then pumped into the tank. C Clean the condenser after every 20 drying cycles or once a month. To clean the condenser; 1 If a drying process has been carried out, open the door of the machine and wait until it cools down. 2 Unlock the 4 condenser locks after opening the kick plate. 3 Pull out the condenser.
9 Solution suggestions for problems Problem Cause Explanation / Suggestion Drying process takes too much time. Cover filter and filter drawer might have not been cleaned. * Clean the cover filter and Filter drawer. Laundry come out wet at the end of drying. Machine does not switch on or the programme does not start. Machine is not activated when set. * Cover filter and filter drawer might have not been cleaned. * Excessive laundry might have been loaded in. * It might have not been plugged in.
10 Door Reversal 1. Unplug the dryer. 2. Open the door. 3. Turn the contact pin in the upper part of door by 90° in the anti-clockwise direction and remove it. 4. Unscrew the 2 screws of each door hinge and remove the door. 5. Removing the door lock: Using a flat screwdriver release the snap-fitted door lock. 6. Remove 2 plugs for the hinges and one for the door-lock on the opposite side. 7. Insert the door lock system on the opposite side of the hinge and be sure it is properly fitted. 8.
11 Guarantee Your new product is guaranteed against the cost of breakdown repairs for twelve months from the date of the original purchase. What is covered? • Repairs necessary as a result of faulty materials, defective components or manufacturing defect. • The cost of functional replacement parts, but excluding consumable items. • The labour costs of a approved repairer to carry out the repair.
12 Service Please keep your purchase receipt or other proof of purchase in a safe place; you will need to have it should the product require attention under guarantee. You should also complete the details below; it will help us assist you when requesting service.