Dryer User Manual DTLP81151W / DTLP81141W EN 2960312621EN/210420.
Please read these instructions first before using your appliance Thank you for choosing a Beko appliance. Please take some time to read this user manual before using your appliance, to ensure you know how to safely operate the controls and functions. Carefully follow all unpacking and installation instructions to ensure the appliance is correctly connected and fitted prior to use.
1 Important instructions for safety and environment C NOTE • This section contains safety instructions that will help protect from risk of personal injury or property damage. Failure to follow these instructions shall void any warranty. 1.
1.1.1 Electrical safety B DANGER! • Electrical safety instructions should be followed while electrical connection is made during the installation. • Connect the dryer to a grounded outlet protected by a fuse at the value specified on the type label. Have the grounding installation performed by a qualified electrician. Our company shall not be liable for any damages that will arise when the dryer is used without grounding in accordance with the local regulations.
DANGER! Points to be taken into consideration for fire hazard: Below specified laundry or items must not be dried in the dryer considering fire hazard. • Unwashed laundry items • Items soiled with oil, acetone, alcohol, fuel oil, kerosene, stain removers, turpentine, paraffin, paraffin removers, petrol, wax or wax removers must be washed in hot water with plenty of detergent before being dried in the dryer.
• • A fixing device should be used between the two machines when installing the dryer above a washing machine. The fitting device must be installed by the authorized service agent. Total weight of the washing machine and the dryer -with full load- when they are placed on top of each other reaches to approx. 180 kilograms. Place the products on a solid floor that has sufficient load carrying capacity! A • WARNING! Washing machine cannot be placed on the dryer.
1.4 Child safety • Packaging materials are dangerous for the children. Keep packaging materials away from children. Electrical products are dangerous for the children. Keep children away from the product when it is operating. Do not let them tamper with the dryer. Use the childproof lock in order to prevent the children to tamper with the dryer. • C NOTE Child-proof lock is on the control panel. (See Child lock) • Keep loading door closed even when the dryer is not in use. 1.
2 Your Dryer 3 Installation 2.1 Overview Before installation, ensure that electrical installation and water drain is appropriate referring to the user’s manual. If they are not suitable, contact a qualified electrician and technician to make necessary arrangements. 11 1 2 10 3 9 8 4 5 7 6 1. Top panel 2. Control panel 3. Loading door 4. Kick plate opening button 5. Ventilation grids 6. Adjustable legs 7. In models where the tank is placed below, the water tank is inside the toe board 8.
• The rear surface of the tumble dryer shall be placed against a wall. B DANGER! Do not place the dryer on the power cable. * Ignore following warning if your product’s system does not contains R290. DANGER! • • • • Dryer contains R290 refrigerant.* R290 is an environment-friendly, but flammable refrigerant.* Ensure that the air inlet of the dryer is open and it is well-ventilated.* Keep potential flame sources away from the dryer.* 3.2 Removing the transportation safety assembly A 3.
3.5 Transportation of the dryer Drain all water that has remained in the dryer. If direct water drain connection is made, then remove the hose connections. A • WARNING! We recommend carrying the dryer in upright position. If it is not possible to carry the machine in the upright position, we recommend carrying it by tilting towards the right side when looked from the front. 3.6 Warnings about sounds C • NOTE • It is normal to hear a metallic noise from the compressor sometimes during operation.
4 Preparation 4.1 Laundry suitable for drying in the dryer • Always obey the instructions given on the garment tags. Dry only the laundry having a label stating that they are suitable for drying in a dryer. • 4.2 Laundry not suitable for drying in the dryer • the condenser once in a month or after every 30 operations regularly. Clean the filter periodically.Read the Maintenance and cleaning of filters for detalied information.
5 Operating the product 5.1 Control Panel 1 1. 2. 3. 4. 5. On/Off/Program selection button Start/Stand-by button End Time button 5 4 3 2 Drying Level Button Buzzer volume/Time programs selection button 5.
5.4 Program selection and consumption chart Programmes Programme Description Capacity (kg) Spin speed in washing machine (rpm) Drying Time (minutes) EN Cottons Iron Dry You may dry your cotton laundry to be ironed in this program to have them slightly damp for ease of ironing. (Shirt, T-shirt, tablecloth, etc.) 8 1000 145 Cottons Eco You may dry all your cotton laundry in this program. (T-shirt, pants, pyjamas, baby clothes, underwear, linen, etc.
Towels It is a long-term program that you can use for the clothes (baby clothes, towels, underwear, etc. cotton) you require hygeine. Hygiene is provided with high temperature. It is especially suitable for durable fabrics. ((This program is identified and approved by England’s “The British Foundation” (Allergy UK).)) 5 800 195 Down Wear You can dry your feather or fibre filled textile that bears can be dried in drier label as a single piece of laundry.
End time You can delay the end time of the program up to 24 hours with End time function. 1. Open the loading door and place the laundry. 2. Select the drying program. 3. Press the End Time selection button and set the delay time you wish. End Time LED will illuminate. (When pressed and hold the button, End Time proceeds nonstop). 4. Press the Start / Stand-by button. End Time countdown starts. “:” Separator in the middle of displayed delay time flashes.
5.9 Changing the program after it is started You can change the program you selected to dry your laundry with a different program after the drying machine starts running • For instance, select Extra Dry program by turning the On/Off/Program selection knob to select Extra Dry instead of Iron Dry. • Press the Start/Stand-by button to start the program.
6 Maintenance and cleaning 6.1 Loading Door Inner Surface The hair and fibres that are separated from the laundry during drying process is collected by the Fibre Filter. C • • NOTE Fibres are formed during wearing and washing clothes. You can clean the filter slot with a vacuum cleaner. A • • Clean both filters under water running in reverse direction of fibre accumulation or with a soft brush. Dry the filter before placing it back.
C • • • 2. Drain the water in the tank. WARNING! Never use solvents, cleaning agents or similar substances for cleaning due to the risk of fire and explosion! 6.3 Draining the water tank Dampness of the laundry is removed and condensed during drying process and the water that arise accumulates in the water tank. Drain the water tank after each drying cycle. A • • 1. Remove the water tank in the drawer or container carefully. Clean the sensor 4 times a year.
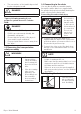
• After the cleaning process is completed, place the air router door to its place, move the latches to close it and close the toe board. A WARNING! • You can clean by hand, provided you wear protective gloves. Do not try to clean with bare hands. Evaporator fins may damage your hands. • Cleaning by left to right movements may damage the evaporator fins. This may lead to drying issues.
7 Troubleshooting Drying operation takes too long. Fibre filter (interior and exterior filter) pores may be clogged. >>> Wash the fibre filters with warm water and dry. Evaporator front side may be clogged. >>> Clean the front side of the evaporator. The ventilation grills in front of the machine may be closed. >>> Remove any object in front of the ventilation grills that blocks air. Ventilation may be inadequate because the are the machine is installed in is too small.
8 Electrical Connection Make sure that you have an earthed power outlet socket rated at 13 amps (minimum). 8.1 Attention! When installed, the socket must be reachable after installation, or a separate switch (which can disconnect the two poles) must be used in the installation. Check for suitability.For a permanent connection, a master switch with at least 3mm contact clearance and minimum 13 A rating must be used. 8.
PRODUCT FICHE Complying Commission Delegated Regulation (EU) No 392/2012 BEKO Supplier name or trademark DTLP81151W / 7188234910 DTLP81141W / 7188234930 Model name 8.
BEKO UK AND IRELAND STANDARD MANUFACTURER GUARANTEE TERMS AND CONDITIONS Your new Beko product is guaranteed against faulty materials, defective components or manufacturing defects. The standard guarantee starts from the date of original purchase of the product, and lasts for a period of twelve (12) months unless Beko plc (the “Manufacturer”) agrees to extend the guarantee for the product in writing.
9. Possession of a copy of these terms and conditions does not necessarily mean that a product has the benefit of this guarantee. If you have any questions, please call our Call Centre on the number set out above. 10. The Manufacturer reserves the right to terminate the guarantee if its staff or representatives are subjected to physical or verbal abuse in the course of carrying out their duties. 11. Optional extras, where available (i.e. extendable feet) are supplied on a chargeable basis only.
BEKO UK AND IRELAND PROSMART INVERTER MOTOR GUARANTEE TERMS AND CONDITIONS This 10 year guarantee relates to Beko products that feature the ProSmart Inverter Motor. The ProSmart Motor guarantee terms and conditions are in addition to our Standard guarantee terms and conditions detailed in the previous section. In order to activate the 10 year guarantee you MUST register the appliance within 90 days of the original purchase date. You can register by first visiting Beko.co.
HOW TO OBTAIN SERVICE FOR YOUR APPLIANCE Please keep your purchase receipt or other proof of purchase details in a safe place; you will need to have this documentation available should the product require attention under guarantee. Please take a few moments to complete the details below, as you will need this information when you call us, or to use our online services. When you call us you may be required to input your serial number into your telephone keypad. For help please visit beko.co.