COLOUR TELEVISIONS IDTV 28C723IDW Operating Instructions
CONTENTS General information....................................................................................................2 Special features of your integrated digital television.........................................................................2 Receiving digital stations..............................................................................................................2 Safety Instructions..............................................................................................
Special features of your integrated digital television This television can receive and process all analogue and all digital stations. This television set has an integrated digital and analogue receiver. The digital receiver unit converts the signals from digital stations to provide outstanding audio and picture quality. The TV guide (only for digital stations) tells you of any schedule changes at short notice, and provides an overview of all the stations’ schedules for the next few days.
Safety is Important Your safety and the safety of others is important. Please, therefore, ensure you read the Safety instructions before you operate this television. Safety instructions ! Read all the safety instructions before first use of your TV. • Position the television so that direct light does not fall on the screen. Excessive light will cause a washed out effect.
Television Thank you for buying this television which is designed to give you many years of satisfactory service. You may already be familiar with using a television but do please take time to read these instructions. They are designed to familiarise you with the unit’s many new features and to ensure you get the very best out of your purchase.
Electrical connections 1.SECTION: INSTALLATION AND PRECAUTIONS ELECTRICAL CONNECTIONS For your own safety read the following instructions carefully before attempting to connect this unit to the mains supply. For your convenience a mains plug with a fuse has been fitted to this appliance. For your safety please observe the following information. The moulded plug on this appliance incorporates a 5A fuse. Should the fuse need to be replaced an ASTA approved BS 1362 fuse of the same rating must be used.
CONNECTION/PREPARATION In the box Inside this package you should have: Television,Remote control,User guide, AAA batteries x 2 Read these instructions before use. Connecting the aerial and the mains cable Plug the cable of the outdoor or indoor aerial (passive or active indoor aerial with its own power supply) into the aerial socket » « of the television set. Please note: When connecting an indoor aerial, you may have to try it out at different positions until you get the best reception.
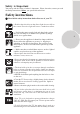
Control Unit Front Panel Program Down/Up button P- P+ Volume Down/Up button.
External connections table 8 Picture tube size/type 28” 16:9 29” 4:3 AV1 Scart STD. STD. AV2 Scart STD. STD. AV3 Scart X X Headphone socket X X Audio/Video PHONO X X S-Video socket X X Back Audio Out X X Coaxial Out X X CI Slot X X STD : Standard X : Model Dependant Please note: The Audio/Video PHONO, S-Video and Headphone socket can be placed on the front panel or on the right-hand side of the cabinet depending to the model of your TV.
TELEVISION OPERATIONS Basic functions Switching on and off Switch on the television by pressing the » « button on the television set.The device switches to standby mode, and the stand-by indicator will illuminate. Switch the television on with any »Numeric button« or » «, » «. Press the » « button to switch the television to standby mode. Completely switch the television off by pressing » « on the television set. This saves electricity.
SETTINGS Searching for television stations The television is equipped with an automatic station search system. You can start the search and can then sort the television stations into your order of preference. There are 899 preset positions for digital stations and 100 for analogue stations, to which you can assign television stations from the aerial or from the cable connection (analogue programmes).
– The »CHANNEL SEARCH - DIGITAL« menu appears and the search begins. The automatic search may last several minutes depending on the number of television channels received. The search is finished when the message »DONE« appears. – At the end of the search, new TV or radio stations are automatically added to the end of the station list. BACK « or » Press » « (Green) to quit the station search. The »DVB MENU« appears. EXIT Press » « to finish the setting.
Use »0« – »9« to enter the password 1234 and confirm with » – The »DVB MENU« appears. « (Green). «, » « and press » « to confirm. Select »AUTOMATIC SEARCH« with » – The »CHANNEL SEARCH - DIGITAL« menu appears and the search begins. The automatic search may last several minutes depending on the number of television channels received. – The search is finished when the message »DONE« appears. BACK Press » Press » « or » EXIT « (Green) to quit the station search. The »DVB MENU« appears.
Service Preference You can select the service preference as » DATA SERVICE « or » SUBTITLE « when data service is selected, MHEG (Interactive text) is available if transmission programme has this data. if data service is not selected this function will not operate even if transmission programme, is carrying this data. When subtitles is selected subtitles are displayed in the preferred language selected, if not selected subtitle (SUBT) button on remote control will not work.
Signal information MENU DVB MENU Press » « to open the »MAIN MENU« menu. – The »MAIN MENU« menu appears. MANUAL SEARCH AUTOMATIC SEARCH RESET RECEIVER INSTALLATION ACCESS CONTROL SIGNAL INFORMATION Select »DIGITAL SETUP« with » » « to confirm. – The »DVB MENU« appears. SELECT BACK BACK EXIT EXIT « and press «, » Select »SIGNAL INFORMATION« with » press » « to confirm. « and «, » Notes: The lower section of the menu shows the signal properties.
Creating a list of favourites MENU EDIT CHANNELS - TV # NAME ZDF SAT1 BBG LIST 1 2 3 4 SELECT FAVOURITE RADIO TV Press » « to open the »MAIN MENU«. The »MAIN MENU « appears. «, » « and Select »PROGRAM TABLE« with» press » « to confirm. – The menu »EDIT CHANNELS - TV« appears. SELECT EXIT EXIT You can select your favourite stations and save them in up to four lists. Select the station with » «, » « and press »1« – »4« to enter it into lists of favourites 1 – 4.
TV guide The electronic TV guide offers an overview of all programmes that will be broadcast in the next week (only for digital stations). Press » « to view the station information. – Information about the current and following programme appears. Please note: Not all stations supply a detailed TV guide. Many broadcasters supply the daily programme but no detailed descriptions. Some broadcasters do not supply any information. Scroll through the station information with » with » « or » «.
Tuning channels using the search Use »0« – »9« to select station position 900. MAIN MENU SOUND PICTURE PROGRAM TABLE SETUP FEATURES MENU Press » « to open the »MAIN MENU«. – The »MAIN MENU« appears. SELECT EXIT OK SETUP CHANNEL FINE TUNE SEARCH AUTOPROGRAM PROGRAM NO STORE DIGITAL SETUP C 06 0 <> 900 Select »SETUP« with » «, » » «. – The »SETUP« menu appears. Select »Program No« with » channel with » « or » «. Select »Search« with » with » « or » «.
Tuning the analogue television channels by entering the channel numbers Use »0« – »9« to select station position 900. SETUP CHANNEL FINE TUNE SEARCH AUTOPROGRAM PROGRAM NO STORE DIGITAL SETUP MENU C 06 0 <> « to open the »MAIN MENU«. Press » – The »MAIN MENU« appears. Select »SETUP« with » «, » « and confirm with » «. – The »SETUP« menu appears. 900 Select »PROGRAM NO« with » the channel with » « or » «. BACK « and «, » set «, » « and confirm with » «.
Entering station names (maximum of 5 characters) In the »PROGRAM TABLE« menu, select the station with » Highlight the channel with » « (yellow). Select letters or numbers with » «, » » « and repeat. Store the channel name with » «, » «. «, move to the next position with » « or « (yellow). Skipping television stations You can mark television channels to be skipped on the program table with » «, » « . You can still select the station using the numerical buttons.
Sound settings MAIN MENU OK SELECT EXIT SOUND 20 VOLUME BALANCE SOUND TYPE SOUND MODE AVL DYNAMIC BASS EQUALIZER MENU Press » « to open the »MAIN MENU«. – The »MAIN MENU« appears. SOUND PICTURE PROGRAM TABLE DIGITAL SETUP FEATURES STEREO NORMAL ON ON USER BACK BACK «, » Select »SOUND« with » » «. – The »SOUND« menu appears. Volume The standard volume is set here. This is the volume of the television after switching on. Select »VOLUME« with » setting with » « or » «.
Automatic volume levelling The television channels broadcast at different volumes. The automatic volume levelling (AVL) function means the volume is kept the same when you switch between channels. Select »AVL« with » « and then select »On« with » « or » « . «, » Dynamic bass (Model dependant) You can amplify the bass-effect using this setting. SOUND VOLUME BALANCE SOUND TYPE SOUND MODE AVL DYNAMIC BASS EQUALIZER STEREO NORMAL ON ON USER Select »DYNAMIC BASS« with » select »ON« with » « or » «.
Picture settings MENU PICTURE BRIGHTNESS CONTRAST COLOUR SHARPNESS CTI DDVa COLOUR TEMPERATURE BACK ON ON NORMAL BACK Press » « to open the »MAIN MENU«. – The »MAIN MENU« appears. «, » « and confirm with Select »PICTURE« with » » «. – The »PICTURE« menu appears. Select »BRIGHTNESS«, »CONTRAST«, »COLOUR« or «, » « and adjust them with »SHARPNESS« with » EXIT » « or » « . Press » « to finish the settings. Note: After a short while the »PICTURE« menu reappears.
SPECIAL FEATURES MENU MAIN MENU SOUND PICTURE PROGRAM TABLE DIGITAL SETUP FEATURES SELECT EXIT OK Press » « to open the »MAIN MENU«. – The »MAIN MENU« appears. «, » Select »FEATURES« with » with » «. – The »FEATURES« menu appears. « and confirm Changing the menu language You can change the language of the OSD menu. LANGUAGE OK SELECT Select »LANGUAGE« with » «, » confirm with » «. – The »LANGUAGE« menu appears. «, » Select the language with » » « and press » « to confirm.
Picture format This allows you to select the picture size on corresponding to the scren type of your TV: Availoble formats for widesereen TV sets are 16:9, 4:3, Zoom, Letterbox, Subtitle and Panaroma. Availoble formats of 4:3 TV sets are 4:3 and 16:9. The formats of the broadcasts (4:3 or 16:9) you watch by means of aerial input are chosen automatically. (4:3, 16:9 and Letterbox for 16:9 TV) This feature is active if the channel you are watching sends WSS (Wide Screen Signalling) information.
TELETEXT MODE Teletext is an information system that displays text on your TV screen. Using the teletext control buttons you can view pages of information that are listed in the teletext index. Please Note No on screen display is available in text mode. The contrast, brightness and colour cannot be changed but the volume control is still available. TV/text mix To view a page of text whilst watching a TV programme press the » MIX « button. The text will be superimposed over the TV programme.
TELETEXT MODE Page hold If the page of text you have selected contains sub pages, these sub pages will automatically be displayed in order with a delay to allow you to read the page. To stop the move to the next sub page press the » HOLD « button. STOP will appear in the top left hand corner. 26 To reveal information Press the » REV « button to reveal concealed information (quiz answers etc.). Press the » REV « button again to conceal the information again.
Connecting external equipment Headphones (Model Dependant) The headphones must have an impedance of between 8 and 32 ohms and have a 3.5 mm stereo jack plug. Plug the headphone jack into the headphone socket of the TV. To activate headphone sound, press the mute “ ” button on the remote control (a mute symbol will appear on the screen) and adjust headphone volume by using the VOL+ on VOL- buttons on the remote control or front panel of the television.
Via aerial socket Make sure the TV and video recorder are both switched off. Unplug the aerial lead from the TV and plug it into the aerial socket on the video recorder (if fitted). Plug a coaxial plug into the RF out socket on the rear of the video recorder and plug the other end into the aerial socket of the TV. Switch on the video recorder and the TV. If your video recorder has a test signal, switch it on. (Refer to the video recorder user guide).
Connecting a DVD player Via SCART Make sure the TV and DVD player are both switched off. Plug one end of the SCART lead (not supplied) into the back of the DVD player and the other end into one of the SCART sockets on the back of the TV. Switch on the DVD and the TV. AV Press the » « button on the remote control to select AV1, AV2 or AV3 (Model dependant) to correspond with SCART socket you are using on the back of the TV.
Connecting a decoder Via SCART Make sure the TV and decoder are both switched off. Plug one end of the SCART lead (not supplied) into the back of the decoder and the other end into the SCART1 on the back of the TV. Switch on the decoder and the TV. Press the » AV « button on the remote control to select AV1. Via PHONO lead (Model Dependant) Make sure the TV and decoder are both switched off.
Connecting TV with video and satellite/digital receiver Satellite/digital receiver Aerial out TV Scart socket Video Rear of TV Aerial out Scart socket Video Scart socket Aerial in Aerial in Scart 1 Aerial socket 31 Connecting TV with camcorder AV1/AV2/AV3 AV3 (3 scart models only) R L VIDEO S-Video In S-Video camcorder Camcorder Connecting TV games and computer AV1 R L VIDEO S-Video In S-Video TV Game Player
Troubleshooting Symptom Possible cause Solution 32 Enter the main menu followed by digital setup option and select installation. Set service prefere to “data service” No Subtitles Enter the main menu followed by digital setup option and select installation.
Technical specifications table Picture tube size/type 28” 16:9 29” 4:3 Screen size 70 cm 72 cm Visible 66 cm 68 cm screen size Sound Output 2x10 W 2x10 W (%10 THD) Power 100 W consumption Stand by 4W Power consumption 105 W 4W Subwoofer X X Dolby Virtual X X 33 X : Model Dependant 16:9 : Widescreen TV 4:3 : Conventional TV Please note: Using a subwoofer (Model dependant) causes 20 W extra power consumption and supplies maximum 20 W extra sound output.
Plc Guarantee - Television Your new television is guaranteed against the cost of breakdown repairs for twelve months from the date of the original purchase. (* see note below for small screen sets) What is covered? • • • • All repairs necessary as a result of faulty materials, defective components or manufacturing defect. The cost of all functional replacement parts, excluding remote control batteries The labour costs of a Beko approved repairer to carry out the repair.
Plc HOW TO OBTAIN SERVICE Congratulations on your choice of a Beko colour television. Your new television has been designed and manufactured to the highest quality standards to give you many years of use. To get the best out of it, please take a few moments to read the instruction book. Your television is supplied with a full 12 months guarantee, covering parts and labour.
ADW.