OmniView KVM Switch ™ Control up to four computers from one PS/2 console belkin.com Belkin Corporation 501 West Walnut Street Compton • CA • 90220 • USA Tel: 310.898.1100 Fax: 310.898.1111 Belkin Components, Ltd. Express Business Park • Shipton Way • Rushden NN10 6GL • United Kingdom Tel: +44 (0) 1933 35 2000 Fax: +44 (0) 1933 31 2000 Belkin Components B.V.
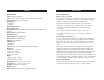
TABLE OF CONTENTS Introduction . . . . . . . . . . Overview Feature Overview . . . . . Equipment Requirements Operating Systems . . . . Unit Display Diagrams . . Specifications . . . . . . . INTRODUCTION . . . . . . . . . . . . . . . . . . . . . . . . . . . . .1 . . . . . . . . . . . . . . . . . . . . . . . . . . . . . . . . . . . . . . . . . . . . . . . . . . . . . . . . . . . . . . . . . . . . . . . . . . . . . . . . . . . . . . . . . . . . . . . . . . . . . . . . . . . . . . . .
OVERVIEW OVERVIEW Feature Overview Direct-Access Port Selectors Direct-access port selectors, located conveniently on the front face of the Switch, allow for simple, manual port-selection. Each button controls a port. The BANK scroll buttons located on the front panel of the Switch let you select daisy-chained switches. Each scroll button corresponds to a daisy-chained switch.
OVERVIEW OVERVIEW Equipment Requirements Operating Systems Cables OmniView SE Plus Series KVM Switches are for use on CPUs using: To connect to the Switch, each PS/2 computer requires one VGA cable, one PS/2 keyboard cable, and one PS/2 mouse cable. Keyboard and mouse cables must have PS/2 male-to-PS/2 male connectors. Each USB computer requires one VGA cable and one USB A-to-B cable.
OVERVIEW OVERVIEW Unit Display Diagrams The Front of the OmniView SE Plus Series KVM Switch: AutoScan button LED for selected port identification 7-segment LED for selected BANK identification The Back of the OmniView SE Plus Series KVM Switch: Computer USB port Computer VGA port Console VGA Flash upgrade port Slave Input Master Input/Slave Output Console PS/2 mouse/keyboard ports DC power jack Computer PS/2 mouse/keyboard ports Master Input/Slave Output Manual BANK scroll buttons Direct-acces
OVERVIEW INSTALLATION Specifications Pre-Configuration Part No.: F1DZ102T, F1DZ104T Power: 12V DC, 1A AC power adapter with center-pin positive polarity Daisy-Chain: Maximum of 4 KVM switches PCs Supported: 2 (F1DZ102T) 4 (F1DZ104T) Keyboard Emulation: PS/2 Mouse Emulation: PS/2 Monitor Supported: VGA, SVGA, MultiSync, and LCD (optional adapter may be required) Max.
INSTALLATION INSTALLATION Step-by-Step Installation Guide Single KVM Switch Installation Cautions and Warnings This section provides complete instructions for the hardware setup of a single SE Plus Series KVM Switch. Before attempting to connect anything to the Switch or your computers, please ensure that all equipment is powered off. Plugging and unplugging cables while computers are powered on may cause irreversible damage to the computers and/or the Switch(es).
INSTALLATION INSTALLATION USB Installation Connect the Computer PS/2 Installation 1. Using an OmniView KVM Cable (F3X1105-XX or F3X1835-XX-GLD), plug in the male VGA connector to the VGA port on the computer. Connect the other end (the female connector) of the VGA cable to the back of the Switch labeled “VGA 01”. 2. Connect the PS/2 keyboard and PS/2 mouse connectors to the keyboard and mouse ports on the computer.
INSTALLATION Connecting Multiple KVM Switches (Daisy-Chaining) You can daisy-chain up to four OmniView SE Plus Series KVM Switches together, giving a server administrator control over a maximum of 16 computers. When daisy-chained together, each unit is referred to as a “BANK” and assigned an address. The Console keyboard, mouse, and monitor connect to BANK 00 and are referred to as the “Master” switch. BANKs 01 through 03 are referred to as “Slave” switches.
INSTALLATION Installation Before you begin: 1. Make sure that all computers are powered off and that each Switch has been assigned a unique BANK address. 2. Place Master and Slave switches in the desired location. Make sure all are turned off and unplugged from the power source. 3. Connect the Console monitor, keyboard, and mouse to the Console ports of the Master switch or BANK 00, as described previously in this User Manual. Connecting the Master Switch to First Slave Switch 4.
USING YOUR SWITCH Select connected computers by either the direct-access port-selectors, located on the front panel of the Switch, or hot key commands, through the console keyboard. It takes approximately 1-2 seconds for the video signal to refresh after switching computers. Re-synchronization of the mouse and keyboard signals also occurs. This is normal operation and ensures that proper synchronization is established between the console and the connected computers.
USING YOUR KVM SWITCH USING YOUR KVM SWITCH AutoScan Mode Connecting Computers Pressing the AutoScan button on the Switch will activate the AutoScan function. In AutoScan mode, the Switch remains on one port for 10 seconds, before switching to the next computer. This time interval cannot be adjusted. 1. Connect a keyboard, monitor, and mouse to the computer you prepared for firmware updates. It must run Windows XP, 2000, NT, 95, 98, or Me. Note: There is no mouse or keyboard control in AutoScan mode.
FAQs FAQs Q: What operating systems does the Switch support? A: The Switch will support any operating system that runs on a PS/2 and USB platform. It will also work with non-USB Sun and Mac® operating systems using the appropriate adapters (OmniView PS/2 Sun Adapter F1D082, OmniView PS/2 Mac Adapter F1D080). Operating systems include, but are not limited to, DOS, Windows® 95, 98, 2000, Me, NT®, XP, Turbolinux® Novell®, NetWare® 4.x/5.x, and all Linux® distributions.
FAQs TROUBLESHOOTING Q: Can I use the Switch on my Sun computer that supports USB? A: Yes, the Switch works with any USB-capable computer. General Q: Does the Switch support serial mice and keyboards? A: Yes, the Switch supports serial devices (serial adapter required). • Make sure that the keyboard and mouse cables are connected tightly between the Switch and the computer.
TROUBLESHOOTING Keyboard The computer does not detect a keyboard and I get a keyboard error reported at boot-up. • Check that the keyboard cable between the Switch and the computer is completely connected. Tighten any loose connections. • Try using a different keyboard. • Try connecting the computer to a different port. • If you are using the keyboard software that was included with your keyboard, uninstall it and then reinstall the standard Microsoft keyboard driver.
WARRANTY, FCC, CE, ICES STATEMENT FCC Statement DECLARATION OF CONFORMITY WITH FCC RULES FOR ELECTROMAGNETIC COMPATIBILITY We, Belkin Corporation, of 501 West Walnut Street, Compton, CA 90220, declare under our sole responsibility that the products: F1DZ102T, F1DZ104T to which this declaration relates: Comply with Part 15 of the FCC Rules.