
Troubleshooting guide


PRINTER SETUP PROCEDURES
AARP Foundation Tax-Aide October 2, 2014 Page 5 of 18
*NOTE: Parallel printer, Centronics, ports and cables have been out of use for many
years. Therefore, present day computers do not have parallel printer ports to connect to
these printers. The alternative, when the computer does not have a parallel printer port
and the printer does, is to purchase a conversion cable that converts the parallel cable to a
USB cable.
Let Windows Automatically Install The Printer Driver
Windows 7 can automatically install drivers for many devices with no intervention from
the user except to plug in the device to a USB port. To use this feature the computer must
be connected to the Internet. Then, plug in the device that you want to install and wait.
Windows will go to its internal device list or, if not there, to the Internet to get the latest
driver and install it. This is a good first option if the printer has never been installed on the
computer. If this fails, then use the method, below.
Manually Install the Printer Driver
If the printer driver needs to be installed on the print server computer do it now, following
the manufacturer’s instructions, and physically connect the printer. The computer will
recognize it. When done, print a test page, to assure it works properly.
The printer installation process will give the printer a generic name based on the printer
model. It is better to give the printer a unique name so it is easy to recognize. If you have
a network that has two HP 1022n printers installed, it will be much easier if they each
have a unique name rather than both being called “HP LaserJet 1022n” or whatever the
default name is. Names should be short and simple, e.g., LIBRARY, SENIOR CENTER
1, SENIOR CENTER 2, HP ROOM 12, or something similar.
Name the printer on the print server computer
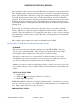
Naming a Printer
1) Click on Start -> Devices and Printers
2) Right-click on the printer
3) Click on "Printer Properties"
4) Type the new name into the top line under “General Tab“
5) Click “OK” to finish the name change.
Put a label on the printer showing the name you gave it. (Don’t write the name on the printer
case with a marker pen; it’s almost impossible to get off without damaging the plastic).
Share the printer on the print server computer
Sharing the printer
1) Right-click on the printer name you want to share
2) Select "Printer Properties"
3) Select the “Sharing” tab