
Installation Guide

12
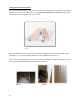
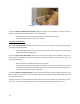
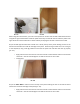
In some cases, you will need to trim the edges of the internal base so that it sets on the shower pan
flange (pic. 3.3) while allowing the track to come all the way down to the bottom of the panels so that
when the internal face is installed it will align with the panels (pic. 3.4)
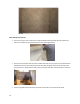
Pic. 3.3 Pic. 3.4
If you decide to Butt Joint the panels on the inside corners and eliminate the Internal trims then it is
recommended that you use some type of waterproofing in those corners, one that is easy and cures fast
is Flex Seal
Spray each corner and let it dry and then use a “Factory edge” on the inside corners as your cut edge will
be covered by the external trims. Use the color coordinating silicone caulk at the finishing process to add
additional protection.
Horizontal Kits-
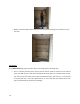
After installing the internal trims, dry fit the Bottom Back Panel aligning to the top of the panel and to
the bottom of Design Strip.
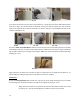
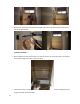
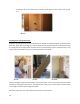
Prior to installing the back panel, place a bead of silicone inside the internal base channels of the
internal trims (pic. 3.5). Then, using 100% silicone, place circles on the backside of the panels about 4” in
between each one (pic. 3.6), these circles will provide suction when pressed firmly to the wall. Be sure to
leave 1½” from any side or top that will have a trim piece applied later to it as this will allow the
backside of the trim piece to slide behind the panel with no blockage (pic. 3.7).