
Installation Guide


21
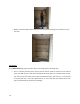
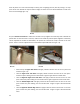
Horizontal Seam
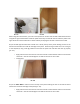
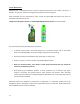
Fill the female groove with silicone (pic. 4.11) and then install the panel at a 45-degree angle (pic. 4.12).
Then engage the male (tongue) and pull tight (pic. 4.13). Wipe any excess silicone from the panels.
Pic. 4.11 Pic. 4.12 Pic. 4.13
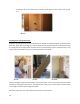
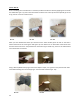
Cutting & Installing the Trim Pieces-
Measure the trim pieces using the “point to point” Measurement Data Sheets (MDS), accounting
for all miters.
Cut ALL the trim pieces to size after the installation of panels prior to installing using a Tile Saw
or Miter Saw
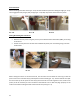
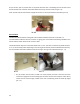
Pic. 5.1 Pic 5.2
When cutting the miters on the external trims, Cut the miter first and leave the trim long so that the
piece can be cut to size after the (2) mitered pieces meet smoothly (pic. 5.1). Cut the Internal trims 3/8”
short from the top of the panel so that the (2) external trims will come together on the inside corner
(miter). It will be necessary to notch the back of the external trims so that they align properly on the
inside corner without hitting the back of the Internal Trim piece (pic. 5.2).