DE AUDIOTÜRSPRECHANLAGEN SET Name 1 Benutzerhandbuch 1, 2, 3 Familien EN KIT AUDIO DOOR PHONE FR KIT INTERPHONE AUDIO User manual 1, 2, 3 Families 2x Manuel d'utilisation 1, 2, 3 Familles Name 2 Name 1 IT NL PL KIT AUDIO-CITOFONO Il manuale dell'utente 1, 2, 3 Famiglie KIT AUDIOINTERFON Gebruikershandleiding 1, 2, 3 Gezinnen 3x ZESTAW AUDIODOMOFON Instrukcja obsługi 1-2-3 Rodziny Name 3 Name 2 Name 1 www.bellcome.
0 1,2 3 4 5 6 7 8,9 IT CONTENUTO NL INHOUD PL SPIS TREŚCI DE INHALT EN CONTENTS FR SOMMAIRE DE EN FR DE EN FR DE EN FR DE EN FR DE EN FR DE EN FR DE EN FR Eigenschaften & Inhalt des sets Features & Kit components Fonctions & Contenu du kit pg. 1...6 pg. 1...6 pg. 1...6 NL Blockdiagramme Block diagrams Schémas-bloc pg. 7...8 pg. 7...8 pg. 7...8 NL pg. 9 pg. 10 pg. 11 NL pg. 15..20 pg. 15..20 pg. 15..20 NL Benutzung der auidotürsprechanlage pg. 21...25 pg. 28...
1 DE EIGENSCHAFTEN EN FEATURES FR FONCTIONS IT NL PL 1. Ruf Call Appel Chiamata Oproep Połaczenie 2. Antwort Answer Réponse Risposta Antwoorden Odpowiedz 3. Freisprechen Hands-free talk Communication mains-libres Conversazione senza mani Handsfree gesprek Rozmowa hands-free 4. Zugangsgewährung Access granting Contrôle d'accès Concedere accesso Toegang geven Przyznanie dostepu 5.
6. Lautstärke Volume levels Volume réglable Livelli di volume Volume niveaus MUTE 1 7 Poziom głośności 7. Einstellen der Anrufdauer Setting the ringing duration 1 x 5 sec 2 x 5 sec 3 x 5 sec Durée de la sonnerie réglable Sciegliere la durata della chiamata De duur van de beltoon instellen x Ustawianie trwania połączenia 8.
11. Zusätzliche Außeneinheiten (3) Additional panels (3) Platines de rue supplémentaires (3) Pannelli adizionali (3) Extra panelen (3) Dodatkowe panele (3) 2 DE INHALT DES SETS EN KIT COMPONENTS FR CONTENU DU KIT Name 1 Außeneinheit Outdoor panel Platine de rue Pannello esterno Buitenpaneel Panel zewnetrzny APA 1x 234 x 144 x 53 mm 1,3 kg - 30oC … + 60oC v VSB.4DN02.BLW STROMVERSORGUNGSEINHEIT (SCU.ADN02.BLW) IN: 4 EINGANG: 230V Wechselspannung 50Hz, 0.
2x Außeneinheit Outdoor panel Platine de rue Pannello esterno Buitenpaneel Panel zewnetrzny Name 2 Name 1 APA 1x 234 x 144 x 53 mm 1,3 kg - 30oC … + 60oC v VSB.4DN02.BLW STROMVERSORGUNGSEINHEIT (SCU.ADN02.BLW) IN: 4 EINGANG: 230V Wechselspannung 50Hz, 0.
3x Name 3 Außeneinheit Outdoor panel Platine de rue Pannello esterno Buitenpaneel Panel zewnetrzny Name 2 Name 1 APA 1x 234 x 144 x 53 mm 1,3 kg - 30oC … + 60oC v VSB.4DN02.BLW STROMVERSORGUNGSEINHEIT (SCU.ADN02.BLW) IN: 4 EINGANG: 230V Wechselspannung 50Hz, 0.
Zusatzprodukte (seperat zu erwerben) Additional products (separately purchased) Produits supplémentaires (vendus séparément) 1x BAT 1x 12V/7Ah 3x Name 3 Name 2 Name 1 Prodotti adizionali (acquisiti separatamente) Aanvullende producten (apart verkrijgbaar) Dodatkowe produkty (do kupienia oddzielnie) LCK Gleichstrom (DC) oder Wechselstrom (AC) Schloss Direct current (DC) or Alternative current (AC) lock Serrure électrique à courant continu (CC) ou alternatif (CA) Serratura per corrente continuo (d.
3 IT NL PL DE BLOCKDIAGRAMME EN BLOCK DIAGRAMS FR SCHÉMAS-BLOC DIAGRAMMA BLOCCO BLOKSCHEMA'S SCHEMAT BLOKOWY 3.1.1 230 Va.c., 50 Hz 3 x 0.75 mm2 2 x 6Aa.c. BAT 12V /7Ah 2 x 0.75 mm VSB.4DN02.BLW STROMVERSORGUNGSEINHEIT (SCU.ADN02.BLW) UTP cat5e Name 1 APA : 12-14 V OUT: 1 S1 2 3 4 SCHLOSS- 5 ÖFFNUNGSZEIT 6 9 8 7 (Sekunden) ACHTUNG! Lebensgefahr, Gerät nicht öffnen! GEFAHR EINES STROMSCHLAGS! (AWG 24) SCU 2 x 0.75 mm2 AUX EINGANG: 230V Wechselspannung 50Hz, 0.
3.2. Zusätzliche Inneneinheiten Additional terminals Postes intérieurs supplémentaires SCU (3.1.1) / ACB(3.1.2, 3.1.3) UTP cat5e UTP cat5e (AWG 24) (AWG 24) Terminali adizionali Extra terminals Dodatkowe terminale 3.4. Zusätzliche Außeneinheiten Additional panels Platines de rue supplémentaires Pannelli adizionali Extra buiten panelen Dodatkowe panele ATA2 ATA APA1 APA2 APA3 Name 3 Name 3 Name 3 Name 3 Name 2 Name 2 Name 2 Name 2 Name 1 Name 1 Name 1 Name 1 SCU2 SCU1 SCU3 VSB.
4 SICHERHEITSHINWEISE während der Installation DE 1. ACHTUNG! Die Installation, die Wartung und die Verbindung zum 230V / 50Hz Netz von der Stromversorgungseinheit (SCU) darf nur von autorisiertem Personal durchgeführt werden! 2. ACHTUNG! Es ist ZWINGEND erforderlich, ein 3 x 0,75 mm Kabel und 2 automatische Sicherungen (6A) zur Energieversorgung der Stromversorgungseinheit ("SCU") 230V / 50Hz Netz zu nutzen. 3.
EN 4 SAFETY INSTRUCTIONS during installation 1. ATTENTION! The installation, the maintenance and the connection to the 230V/50Hz network of the central unit (SCU) will be carried out only by authorized personnel! 2. ATTENTION! It is MANDATORY to use a 3 x 0,75 mm2 cable and 2 automatic fuses (6A) for power supplying the central unit (SCU) from the 230V/50Hz network. 3.
4 CONSIGNES DE SÉCURITÉ pendant l'installation FR 1. ATTENTION! L'installation, l'entretien et le branchement de l'unité centrale (SCU) au réseau de 230V/50Hz seront faites uniquement par du personnel autorisé! 2. ATTENTION! Il est obligatoire d'utiliser un câble de 3 x 0,75 mm2 et 2 fusibles automatiques (6A) pour alimenter l'unité centrale (SCU) du réseau de 230 V/50 Hz. 3.
IT 4 ISTRUZIONI DI SICUREZZA durante il montaggio 1. ATTENZIONE! Il montaggio, la manutenzione e la connessione dell'unità centrale (SCU) alla rete di 230V/50 Hz va eseguita soltanto da persone autorizzate! 2. ATTENZIONE! È imperativo l'uso di un cavo di 3 x0.75 e di 2 dispositivi di sicurezza (fusibili) automatici (6A) per l'alimentazione dell'unità centrale (SCU) dalla rete di 230V/50 Hz. 3.
4 VEILIGHEIDSINSTRUCTIES tijdens de installatie NL 1. LET OP! Het installeren, onderhoud en aansluiten van de centrale eenheid (SCU) op het 230V/50Hz netwerk mag alleen worden gedaan door bevoegd personeel! 2. LET OP! Het is verplicht om een kabel van 3 x 0,75 mm en 2 automatische zekeringen (6A) te gebruiken voor de stroomtoevoer van de centrale eenheid (SCU) van het 230V/50Hz netwerk. 3.
PL 4 ZASADY BEZPIECZEŃSTWA podczas instalacji 1. UWAGA! Instalacja, utrzymanie i podłączenie do sieci 230V / 50Hz jednostki centralnej (SCU) będą wykonywane wyłącznie przez autoryzowany personel! 2. UWAGA! Jest to obowiązkowe, aby użyć kabla 3 x 0,75 mm i 2 automatyczne bezpieczniki (6A) do zasilania jednostki centralnej (SCU) z sieci 230V / 50Hz. 3.
5 DE EN FR 5.1. Erforderliches Kabel Required cable Wymagany kabel Contact the producer UTP (FTP) cat. 5e AWG24 + UTP (FTP) cat. 5e AWG24 UTP (FTP) cat. 5e AWG24 + 2x0.75 mm2 Contact the producer ATA UTP (FTP) cat. 5e AWG24 1 2 3 UTP cat 5e (AWG24) 4 LCK 230 Va.c./ 50 Hz orange ≤ 150 m UTP (FTP) cat. 5e AWG24 + 2x0.75 mm SCU SCU ≤ 150 m UTP (FTP) cat. 5e AWG24 SCU SCU ≤ 100 m ≤ 50 m UTP (FTP) cat.
5.2.3 Aufputz Version Surface version Version en surface Versione in superficie Oppervlekversie Wersja powierzchniowa 1.5 cm Torx 2 ≈20 cm Protezione antifurto. Avitate completamente Torx 2! Diefstalbeveiliging. Torx 2 volledig inschroeven! Ochrona przed kradzieżą. Zakręcić całkowicie Torx 2! Anti Diebstahl Schutz. Schrauben Sie die Torx 2 fest! Antitheft protection. Screw the Torx 2 completely! Protection antivol. Visser complètement Torx 2 ! 5.2.
5.3.2 Connessioni elettriche a connettore RJ45 Elektrische aansluitingen met RJ45 connector Połączenie elektryczne ze złączem RJ45 Elektrische Verbindungen mit RJ45 Electrical connections with RJ45 connector Connexions électriques à l'aide du connecteur RJ45 ATA 1 ATA 2 UTP cat5e (AWG 24) +14 GND GND (FAKULTATIV) 4 2 1 3 (Optional) UTP cat5e (AWG 24) SCU 5.3.
5.4. ATA 5.4.1 Aufputz Surface En surface Su superficie Oppervlak Na powierzchni 170 cm 135 cm Einbau der Audio Inneneinheit Installation of the audio terminal Installation du poste intérieur audio Installazione del Terminale audio Installeren van de audio terminal Instalacja terminala audio 5.4.
5.5. SCU 1 A UT HORIZE D 5.5.1 Einbau der Stromversorungseinheit Installation of the central unit Installation de l'unité centrale Installazione dell'unità centrale Installatie van de centrale eenheid Instalacja jednostki centralnej VSB.4DN02.BLW STROMVERSORGUNGSEINHEIT (SCU.ADN02.BLW) PROG EINGANG: 230V Wechselspannung 50Hz, 0.
5.6. Verificate le tensioni di alimentazione (SCU connesso a 230 Va.c.) Überprüfen der Spannung (SCU verbunden mit 230 Va.c.) Controle van toevoerspanningen (SCU aangesloten op 230 V a.c.) Checking the voltages (SCU connected to 230 Va.c.) Vérification des tensions d'alimentation (SCU branchée à 230 V CA) Sprawdzanie napięcia zasilania (SCU podłączony do 230 Va.c.) AUX1 V 13,5 14,3Vd.c. 3.0 4.8Vd.c. 3 SCU AUX1 AUX2 LC SWC LA/C LA +14 +14V V 13,5 14,3Vd.c.
6 BENUTZUNG DER AUDIOTÜRSPRECHANLAGE DE 6.1. SICHERHEITSHINWEISE während des Gebrauchs è è Schlagen Sie nicht mit harten Gegenständen auf die Produkte. Schützen Sie die Produkte vor Kalk und Staub während der Renovierung. 6.2. Bedeutung der akustischen Signale/Verwendung der Tasten [BEEP] Kurzer Bestätigungston mit einem hohen Ton. 2x[ BEEP [ BEEEEP ] ] Zwei kurze Beep mit einem hohen Ton. Langer Bestätigungston mit einem hohen Ton. [BEEEEP] Langer Störungs Beep mit niedrigem Ton.
Bedeutung der LEDs an der SCU BUTTON PROG LED PROG LED S1 Das System ist nicht an das 230 Va.c./50 Hz Netz angeschlossen. GRÜN Langes Drücken ROT GRÜN System Ok, angeschlossen an 230Va.c./50 Hz Netz. Programmiermodus (Das Kit wurde bereits programmiert) Für rote LEDs sehen Sie Kap. 7 – Fehlerdiagnose. 6.4.
6.4.2 Programmierung der Adresse der Außeneinheit Die Außeneinheit ist bereits mit Adresse 1 programmiert, dies ist für die einwandfreie Funktion notwendig. Eine Programmierung ist notwendig, wenn: -Die Adresse 1 unabsichtlich während der Installation geändert wurde -Zusätzliche Außeneinheiten installiert wurden. Das System ist bis zu 3 Außeneinheiten erweiterbar (alle mit einer eigenen Stromversorgung), und alle Außeneinheiten müssen mit einer anderen Adresse programmiert werden – 2,3, oder 4.
6.5.1 Funktionen STAND-BY Die Tastatur ist ausgeschalten. ANRUF Bei einem Ruf leuchtet die Inneinheit, die RUF von einer Türklingel Die Inneneinheit läutet mit einem speziellen Türklingel Rufton. EINSTELLEN DER RUFLAUTSTÄRKE Aufeinanderfolgende kurze Berührungen von . Die lauteste Einstellung wird mit 2x [BEEP] signalisiert. Mit der nächsten Berührung stellt sich die Lautstärke wieder auf Stufe 1 ein. Die Einstellung wird nicht gespeichert, die Seteinstellung hat Vorrang.
6.5.2 Einstellungen und Anpassungen Sie können jede Standard Einstelung der Inneinheit mit den folgenden Schritten ändern: Gleichzeitiges, langes Drücken von und [BEEEEP]. Die Inneneinheit ist im Einstellungsmodus. Sie haben 2 Min. Schritt 1 um alle 3 Einstellungen zu ändern, die Reihenfolge ist nicht wichtig. Wir empfehlen die folgende Sequenz. Um die KLINGELTON einzustellen, kurze Berührungen von : 1. kurze Berührung von Es wird der erste Klingelton abgespielt. 2.
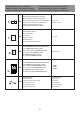
DE No. 7 FEHLERDIAGNOSE Problem SCU signalisiert Mögliche Ursachen Mögliche Lösungen 1. Das System funktioniert nicht. S1 PROG Überprüfen Sie die Stromversorgung Das System bekommt keinen Strom vom vom 230V/50 Hz Netz oder die 230 Vc.a./50 Hz Netz und es ist keine Sicherungen. Überprüfen Sie FUSE am Batterie in Verwendung in der SCU. Eingang der SCU. 2. Das System ist OK. S1 Grün PROG System OK. 3. Das System funktioniert nicht. 4.
8 INSTANDHALTUNG 9 GARANTIE DE Die Außeneinheiten müssen von ätzenden Stoffen, Farbe oder Stromschlägen ferngehalten werden. Die Inneneinheiten müssen vor Wasser oder andere Flüssigkeiten, Stromschlägen, Dämpfen, Stäuben etc. ferngehalten werden. Die Komponenten des Systems können mit einem Stück weichen Baumwolltuch gereinigt werden. Die optionale Batterie, welche an der Stromversorgungseinheit angeschlossen ist muss nach ihrer Lebenszeit ausgetauscht werden.
6 EN USE OF THE AUDIO DOOR PHONE 6.1. Safety instructions during use DO NOT HIT the products with hard objects. PROTECT THE PRODUCTS against lime and dust during renovation. è è 6.2. Significance of the acoustic signals / use of the keys [BEEP] Short confirmation beep with a high tone. 2x[ BEEP [ BEEEEP ] ] Sequence of 2 short beeps with a high tone for confirmation. Long confirmation beep with a high tone. [BEEEEP] Long error beep with a low tone.
Significance of LEDs signaling on SCU BUTTON PROG LED PROG LED S1 The system is not connected to the 230 Va.c./ 50 Hz network. GREEN Long press RED GREEN The system is OK, connected to the 230 Va.c./ 50 Hz network. Programming mode (The kit is already programmed.) For LED signaling RED, see ch. 7 – Troubleshooting. 6.4.
6.4.2 Programming the panel address The panel is already programmed with address 1, which is mandatory for the correct functioning of the system. The programming is necessary only if: -The address 1 is changed by mistake during installation. -Additional panels are installed. The system allows up to 3 additional panels (each with a SCU) and each of them must be programmed from its own SCU with a different address – 2, 3 or 4.
6.5.1 Functioning STAND-BY The keyboard is off. CALL When called from the outdoor panel, the terminal rings, the key blinks white. CALL from the doorbell The terminal rings with the specific doorbell ringtone. RINGING VOLUME ADJUSTMENT Successive short touches of .The maximum level is signaled with 2 x [BEEP]. With the next touch, the volume restarts from level 1. This adjustment won`t be memorized, the set level has priority.
6.5.2 Settings and adjustments You can change any standard settings of the terminal by the following procedures: Simultaneous long press of and [BEEEEP]. The terminal goes in setting mode. You have 2 min. to Step 1 set all the 3 features, in whatever order you choose. We suggest the following sequence. For setting the RINGTONE, short touches of : 1st short touch of The terminal plays the 1st ringtone. 2nd short touch of The terminal plays the 2nd ringtone.
7 TROUBLESHOOTING SCU signals EN No. Problem 1. The system doesn`t work. S1 PROG Check the power supply of SCU from The system has NO power supply from the 230 Va.c./ 50 Hz network or the the 230 Va.c./ 50 Hz network and there fuses status. Check FUSE on the is no battery connected to the SCU. entry in SCU. 2. The system works OK. S1 green PROG System OK. 3. The system doesn`t work. S1 red PROG Short circuit between +14V and GND. 4.
EN 8 MAINTENANCE 9 WARRANTY The outdoor panels must be kept away from corrosive substances, paints or mechanical shocks. The terminals must be kept away from water, or any other liquids, mechanical shocks, fumes, dusts etc. The components of the system can be cleaned with a piece of soft, cotton cloth. The optional battery connected with the central unit will be replaced after the expiry of its life span. The central unit ensures the battery's charging, as long as the battery is not defect.
6 UTILISATION DE L'INTERPHONE AUDIO FR 6.1. CONSIGNES DE SÉCURITÉ pendant l'utilisation NE PAS FRAPPER le dispositif avec des objets durs. PROTÉGER le dispositif contre la chaux et la poussière pendant les travaux de rénovation. è è 6.2. Signification des signaux acoustiques / utilisation des touches [BEEP] Bip court à haute fréquence pour confirmation. 2x[ BEEP [ BEEEEP ] ] Séquence de 2 bips courts à haute fréquence pour confirmation. Bip long à haute fréquence pour confirmation.
Signification des clignotements des LED de SCU BUTTON PROG LED PROG LED S1 Le système n'est pas branché au réseau de 230 V / 50 Hz. VERT Appui long ROUGE VERT Le système est en bon état, branché au réseau de 230 V CC / 50 Hz. Mode de programmation (le kit est déjà programmé). Si les LED signalent ROUGE, consulter Chap. 7 – DÉPANNAGE. 6.4.
6.4.2 Programmation de l'adresse de la platine de rue La platine de rue est déjà programmée avec l'adresse 1, chose obligatoire pour le fonctionnement correcte du système. Il est donc nécessaire de reprogrammer seulement au cas où : - L'adresse 1 a été modifiée par accident pendant l'installation. - On installe des platines de rue supplémentaires.
6.5.1 Fonctionnement MODE VEILLE Le clavier est éteint. APPEL Lorsqu'on l'appelle depuis la platine de rue, le poste intérieur sonne, la touche clignote en. APPEL de la sonnette Le poste intérieur émet une mélodie spécifique prédéfinie. RÉGLAGE DU VOLUME DE L'APPEL Des appuis courts et successifs sur la touche . Le volume maximum est signalé par une séquence de 2 x [BEEP]. Après que le volume maximum a été atteint, le volume recommence au niveau 1.
6.5.2 Paramètres et réglages Tout paramètre prédéfini du poste intérieur peut être modifié en suivant ces étapes : Appui long et simultané sur les touches et [BEEEEP]. Le poste intérieur entre dans le mode réglage. Étape 1 Vous avez 2 min. pour régler les 3 paramètres dans l'ordre que vous préférez. Nous recommandons la séquence suivante. Pour régler LA MÉLODIE DE L'APPEL, appuis courts sur la touche : Premier appui court sur la touche La première mélodie joue.
FR 7 DÉPANNAGE Signalisations SCU No. Problème 1. Le système ne fonctionne pas. 2. Le système fonctionne correctement. 3. Le système ne fonctionne S1 Rouge PROG pas. Court-circuit entre +14 V et GND. Vérifier les connexions entre +14 V et GND. Corriger les erreurs possibles. 4. Le système fonctionne correctement, mais les tensions mesurées aux bornes du poste intérieur (ATA) sont au-dessous de 11 V CC.
8 ENTRETIEN 9 GARANTIE FR Les platines de rue doivent être protégées contre les substances corrosives, la chaux ou les chocs mécaniques. Les postes intérieurs doivent être protégés contre l'eau, la chaux ou toute substance liquide, les chocs mécaniques, les vapeurs, la poussière etc. Les composants du système peuvent être nettoyés en utilisant un chiffon en coton doux. L'accumulateur connecté facultativement à l'unité centrale sera remplacé après l'expiration de sa durée de vie.
6 IT L'UTILIZZO DEL AUDIOCITOFONO 6.1. Istruzioni di sicurezza durante l'uso è è Non colpite i prodotti con oggetti duri. Proteggere i prodotti da calce e polvere durante la ristrutturazione. 6.2. Significato dei segnali acustici/utilizzo dei tasti [BEEP] Breve squillo di alta frequenza per la conferma. 2x[ BEEP [ BEEEEP ] ] Sequenza tipo 2 squilli brevi di alta frequenza per la conferma. . Squillo lungo di alta frequenza per la conferma. [BEEEEP] Squillo lungo di bassa frequenza per errore.
Significato della segnalazione dei LED a SCU BUTTON PROG LED PROG LED S1 L'installazione non è connessa alla rete di 230Vc.a./50Hz. VERDE Spingere a lungo ROSSO VERDE L'installazione in regola, connessa alla rete di 230Vc.a./50Hz Modo programmazione (il kit è già programmato) Se i LED hanno il segnale ROSSO da verificare Cap. 7 – RIPARAZIONI 6.4.
6.4.2 Programmazione dell'indirizzo del pannello Il pannello è già programmato con l'indirizzo 1, d'obbligo per il corRetto funzionamento dell'installazione. La programmazione è necessaria solo se: - L'indirizzo1 è modificato per errore durante il montaggio. - Vengono montati dei pannelli adizionali. L'installazione accetta fino a 3 pannelli adizional (ognuno con SCU) ed ognuno va programmato dalla propria SCU con indirizzo diverso – 2, 3 o 4.
6.5.1 Funzionamento PAUSA La tastiera è spenta. CHIAMATA Quando la chiamata è effettuata dal pannello esterno, il terminale squilla, il tasto lampeggia bianco. Chiamata dal campanello Il terminale squilla con una suoneria specifica, prescelta. Brevi e successivi contatti del tasto . Il livello massimo è segnalato con una sequenza di 2 x [BEEP]. Dopo il il livello massimo, il volume riparte dal 1 livello.
6.5.2 Impostazioni e regolazioni Ogni impostazione standard del terminale può essere modificata attraverso le seguenti procedure: IMPOSTAZIONI PER CHIAMATA: Terminale in attesa 1. SUONERIA CHIAMATA 2. DURATA DELLA CHIAMATA 3. VOLUME DELLA CHIAMATA (valido per la chiamata da pannello esterno e intercomunicazione) Lungo e simultaneo pressione dei tasti e [BEEEEP]. Il terminale entra nel modo impostazioni. Avete a disposizione Passo 1 2 minuto per impostare tutti i 3 parametri nell'ordine desiderata.
7 Nr. RIPARAZIONE Problema Segnalazioni SCU IT Cause possibili Potenziali soluzioni 1. L'installazione non funziona. S1 PROG Verificate la connessione SCU alla L'installazione non è fornita dalla rete rete di 230 Vc.a./ 50 Hz oppure lo stato di 230 Vc.a/50 Hz e manca la connessione dei fusibili dalla rete. Verificate FUSE di una batteria al SCU. dall'ingresso in SCU. 2. L'installazione funziona in regola. S1 Verde PROG L'installazione in regola. 3. L'installazione non funziona.
IT 8 MANUTENZIONE 9 GARANZIA I pannelli esterni vanno tenuti fuori dalla portata delle sostanza corosive, calce o scosse meccaniche. I terminali tenuti lontano dai fonti d'acqua, calce o qualsiasi sostanze liquide, scosse meccaniche, vapori, polveri, ecc. I pezzi dell'installazioni vanno puliti con un panno morbido di cotone. La batteria connessa opzionale all'unità centrale va sostituita dopo essere passato il periodo d'uso.
6 HET GEBRUIK VAN AUDIO-INTERCOM NL 6.1. VEILIGHEIDSINSTRUCTIES tijdens gebruik è è SLA NIET met harde voorwerpen op de producten. BESCHERM DE PRODUKTEN tegen kalk en stof tijdens kluswerkzaamheden. 6.2. De betekenis van de akoestische signalen/gebruik van toetsen [BEEP] Korte pieptoon met hoge frequentie ter bevestiging. 2x[ BEEP [ BEEEEP ] ] Opeenvolging van 2 korte tonen met hoge frequentie ter bevestiging.
Betekenis LED signaleringen op SCU BUTTON PROG LED PROG LED S1 De installatie is niet aangesloten op de 230VAC/50Hz installatie. GROEN Lang indrukken ROOD GROEN Het systeem werkt goed, verbonden met het 230 Va.c./ 50 Hz netwerk. Programmeermodus (de kit is al voorgeprogrammeerd) Voor rood verlichte LEDs, zie hoofdstuk 7 – Problemen verhelpen. 6.4.
6.4.2 Programmeren van het adres in het paneel Het panel is reeds geprogrammeerd met adres 1, wat noodzakelijk is voor het goed functioneren van het systeem. Het programmeren is alleen nodig indien: - Het adres 1 abusievelijk wordt gewijzigd tijdens installatie. - Extra panelen worden geïnstalleerd. Het systeem staat 3 extra panelen toe (elk met een SCU) en elk moet worden geprogrammeerd door zijn eigen SCU met een ander adres – 2, 3 of 4. Stap 1 Centrale eenheid SCU PROG Lang indrukken van PROG.
6.5.1 Werking STAND-BY Het keyboard staat uit. OPROEP Indien gebeld vanaf het buitenpaneel, geeft de terminal een signaal, de toets knippert wit. OPROEP van de deurbel The terminal rinkelt met de specifieke deurbel beltoon. AANPASSING BELVOLUME Herhaald kort drukken op . Het maximum niveau wordt aangegeven met 2 x [BEEP]. Met de volgende druk keert het volume terug naar niveau 1. Deze aanpassing wordt niet opgeslagen, het niveau van de set heeft prioriteit.
6.5.2 Instellingen en aanpassingen U kunt iedere standaard instelling van de terminal aanpassen via de volgende procedures: Stap 1 Gelijktijdig lang indrukken van en [BEEEEP]. De terminal gaat in de instellingsmodus. U heeft 2 min. om alle 3 de parameters in te stellen, ongeacht de volgorde die u kiest. We raden de volgende volgorde aan. Om de BELTOON in te stellen, kort drukken op : 1e korte druk op De terminal speelt de 1e beltoon. 2e korte druk op De terminal spelt de 2e beltoon.
NL Nr. 7 PROBLEMEN VERHELPEN Probleem SCU signalen Mogelijke oorzaken Mogelijke oplossingen 1. Het systeem werkt niet S1 PROG Controleer de stroomtoevoer van de Het system krijgt GEEN stroom van het SCU van het 230 Vc.a./ 50 Hz netwerk 230 Va.c./ 50 Hz netwerk en er is geen of de status van de zekeringen. batterij verbonden met de SCU. Check FUSE bij toegang tot SCU. 2. Het systeem werkt goed. S1 Groen PROG Systeem OK. 3. Het systeem werkt niet.
8 ONDERHOUD 9 GARANTIE NL De buitenpanelen moeten worden afgeschermd van corrosieve stoffen, verfstoffen of mechanische schokken. De terminals moeten worden afgeschermd van water of andere vloeistoffen , mechanische schokken, rook, stof etc. De componenten van het systeem kunnen worden gereinigd met een zachte katoenen doek. De optionele batterij verbonden met de centrale eenheid kan worden vervangen na de levensduur.
6 PL UŻYWANIE AUDIODOMOFONU 6.1. ZASADY BEZPIECZEŃSTWA podczas użytkowania NIE UDZERZAJ w produkty twardymi przedmiotami. CHRONIĆ PRODUKTY przed wapnem i pyłem podczas remontu. è è 6.2. Znaczenie sygnałów akustycznych / użycie klawiszy [BEEP] Krótki sygnał wysokiej częstotliwości, dla potwierdzenia. 2x[ BEEP [ BEEEEP ] ] Sekwencja 2 krótkie dźwięki o wysokiej częstotliwości dla potwierdzenia Długi dźwięk o wysokiej częstotliwości, dla potwierdzenia.
Znaczenie LED sygnalizujące SCU BUTTON PROG LED PROG LED S1 Roślina ta jest połączona z 230Vc.a. / 50Hz. Długie naciśnięcie CZERWONY ZIELONY Instalacja jest OK, podłączona do sieci 230Va.c./50Hz. ZIELONY Tryb programowania (zestaw jest już zaprogramowany.) Jeżeli migajace diody Led sygnalizyują CZERWONY, należy sprawdzić Rozdz. 7 - ROZWIĄZYWANIE PROBLEMÓW 6.4.
6.4.2 Programowanie adresu panelu Panel jest zaprogramowany z adresem 1, jest to obowiązek dla prawidłowego funkcjonowania instalacji. Programowanie jest konieczne tylko, jeżeli: - Adres 1 jest zmieniony przez pomyłkę podczas instalacji. - Dodatkowe panele są zainstalowane. Instalacja umożliwia aż do 3 dodatkowych paneli (każdy z SCU), i każdy z nich musi być zaprogramowany z własnego SCU z innym adresem - 2, 3 lub 4. Krok 1 Jednostka centralna SCU PROG Długie naciśnięcie przycisku PROG.
6.5.1 Funkcjonowanie STAND-BY Klawiatura jest wyłączona. POŁĄCZENIE Po wywołaniu z panelu zewnętrznego, łaczy się/dzwoni terminal, przycisk jest biały. POŁĄCZENIE od dzwonka Terminal dzwoni z dzwiękiem wcześniej ustawionym. REGULACJA GŁOŚNOŚCI POŁACZENIA Terminal podczas rozmowy TRYB CICHY (WYCISZENIE ) Terminal w trybie stand-by lub w trakcie połączenia Sukcesywne, krótkie dotkniecia przycisku . Maksymalny poziom sygnalizowany jest sekwencja 2 x [BEEP].
6.5.2 Ustawienia i regulacje Każde ustawienie standard terminalu może być zmieniona w następujący sposób: Krok 1 USTAWIENIA DLA POŁĄCZEŃ: Dla ustawienia DZWONKA POŁĄCZENIA, należy nacisnąć krótko przycisk : Pierwszy dotyk przycisku włancza się pierwszy dzwonek Krok 2 Drugi dotyk przycisku włancza się drugi dzwonek Trzeci dotyk przycisku włancza się trzeci dzwonek i tak dalej aż do wszystkich pięciu dzwonków dostępnych. Ten ostatni wysłuchany dzwonek pozostaje ustawiony po 3 sek.
7 ROZWIĄZYWANIE PROBLEMÓW Nr. Problem 1. Instalacja nie działa. Sygnały SCU Prawdzić połaczenie SCU do sieci Instalacja nie jest podłączona do 230 Vc.a./ 50 Hz lub stan bezpieczników zasilania z sieci 230 Vc.a./ 50 Hz i w sieci. Sprawdzić FUSE przy wejściu akumulator nie jest podłączony do SCU. do SCU. Instalacja OK. Instalacja działa OK. S1 zielony PROG 3. Instalacja nie działa.
PL 8 UTRZYMANIE 9 GWARANCJA Należy chronić panele zewnętrzne przed substancjami korozyjnymi, wapnem lub wstrząsami mechanicznymi. Terminale należy chronić przed wodą, wapnem lub jakimkolwiek płynem, wstrząsami mechanicznymi, oparami, kurzem, itp. Elementy systemu można czyścić miękką bawełnianą szmatą. Bateria podłączony opcjonalnie do jednostki centralnej zostanie wymieniony po zakończeniu jego ważności. Jednostka centralna zapewnia ładowanie bateria, jeżeli nie jest uszkodzony.
DE BELLCOME ist eine Marke von ELECTRA. EN BELLCOME is a trademark of ELECTRA. FR BELLCOME est une marque d`ELECTRA. IT BELLCOME è un marchio di fabbrica di ELECTRA. NL BELLCOME is een handelsmerk van ELECTRA. PL BELLCOME jest znakiem towarowym firmy ELECTRA.