Users Guide & Installation Handbook Belling Freestanding Fanned Gas UK 083305903 02/12/2014
CONTENTS & INTRODUCTION CONTENTS • SAFETY • USING THE PRODUCT • CLEANING • INSTALLATION INSTRUCTIONS • TECHNICAL DATA • CUSTOMER CARE INTRODUCTION Thank you for buying this British-built appliance from us. This guide book is designed to help you through each step of owning your new cooker, from installation to use. Please read it carefully before you start using your product, as we have endeavored to answer as many questions as possible, and provide you with as much support as we can.
CONTENTS & INTRODUCTION Our policy is one of constant development and improvement, therefore we cannot guarantee the strict accuracy of all of our illustrations and specifications - changes may have been made subsequent to publishing. GAS WARNING If you smell gas: Do not try to light any appliance. Do not touch any electrical switch. Call the Gas Emergency Helpline at 0800 111999 3.
SAFETY BEFORE USING THE PRODUCT Make sure that you have removed all packaging and wrapping. Some of the items inside this appliance may have additional wrapping. It is advised that you turn the ovens and/ or grill on for a short while. This will burn off any residues left from manufacturing. There may be a smell which accompanies this process - but this is nothing to worry about and is harmless.
SAFETY WARNING! - The appliance must never be disconnected from the mains supply during use, as this will seriously affect the safety and performance, particularly in relation to surface temperatures becoming hot and gas operated parts not working efficiently. The cooling fan (if fitted) is designed to run on after the control knob has been switched off. WARNING! Do not spray aerosols in the vicinity of this appliance while it is in operation.
SAFETY WARNING! - Never place food, or dishes on the base of the main oven, the element is here and it will cause over heating. WARNING! - Do not modify the outer panels of this appliance in any way. WARNING! - This appliance must be earthed. WARNING! - The top element gets extremely hot when in use, so take care to avoid touching it. GAS WARNING! If you smell gas: Do not try to light any appliance. Do not touch any electrical switch. Contact your local gas supplier immediately.
SAFETY not use it for heating the room. pans, old or misshapen pans, or any pan that is not stable on a flat surface, including round bottomed woks, directly on top of the pan supports GAS HOB Do • Always ensure that pan bases are dry and flat before using them on the hob. • Never leave cooking fat, or oil, unattended. • Always position pans over the centre of the heat zone, and turn the handles to a safe position so they cannot be knocked or grabbed.
SAFETY extremely hot. • Turn off the heat if it is safe to do so but never lean over a pan to reach the controls. If you have a fire blanket, put it over the pan. If you have put the fire out, leave the pan to cool completely. Deep-fat frying presents more dangers in your kitchen. • Never fill a chip pan (or other deepfat fryer) more than one-third full of oil. • Do not use a fire extinguisher on a pan of oil, the force of the extinguisher can spread the fire and create a fireball.
USING THE HOB - GAS • If your hob is supplied with left and right handed pan supports, ensure that they are located over the alignment pins and are sitting flat on the hob. • Use pans which are large enough to avoid overflows onto the hob surface. • Wipe any spillage as soon as possible. • Clean the hob top as regularly as possible, this will prevent any build up of grease which may be a fire hazard.
USING THE HOB - GAS FOLD DOWN LID (IF FITTED) Caution: Glass lids may shatter when heated. Turn off all the burners before shutting the lid. When opening and closing the lid, use the cooler outer sides of the lid glass. The lid must be opened fully, so there is no danger of it closing while the hob is being used. Appliances fitted with glass lids are fitted with a safety system which will automatically turn off the hot plate burners if they are inadvertently left on as the lid is closed.
USING THE GRILL - GAS (IF FITTED) Caution: Accessible parts may be hot when the grill is used - young children should be kept away. A grill pan handle can be purchased as an optional extra from our spares department quoting the numbers below. Handle - 082283705 Handle grip - 082469100 Complete grillpan pack - 012635666 Contact details can be found on the customer care page. If cleaning the grill pan when it is hot, use oven gloves to move it.
USING THE GRILL - ELECTRIC (IF FITTED) Caution: Accessible parts may be hot when the grill is used - young children should be kept away. A grill pan handle can be purchased as an optional extra from our spares department quoting the numbers below. Handle - 082283705 Handle grip - 082469100 Complete grillpan pack - 012635666 Contact details can be found on the customer care page. If cleaning the grill pan when it is hot, use oven gloves to move it.
USING THE TOP OVEN - GAS USING THE TOP OVEN Preheating Ignition Always preheat the top oven for 15 minutes. However, if the main oven is being used at the same time, then preheating may not be necessary. The cooking time may need to be shortened slightly, or the cooking temperature adjusted, to allow for heat transfer from the main oven to the top oven if both ovens are used together. Push in and turn the top oven control knob to the ‘FULL ON’ position.
USING THE TOP OVEN - GAS OVEN FURNITURE SLOW COOKING Baking tray and roasting tins For best cooked results and even browning, the maximum size baking trays and roasting tins that should be used are as follows; Baking tray 350mm x 330mm Roasting tin 370mm x 320mm Position baking trays and roasting tins on the middle of the shelves, and leave one clear shelf position between shelves, to allow for circulation of heat. Oven shelves Extra shelves may be ordered from your local supplier.
USING THE TOP OVEN - GAS TOP OVEN BAKING GUIDE Food Recommended temperature (°C) Suggested Approximate shelf cooking time position (preheated oven) Scones 210 top - middle 10 - 15 mins Meringues 125 bottom 2 - 3 hours Small cakes 180 middle 15 - 25 mins Whisked sponge 180 middle 20 - 30 mins Swiss roll 195 middle 10 - 12 mins Victoria sandwich 165 middle 20 - 35 mins Cakes (2 x 180 mm / 7” per shelf) Genoese Sponge (side by side) 180 middle 25 - 30 mins Rough Puff 210
USING THE TOP OVEN - GAS Traditional fruit cakes Roast turkey It should be remembered that ovens can vary over time, therefore cooking times can vary, making it difficult to be precise when baking fruit cakes. Roasting turkey involves cooking two different types of meat - the delicate light breast meat, which must not be allowed to dry out, and the darker leg meat, which takes longer to cook. It is necessary therefore, to test the cake before removal from the oven.
USING THE TOP OVEN - GAS Roasting guide Notes: The times given in the roasting guide are only approximate, because the size and age of the bird will influence cooking times as will the shape of a joint and the proportion of the bone. • When cooking stuffed meat or poultry calculate the cooking time from the total weight of the meat plus the stuffing. • For joints cooked in foil or covered roasters, and for lidded casseroles, add 5 minutes per 450g (1lb) to the calculated cooking time.
USING THE MAIN OVEN - GAS USING THE MAIN OVEN Ignition Push in and turn the main oven control knob to the ‘FULL ON’ position. Hold the control knob in, and press the ignition switch (if fitted) or hold a lighted match or taper to the burner, until the burner lights. If after 15 seconds, the burner has not lit, turn off the oven and leave the compartment door open. Wait at least one minute before a further attempt to ignite the burner. Do not hold the control knob in for more than 15 seconds.
USING THE MAIN OVEN - GAS For roasting joints of meat or poultry, and for pot roasts preheat the oven to gas mark 6 and cook for 30 minutes, then adjust the oven control to the 125 °C setting for the remainder of the cooking time. Slow cooking times will be about three times as long as conventional cooking times.
USING THE MAIN OVEN - GAS Traditional fruit cakes Roast turkey It should be remembered that ovens can vary over time, therefore cooking times can vary, making it difficult to be precise when baking fruit cakes. Roasting turkey involves cooking two different types of meat - the delicate light breast meat, which must not be allowed to dry out, and the darker leg meat, which takes longer to cook. It is necessary therefore, to test the cake before removal from the oven.
USING THE MAIN OVEN - GAS Roasting guide Notes: The times given in the roasting guide are only approximate, because the size and age of the bird will influence cooking times as will the shape of a joint and the proportion of the bone. • When cooking stuffed meat or poultry calculate the cooking time from the total weight of the meat plus the stuffing. • For joints cooked in foil or covered roasters, and for lidded casseroles, add 5 minutes per 450g (1lb) to the calculated cooking time.
USING THE MAIN OVEN - FANNED GAS USING THE MAIN OVEN Ignition Push in and turn the top oven control knob to the ‘FULL ON’ position. Hold the control knob in, and press the ignition switch (if fitted) or hold a lighted match or taper to the burner, until the burner lights. Hold the control knob in for 15 seconds. Do not hold the control knob in for longer that 15 seconds. If the burner fails to light within this time, release the control knob and wait one minute before attempting further ignition.
COOKING GUIDE - FANNED GAS The following is intended as a guide and experience may show some slight variation to be necessary to meet individual requirements. Ovens were preheated for 15 minuets before testing.
COOKING GUIDE - FANNED GAS Cook in oven at 200 °C Approximate Cooking Time (preheated oven) Beef Rare Medium Well done 20 minutes per 450g (1lb), plus 20 minutes 25 minutes per 450g (1lb), plus 25 minutes 30 minutes per 450g (1lb), plus 30 minutes Lamb Medium Well Done 25 minutes per 450g (1lb), plus 25 minutes 30 minutes per 450g (1lb), plus 30 minutes Pork 35 minutes per 450g (1lb), plus 35 minutes Poultry 20 minutes per 450g (1lb), plus 20 minutes
HANDLING BAKING PROBLEMS Problem Causes Uneven cooking • Oven not preheated adequately • Preheat oven to instructions • Incorrect shelf position • Refer to oven cooking guide • Baking tray or dish incorrect colour • Electric - silver or shiny Gas - Dark Coloured • Oven tray too large • Try other trays or dishes • Trays not in centre of shelf • Put trays in centre of shelf • Air flow in oven uneven • Turn food during cooking • Oven not preheated • Preheat until indicator light go
HANDLING BAKING PROBLEMS Problem Causes Cakes have cracked thick crust • Baking temperature too high • Lower temperature • Food too high in oven • Cook two shelves lower • Cake batter over mixed • Mix just long enough to combine ingredients • Pan too deep • Check size of pan and use recommended size • Baking tins too dark • Change to shiny tins • Baking temperature too low • Raise temperature • Food too low or high in oven • Cook two shelves higher for gas or lower for electric
RECOMMENDATIONS AND GOOD PRACTICES • After igniting the oven burner, always turn the oven burner control knob to the maximum control knob setting and then turn down to the desired temperature setting. • After preheating the oven for 15 minutes at the selected temperature, open the door and enter the food as quickly as possible to minimise heat losses. • Close oven door gently so as not to disturb the position of foods or cause unnecessary disturbance to the oven flame.
USING THE CLOCK PROGRAMMER-GAS (IF FITTED) The ‘function’ button in the centre is used for setting the minute minder and setting up the automatic cooking. See below for details. To set the time of day When the power is turned on to the appliance, the time of day starts from 0.00. Press and release the (minus) and (plus) buttons simultaneously. Set the time of day, eg 2.00 with the and buttons while the ‘dot’ between the hours and minutes is flashing.
USING THE MINUTE MINDER (IF FITTED) Setting the minute minder ELECTRONIC MINUTE MINDER The digital timer enables you to set the time of day (24 hour clock) and the minute minder alarm. Setting the “Time of Day” • Press and release the plus button to change the display from clock to minute minder - the bell symbol will light. • Use the plus and minus buttons to set the length of time before the alarm tone will sound.
CLEANING GAS HOB Cast iron griddle or pan supports (if fitted) Burner caps and heads • The slots in the burner head where the flames burn should be cleared of deposits. • Clean with a nylon brush, rinse and then dry thoroughly. There may be brown coloured markings on your burners; these are carbon deposits or fat stains and can be removed using a soap filled pad. • Do not put burners in the dishwasher or soak them.
INSTALLATION INSTRUCTIONS - GAS Before you start: Please read the instructions. Planning your installation will save you time and effort. Prior to installation, ensure that the local distribution conditions (nature of the gas and gas pressure) and the adjustment of the appliance are compatible. The adjustment conditions are stated on the data badge. This appliance is not connected to a combustion evacuation device. It shall be installed and connected in accordance with current installation regulation.
INSTALLATION INSTRUCTIONS - GAS Windows and permanent vents should therefore not be blocked or removed without first consulting a GAS SAFE gas installer. In the Republic of Ireland, refer to relevant Irish Standards for correct ventilation requirements. Failure to install appliances correctly is dangerous and could lead to prosecution. Whilst every care is taken to eliminate burrs and raw edges from this product, please take care when handling - we recommend the use of protective gloves during installation.
INSTALLATION INSTRUCTIONS - GAS LEVELLING YOUR COOKER Stability bracket Place a spirit level on a baking sheet onto an oven shelf. If the cooker is fitted with a flexible connection, a stability bracket should be fitted to engage in the back of the cooker. A stability bracket can be bought from your local supplier. The cooker is fitted with LEVELLING FEET. Level your cooker to your desired height using the levelling feet at the front and rear of the cooker.
INSTALLATION INSTRUCTIONS - GAS (Live), or coloured Red. CONNECT TO THE ELECTRICITY SUPPLY (mains ignition models only) Warning: This appliance must be earthed. The flexible mains lead is supplied connected to a BS 1363 fused plug, the plug is fitted with the correct fuse. Important: - ensure that you route all mains and electrical cables and flexible tubing well clear of any adjacent heat source. Replace only with a fuse of the same rating and type.
INSTALLATION INSTRUCTIONS - GAS CONNECT TO THE GAS SUPPLY The inlet to the cooker is ½” BSP internal situated at the rear right corner. Fit the bayonet connection. This should be located so as to ensure that the flexible connector hose does not kink. Under no circumstances should the flexible connector be allowed to come into contact with the vertical oven flue tubes on the rear of the appliance. Use a 900mm - 1125mm length of flexible connector.
TECHNICAL DATA GAS PRODUCTS Data badge - Lower part of front frame Gas category Natural Gas - I2H, LP GAS - I3+. Pressure setting G20 Natural Gas @ 20 mbar Grill - Grill burner is surface combustion type. Spark gaps 3 - 4mm. Hob - Burners have burner heads and caps which are removable for cleaning. Concealed electrodes to each burner. Oven - Oven burner is sheet steel, with pierced ports in stainless steel flame strip. Spark Gap: 3 - 4mm. Flame supervision: Thermoelectric type.
CUSTOMER CARE FAQs What parts of the appliance can be washed in a dishwasher? • Any enamelled parts such as the grill pan can be cleaned in a dishwasher, as can oven shelves and shelf guides. duce condensation when the oven is cooling down with food inside.
CUSTOMER CARE CUSTOMER CARE WEB SHOP Having purchased a superior cooker, hob or hood from us, you’ll naturally want to keep it looking great. And who better to help you care for it than the manufacturer? We offer an extensive range of accessories, components and cleaning products which, will instantly give your cooker a good as new look. range of Bake ware and Cookware essentials including Roasting Pans, Cake Tins and Non-Stick Cooking Liners. For all enquires, please visit our Web Shop at www.gdhaonline.
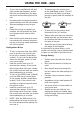
CUSTOMER CARE CHANGING LIGHT BULBS (where fitted) Warning: There is a risk of electric shock, so always make sure you have turned off and unplugged your appliance before starting. Always allow the product to cool down before you change a bulb. Not all appliances have the same number and type of bulbs. Before replacing your bulb, open the oven door and see which type you have. Then use the table to help you change your bulb correctly.
CUSTOMER CARE To contact Belling about your appliance, please call Warranty Registration 0844 481 0182 to register your appliance Customer Care Helpline 0844 815 3746 in case of difficulty within the UK Alternatively general, spares and service information is available from our website at www.belling.co.uk Please ensure that you have the product’s model no and serial no available when you call.