Thermoglaze Model TG 25 Operator’s Manual For Serial # W04050002 on Belshaw Bros., Inc. 1750 22nd Avenue South Seattle, WA 98144-4590 Phone: (206) 322-5474 Fax: (206) 322-5425 Toll Free: 1-800-578-2547 Email: service@belshaw.com http://www.belshaw.
Congratulations on buying a new Thermoglaze from Belshaw Bros., Inc. Please inspect the unit carefully for damage or missing pieces immediately after receiving your system. Belshaw cannot pay for shipping damage, because the freight company has accepted the machine from Belshaw in good condition, and is responsible for its safe delivery.
Contents 1 Unloading and Uncrating 1 2 Identification 2 3 Installation 4 4 Assembly 6 5 Operation 10 6 Cleaning 13 7 Maintenance 21 8 Troubleshooting 22 9 Appendix 27 Belshaw Bros., Inc. 1750 22nd Ave. S.
Preface The operator of the Thermoglaze is expected to behave safely, read this manual before operation, and follow its instructions and warnings. Study the instructions and warnings in this manual carefully before operating the equipment. A thorough understanding of how to install, maintain, and safely operate the Thermoglaze will prevent production delays and injuries.
1 Unloading and Uncrating DO NOT LIFT EXCESSIVE WEIGHT Once the crate has been delivered, immediately take the covers off the crate and inspect for hidden damage. If damage is found, please see the above information to make a damage claim to the shipping company. After inspection, cut the banding and remove any other restrains from the Thermoglaze unit. Remove the banding and other packing material from the Thermolizer unit.
Identification 2 This information is key to identification for service or ordering parts on the ThermoGlaze. When servicing the equipment, please have the Model and serial number so the technician can order the correct parts for you. To identify which Thermoglaze system you have, please use the model number key on the following page. Belshaw Bros., Inc. 1750 22nd Ave. S.
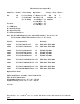
ThermoGlaze Description Key Model No: - Doz/hr: - Glaze Pump: TG 50 25 Location: Opt. Items: - Voltage: - Freq: - Phase: - G = Gear Pump V = End Cover -50 208 L = Lift Pump M = Mono -50 220/240 N = No Pump A = RF Oper. - 25 400/230 B = LB Oper. - 25 C = LF Oper. - 25 D = RB Oper.
Installation 3 Venting: WARNING To avoid electrocuting yourself or damaging the Thermoglaze, never allow water, steam, cleaning solution, or other liquid to enter the electrical panels or connections Electrical: Model Dimensions Power Requirements TG25 60"L x 31W x 52"H See data tag Make sure that the power requirements of the Thermoglaze, shown on the data plate, match your power source. Only plug in to power source that matches the required voltage and current for the Thermoglaze.
7. area. Refer to Section 6 for cleaning instructions. Install screen rack angles onto angle supports by tilting the angles up and sliding the flange into the notches of the supports. See Figure 1. WARNING If water is spilled while cleaning the thermolizer, be sure to dry the floor thoroughly. 9. Place the control box into the cabinet, push the cord through the hole in the bottom to the right of the control panel, and close the cord opening cover plate. 10.
Assembly 4 Clean all parts with mild soap and water and let dry before assembly and applying electrical power to the equipment. The Thermoglaze unit is design for ease of assembly and use. The system is crated in a manner so there are few pieces to put together once the Thermoglaze is in place for production. To help familiarize you with your Thermoglaze, please study the following photographs: Figure 4-1 Front view: Belshaw Bros., Inc. 1750 22nd Ave. S.
Figure 4-2 Infeed view. Figure 4-3 Outfeed View: Belshaw Bros., Inc. 1750 22nd Ave. S.
Glaze Speed Adjustment Convection Heat Adjustment Speed Control Adjustment Figure 4-6. Electrical Panel. Figure 4-4. Control Panel View. The Thermoglaze system consists of a Thermoglaze unit and the Thermolizer. They are placed in unison in the area located for the production of donuts. Radiant Heat Adjustment Initial Setup Procedure of Thermoglaze Model TG25 Convection Heat Adjustment Push the up and down arrows on the digital controller to adjust the convection heat set point. See Figure 4-4.
found. To decrease the cook time, turn the knob clockwise. To increase the cook time, turn the knob counterclockwise. on and off. Higher numbered settings create a longer on-cycle and high humidity. The factory setting is 4.5 on the dial. Glazer Speed Control Heat Control Turn off the power to the TG 25 before opening electrical control box. This control is located on the right hand side of the control box behind the front panel. It controls the air-heating element.
Operation 5 Turn on main power switch and allow to heat to operating temperature. (Note: Heat light will go out when oven reaches temperature.) Turn on the Thermolizer and heat for 30 minutes to allow it to reach operating temperature. Load glaze reservoir with 20 pounds (one small bucket) of glaze and turn on the glaze pump. To swing the glaze trough back, turn off glaze pump, lift up on the mount slightly and rotate to the trough to the rear. (Optional Equipment) See Figure 4-3.
the lower door(s) and remove screen(s) or tray(s) to access the water reservoir. Do not fill beyond ½” of the top edge. When finished, replace the cover and doors. If equipped with the autofill unit, turn on the water and the filler unit will stop at the correct water level. CAUTION If water is spilled while filling the water pan, thoroughly dry all surfaces including the floor. Spilled water may cause serious injury, loss of life, or damage to equipment. Water may continue to drip.
Thermoglaze 25 Symbol Key Belshaw Bros., Inc. 1750 22nd Ave. S.
Cleaning 6 Daily TG Cleaning Instructions TG 25 Daily Cleaning instructions. Disassembly: 4. Remove glaze trough. 1. Remove glaze hose from glaze trough and pump unused glaze into a clean storage container. 2. Disconnect main power cord. 5. Remove transfer shaft drive belt. 3. Return glaze tube to the holder in the glaze kettle. 6. Remove the transfer drive shaft. Belshaw Bros., Inc. 1750 22nd Ave. S.
10. Remove the glaze kettle. 7. Remove the drain tray assembly. 11. Remove the lower hose clamp, hose and hose gasket. 8. Remove the outfeed crumb tray. 9. Removed the hose clamp from the glaze tank drain. 12. Remove the 4 wing nuts from the glaze pump cover. Belshaw Bros., Inc. 1750 22nd Ave. S.
13. Remove the glaze pump cover and gasket. 16. Clean the pump shaft splines thoroughly to prevent the gear from sticking onto the shaft during assembly. Note: Allow the oven to cool below 130 deg F. before disassembling the oven or conveyor. 14. Remove the pump body and gear impellers. 17. Pull the conveyor drive coupling back to release the conveyor. 15. Remove the gear impellers from the pump body. Belshaw Bros., Inc. 1750 22nd Ave. S.
18. Remove the conveyor assembly trough the outfeed end of the oven. 19. Remove the oven crumb tray. 20. Hand wash all parts in hot soapy water, rinse and sanitize. 21. Allow to dry before assembling. Belshaw Bros., Inc. 1750 22nd Ave. S.
Assembly: 1. Install the crumb tray. 2. Install the conveyor into the oven and line up the locating pins at the outfeed end of the oven. Note: lubricate the pump shaft “O” ring and gear impellers with food grade mineral oil before installation. 3. Install the glaze pump body. 4. Install the drive gear onto the splined shaft. 5. Install the lay gear onto the smooth shaft. 6. Install the glaze pump cover “O” ring into the cover and install the cover onto the pump.
7. Install the wing nuts onto the pump, do not over tighten them. 10. Install the hose clamp. Finger tighten only, do not use tools. 8. Install a hose gasket on the top of the pump. 11. Install the glaze hose, gasket and clamp. Finger tighten clamp only. 9. Install the glaze kettle; make sure the gasket is properly seated. 12. Install the outfeed crumb tray. Belshaw Bros., Inc. 1750 22nd Ave. S.
13. Install the drip tray by lining up the locating pins at the outfeed end of the tray. 16. Install the glaze trough. 17. Install the glaze hose into the glaze trough. 14. Install the transfer drive shaft assembly. 15. Install the transfer shaft drive belt. Belshaw Bros., Inc. 1750 22nd Ave. S.
Thermolizer Cleaning Instructions Once a week, clean the Thermolizer as follows: 1. Remove and clean Plexiglas doors with warm water. 2. Disconnect from power and remove control box from cabinet. 3. Remove and clean the screen rack angles, angle supports, and air duct. 4. Wipe the cabinet interior clean. 5. Special attention should be given to cleaning the water box (Item 2 of Control Box Assy., parts list drawings). Clean the water box as follows: a. Turn off water to the Thermolizer control box.
Maintenance 7 The ThermoGlaze is engineered to need little maintenance. By keeping the system clean, the equipment will last for years. The only maintenance that is required is the following: When cleaning the donut system, check all rubber gaskets for wear and replace when necessary. Check for wear on impellers of the glaze pump, replace when necessary. . DO NOT spray machine with water or cleaning agents to clean. Only wipe main unit off with damp cloth. Belshaw Bros., Inc. 1750 22nd Ave. S.
Troubleshooting Call Belshaw Bros. at (206)322-5474, or (800) 578-2547. One of our customer support representatives will be happy to help you. When you call, please specify the following: The model name of the machine. The serial number of the machine. The voltage, phase, and hertz (cycle) of the machine. This information can be found on the small, rectangular data tag/plate. 8 Following is a troubleshooting chart to help you identify and solve some basic problems.
CONVEYOR WILL NOT MOVE Possible Causes What To Do Conveyor is jammed. Check for obstruction in conveyor and remove. GLAZER WILL NOT PUMP GLAZE Glazer motor is not running. Check to make sure the motor is running. (See Pump Motor Will Not Run) Glazer pump impellers are worn. 1. Disconnect power. 2. Replace impellors. GLAZE IS MISSING THE DONUTS ON ONE SIDE OF THE GLAZE SCREEN Glazer or glaze trough is not level. Adjust level of glaze trough by moving set collar. Glaze pump is running too slow. 1.
Troubleshooting the Thermolizer If you have problems with your Thermolizer, call your dealer or another qualified technician. If your dealer cannot help you, please call Belshaw. To do so, first dial the appropriate international access code, then 1-206-322-5474 (United States). When you call, please specify the following: The model name of the machine. The serial number of the machine. The voltages, phase, and cycle of the machine.
THE PROOF BOX WILL NOT HEAT UP Possible Causes What To Do Control box power switch is not on. Flip switch to on position. Defective heat control. Replace the heat control. Loose wire or bad connection. Repair the wire. Defective heat element. Replace the heat element. Defective control box power switch. Replace power switch. LACK OF HUMIDITY OR UNEVEN HUMIDITY Possible Causes What To Do Low water. Refill water reservoir/Check water is on. Defective humidity control.
BLOWER WILL NOT RUN Possible Causes What To Do Control box power switch is not on. Flip switch to on position. Defective blower motor. Replace blower motor. Defective control box power switch. Replace control box power switch. Loose wire or bad connection in blower control circuit. Repair loose wire or bad connection. Belshaw Bros., Inc. 1750 22nd Ave. S.
Appendix Assembly/Parts Drawing 9 TJ-2006 TJ-1001 TJ-1002 TJ-1003 TJ-1005 TJ-1011 TJ-1500 TJ-1501 Wiring Diagram TJ-4000 Service Kit SK-1281 Belshaw Bros., Inc. 1750 22nd Ave. S.
TG-25 FINAL ASSEMBLY TJ-2006 Belshaw Bros., Inc. 1750 22nd Ave. S.
TG-25 FINAL ASSEMBLY TJ-2006 Belshaw Bros., Inc. 1750 22nd Ave. S.
Belshaw Bros., Inc. 1750 22nd Ave. S.
Belshaw Bros., Inc. 1750 22nd Ave. S.
Belshaw Bros., Inc. 1750 22nd Ave. S.
Belshaw Bros., Inc. 1750 22nd Ave. S.
Belshaw Bros., Inc. 1750 22nd Ave. S.
Belshaw Bros., Inc. 1750 22nd Ave. S.
Belshaw Bros., Inc. 1750 22nd Ave. S.
Belshaw Bros., Inc. 1750 22nd Ave. S.
Belshaw Bros., Inc. 1750 22nd Ave. S.
Belshaw Bros., Inc. 1750 22nd Ave. S.
SK-1281 REC.