
How-To Guide Part 2

Using the Application Programs 41
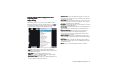
Contacts
With the Contact application program, you can easily manage
your contact records. In addition to just carrying and viewing
these records, you can also quickly make phone calls, send mes-
sages/Email and open web pages thanks to the integration with
other application programs.
Creating a New Contact
Creating a New ContactCreating a New Contact
Creating a New Contact
Creating a New Contact from the Phone Screen
Creating a New Contact from the Phone ScreenCreating a New Contact from the Phone Screen
Creating a New Contact from the Phone Screen
See "Adding number to Contacts" on page 29 for more informa-
tion.
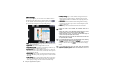
Creating a New Contact from the Contacts Screen
Creating a New Contact from the Contacts ScreenCreating a New Contact from the Contacts Screen
Creating a New Contact from the Contacts Screen
1. In the Contacts screen, tap Contact
ContactContact
Contact and select New
NewNew
New.
2. Tap Unfiled
UnfiledUnfiled
Unfiled and select a folder where you want to place this
contact.
3. Enter contact information.
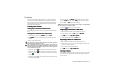
You can specify a ring tone for the contact by selecting a ring tone
from the Ring tone drop-down menu.
The personalized ring tone will only be played if your phone net-
work is CLI (Calling Line Identity) compatible, so the caller can be
identified. Otherwise, the default ring tone will be used, regardless
of your selection of ring tone.
4. (Optional) Tap the tab to enter your note for this contact.
5. (Optional) Tap the tab to specify a picture for this contact.
Tap the icon to open a box where you can browse and select
a picture.
6. (Optional) Tap the button to add a voice tag for this contact
for using voice dialing.
To add a voice tag, tap Record
RecordRecord
Record and speak after the beep. When
done, tap Done
DoneDone
Done. You can also tap Play
PlayPlay
Play to play the voice tag you
just recorded, or Del
DelDel
Del to delete the voice tag.
To prevent failure when recording the voice tag, it is recommended
that you do so in a quiet location.
7. Tap the button to save the contact.
Importing Contacts from a SIM Card
Importing Contacts from a SIM CardImporting Contacts from a SIM Card
Importing Contacts from a SIM Card
1. Make sure that the SIM card is installed on your P31.
2. In the Contact screen, tap All
AllAll
All and select SIM card
SIM cardSIM card
SIM card.
3. Tap Edit
EditEdit
Edit and select Copy all to contacts
Copy all to contactsCopy all to contacts
Copy all to contacts.
4. In the box that follows, tap the Yes
Ye sYe s
Yes bu t t o n .
Exporting Contacts to a SIM Card
Exporting Contacts to a SIM CardExporting Contacts to a SIM Card
Exporting Contacts to a SIM Card
1. Make sure that the SIM card is installed on your P31.
2. In the Contacts screen, tap to select a folder that contains the
contact you want to export.
3. Tap to open the contact from the list.
4. Tap Edit
EditEdit
Edit and select Copy to SIM card
Copy to SIM cardCopy to SIM card
Copy to SIM card.
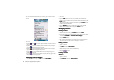
Viewing Contacts
Viewing ContactsViewing Contacts
Viewing Contacts
The Contact screen displays all contacts in your P31. You can also
tap a tab below to view only the contacts that begin with the let-
ters on the tab.