
How-To Guide Part 2

Using the Application Programs44
5. Perform the same operation as described in step 3 in "Sending
a Contact" on page 43.
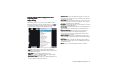
Sending All Contacts in a Folder
Sending All Contacts in a FolderSending All Contacts in a Folder
Sending All Contacts in a Folder
1. In the Contacts screen, tap All
AllAll
All and select a folder.
2. Tap Contacts
ContactsContacts
Contacts and select Send this folder
Send this folderSend this folder
Send this folder.
3. Perform the same operation as described in step 3 in "Sending
a Contact" on page 43.
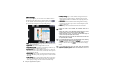
Owner Card
Owner CardOwner Card
Owner Card
The owner card is your electronic name card. Once created, you
can exchange it freely with other people.
Creating Your Owner Card
Creating Your Owner CardCreating Your Owner Card
Creating Your Owner Card
Method 1
Method 1Method 1
Method 1
1. In the Contacts screen, tap Contact
ContactContact
Contact and select New
NewNew
New.
2. Enter your personal data.
3. Tap Contacts
ContactsContacts
Contacts and select Set as owner card
Set as owner cardSet as owner card
Set as owner card.
4. Tap the button.
Method 2
Method 2Method 2
Method 2
1. Open a contact.
2. Tap Contacts
ContactsContacts
Contacts and select Set as owner card
Set as owner cardSet as owner card
Set as owner card.
Sending Owner Card
Sending Owner CardSending Owner Card
Sending Owner Card
1. In the Contacts screen, tap Contact
ContactContact
Contact and select Send owner
Send owner Send owner
Send owner
card
cardcard
card.
2. Perform the same operation as described in step 3 in "Sending
a Contact" on page 43.
Editing Owner Card
Editing Owner CardEditing Owner Card
Editing Owner Card
1. In the Contacts screen, tap Contact
ContactContact
Contact and select View owner
View owner View owner
View owner
card
cardcard
card.
2. Perform the same operation as described in "Editing a Contact"
on page 42.
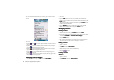
Contacts Preferences
Contacts PreferencesContacts Preferences
Contacts Preferences
1. In the Contacts screen, tap Edit
EditEdit
Edit and select Preferences
PreferencesPreferences
Preferences.
2. In the box that follows, tap to select a method by which the
Contacts application program sorts your contacts.
3. If you want the preferred phone number to appear next to the
contact name when viewing, tap the Show preferred phone
Show preferred phone Show preferred phone
Show preferred phone
number
numbernumber
number checkbox. If this option is selected and no preferred
number is specified, the first phone number in the contact will
be used as the preferred number.
4. Tap the Done
DoneDone
Done button.
Specifying Preferred Phone Number for Contacts
Specifying Preferred Phone Number for ContactsSpecifying Preferred Phone Number for Contacts
Specifying Preferred Phone Number for Contacts
1. Open a contact.
2. Tap Edit
EditEdit
Edit and then select Edit contact
Edit contactEdit contact
Edit contact.
3. Tap Edit
EditEdit
Edit and then select Show in list
Show in listShow in list
Show in list.
4. Tap to select a preferred number from the drop-down menu.
5. Tap the Done
DoneDone
Done button.