
Owners manual


Introduction12
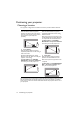
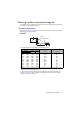
Controlling your smart device with the remote control
When the projector projects the content from your MHL compatible smart device, you
can use the remote control to control your smart device.
To enter the MHL mode, press and hold AUTO for 3 seconds. The following buttons are
available for controlling your smart device: Arrow keys ( / Up, / Down,
Left, Right), MENU/EXIT, MODE/ENTER, MHL control buttons.
To leave the MHL mode, press and hold AUTO for 3 seconds.
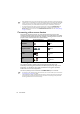
11. PAGE +/PAGE -
Operate your display software program
(on a connected PC) which responds to
page up/down commands (like Microsoft
PowerPoint).
12. FREEZE
Freezes the projected image.
13. NETWORK SETTING
Displays the Network Settings OSD
menu.
14. QUICK INSTALL
Quickly selects several functions to adjust
the projected image and displays the test
pattern.
15. AUTO
Automatically determines the best picture
timings for the displayed image.
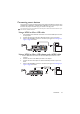
16. Right/
Increases the projector volume.
When the On-Screen Display (OSD) menu
is activated, the #5, #3, and #16 keys are
used as directional arrows to select the
desired menu items and to make
adjustments.
17. SOURCE
Displays the source selection bar.
18. MIC/VOL +/MIC/VOL -
(No function.)
19. MUTE
Toggles projector audio between on and
off.
20. ASPECT
Selects the display aspect ratio.
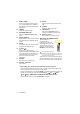
21. SMART ECO
Displays the Lamp Mode
menu for
selecting a suitable lamp operating mode.
22. Numeric buttons
Enters numbers in network settings.
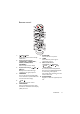
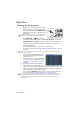
Operating the LASER pointer
The Laser Pointer is a
presentation aid for
professionals. It emits red
colored light when you press it.
The laser beam is visible. It is
necessary to press and hold
LASER for continuous output.
Do not look into the laser light
window or shine the laser light beam on yourself or
others. See the warning messages on the back of the
remote control prior to using it.
The laser pointer is not a toy. Parents should be
mindful of the dangers of laser energy and keep
this remote control out of the reach of children.