
User's Manual
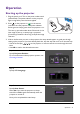
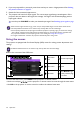
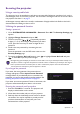
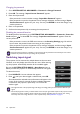


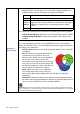
Table Of Contents

26 Menu operation
Menu operation
Please note that the on-screen display (OSD) menus vary according to the signal type selected and the
projector model you are using.
The menu items are available when the projector detects at least one valid signal. If there is no
equipment connected to the projector or no signal detected, limited menu items are accessible.
PICTURE menu
Picture Mode
The projector is preset with several predefined picture modes so that you can
choose one to suit your operating environment and input signal picture type.
• Bright: Maximizes the brightness of the projected image. This mode is suitable
for environments where extra-high brightness is required, such as using the
projector in well lit rooms.
• PRESN: Is designed for presentations. The brightness is emphasized in this mode
to match PC and notebook coloring.
• sRGB: Maximizes the purity of RGB colors to provide true-to-life images
regardless of brightness setting. It is most suitable for viewing photos taken with
an sRGB compatible and properly calibrated camera, and for viewing PC graphic
and drawing applications such as AutoCAD.
• Vivid: With well-balanced color saturation and contrast with a low brightness
level, this is most suitable for enjoying movies in a totally dark environment (as you
would find in a commercial cinema).
• DICO-S: Follows the standard of DICOM to get the gray level parameter.
• User 1/User 2: Recalls the settings customized based on the current available
picture modes. See User Mode Management on page 26.
• HDR: Delivers High Dynamic Range effects with higher contrasts of brightness
and colors. This mode is only available when:
• DISPLAY > HDR is set at Auto, and HDR content is detected.
• DISPLAY > HDR menu is set at HDR.
User Mode
Management
There are two user-definable modes if the current available picture modes are not
suitable for your need. You can use one of the picture modes (except the User
1/User 2) as a starting point and customize the settings.
• Load Settings From
1. Go to PICTURE > Picture Mode.
2. Press / to select User 1 or User 2.
3. Press to highlight User Mode Management, and press OK. The User
Mode Management page is displayed.
4. Select Load Settings From and press OK.
5. Press / to select a picture mode that is closest to your need.
6. Press OK and BACK to return to the PICTURE menu.
7. Press to select the sub-menu items you want to change and adjust the values
with / . The adjustments define the selected user mode.