
Operation Manual
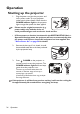

Operation
28
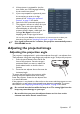
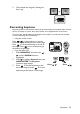
Auto-adjusting the image
In some cases, you may need to optimize the
picture quality. To do this, press AUTO on
the projector or remote control. Within 3
seconds, the built-in Intelligent Auto
Adjustment function will re-adjust the values
of Frequency and Clock to provide the best
picture quality.
• The screen will be blank while Auto
is functioning.
• This function is only available when PC signal (analog RGB) is selected.
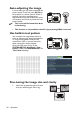
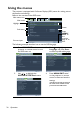
Use build-in test pattern
You can adjust the image shape and focus
status by observing the input signal content,
or using the test pattern build-in OSD
manual from OSD or remote control for
better observe the shape changed.
Open the OSD menu and go to the
SYSTEM SETUP: Advanced > Test
Pattern > On. Press MODE/ENTER. The
Test Pattern displays.
Fine-tuning the image size and clarity
1. Adjust the projected image to the size
that you need using the zoom ring.