
User Manual


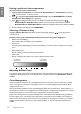

Table Of Contents
- Table of contents
- Important safety instructions
- Overview
- Positioning your projector
- Connecting to video equipment
- Using the projector
- Turning the projector on
- Selecting an input source
- Using the menus
- Securing the projector
- Adjusting the projected image
- Using the preset and user modes
- Fine-tuning the picture quality
- Advanced picture quality controls
- Selecting the aspect ratio
- Setting a wall color
- Hiding the image
- Locking control keys
- Freezing the image
- Adjusting the sound
- Using the test pattern
- Using the teaching templates
- Setting the lamp mode
- Controlling the projector through a Wired LAN environment
- Operating in a high altitude environment
- Turning the projector off
- On-Screen Display (OSD) menus
- Additional information
- Warranty and Copyright information
31
Using the projector
English
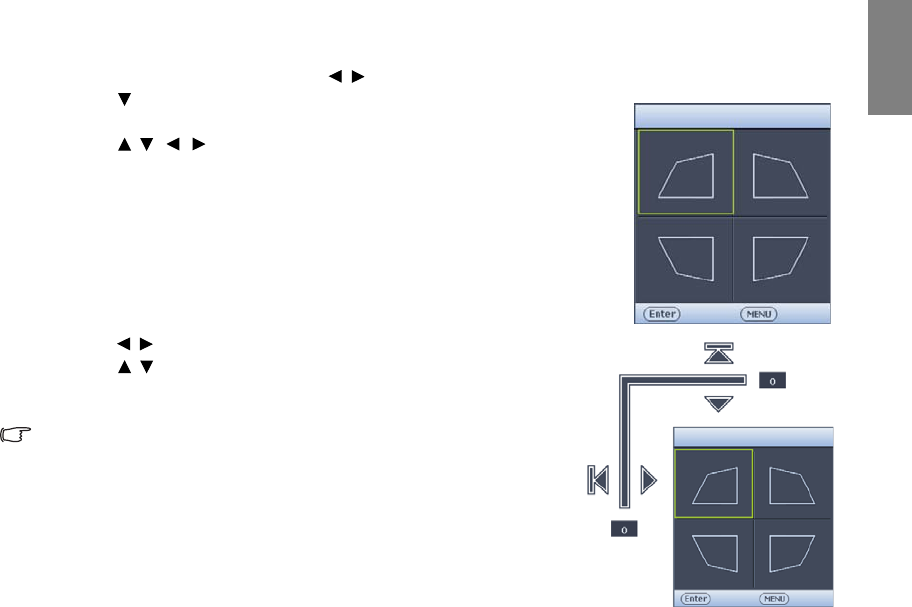
Using Corner Fit function
Manually adjust four corners of the image by setting the horizontal and vertical values.
1. Press MENU/EXIT and then press / until the DISPLAY menu is highlighted.
2. Press to highlight Corner Fit and press MODE/ENTER. The Corner
Fit correction page displays.
3. Press / / / to select one corner and press MODE/ENTER.
4. Press / to adjust horizontal values.
5. Press / to adjust vertical values.
6. If optimal effect cannot be achieved, press MODE/ENTER to reset
Corner Fit value and repeat steps 4 and 5.
When resetting any one corner of the Corner Fit function, all
corners will return to default value.
7. When done, press MENU/EXIT to go back to the previous page.
Corner Fit
Enter
Back
Corner Fit
Reset
Back