
User Manual
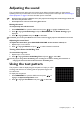
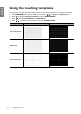
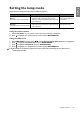
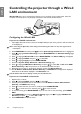

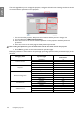
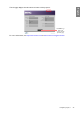


Table Of Contents
- Table of contents
- Important safety instructions
- Overview
- Positioning your projector
- Connecting to video equipment
- Using the projector
- Turning the projector on
- Selecting an input source
- Using the menus
- Securing the projector
- Adjusting the projected image
- Using the preset and user modes
- Fine-tuning the picture quality
- Advanced picture quality controls
- Selecting the aspect ratio
- Setting a wall color
- Hiding the image
- Locking control keys
- Freezing the image
- Adjusting the sound
- Using the test pattern
- Using the teaching templates
- Setting the lamp mode
- Controlling the projector through a Wired LAN environment
- Operating in a high altitude environment
- Turning the projector off
- On-Screen Display (OSD) menus
- Additional information
- Warranty and Copyright information

48
Using the projector
English
Operating in a high altitude environment
We recommend that you activate High Altitude when your environment is higher than 1500 meters
(around 4920 feet) above sea level, or whenever the projector will be used for extended periods of time
(>10 hours) without shutdown.
To activate High Altitude:
1. Press MENU/EXIT and then press / until the System Setup: Advanced menu is highlighted.
2. Press to highlight High Altitude.
3. Press / to select On. A confirmation message is displayed.
4. Highlight Yes and press MODE/ENTER.
Operation under High Altitude may cause a higher decibel operating noise level because of increased fan
speed necessary to improve overall system cooling and performance.
If you use this projector under other extreme conditions excluding the above, it may display auto shut-down
symptoms, which is designed to protect your projector from over-heating. In cases like this, you should
switch to High Altitude to solve these symptoms. However, this is not to state that this projector can
operate under any and all harsh or extreme conditions.