
Specifications


(D) Rated voltage of the unit shall be identical with full supply voltage.
(E) Voltage drop on the supply line shall not exceed 10% of full supply voltage.
(F) The feederline conductor size in the raceway from the branch circuit to the unit must be correct to assure
adequate voltage under heavy starting and short overload conditions.
(G) The feederline conductor shall only be used for the supply of one unit of the relevant horsepower. For
connections of more than one unit on the same feederline, a local electrician will have to be consulted to
determine the proper conductor size.
(H) The size of the electrical wiring required from the power source to the grinder on the 3, 5, 7
1
2
HP Grinders is
a MINIMUM OF No. 10 WIRE. On the 10 & 15 HP Grinders a MINIMUM OF No. 8 and No. 6 respectively.
(I) The BIRO Manufacturing Company is not responsible for permanent wiring, connection or installation.
MOTOR SPECIFICATIONS
HP KW VOLTS HZ PH AMPS
5 4 208/220 60 3 17/16
5 4 230 60 1 27
5 4 440 60 3 8
5 4 550 60 3 6.4
7.5 5.5 208/220 60 3 23/22
7.5 5.5 440 60 3 11
10 7.5 208/220 60 3 27/25.6
10 7.5 440 60 3 12.8
10 7.5 550 60 3 10
15 11 208/220 60 3 41/39
15 11 440 60 3 19.5
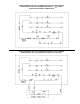
7. Located on the side of the machine is a toggle handle that activates the internal on/off switch. The interlock
safety switch is mounted to the top of the internal switch and will break contact with the magnetic starter should
the tray be removed.
8. Turn the toggle handle to the “ON” position. CHECK THE ROTATION OF THE WORM DRIVE SHAFT;
ROTATION MUST BE COUNTER-CLOCKWISE as indicated by the rotation decal affixed to the grinding bowl.
ROTATION MUST ONLY BE CHECKED WITH THE GRINDING WORM REMOVED, otherwise serious
irreparable damage may occur to grinding components.
9. If machine runs clockwise (backwards), it must be rewired to correct rotation, otherwise serious irreparable
damage may occur to grinding components.
10. Insert worm assembly into grinding bowl, place knife (sharp edges out) onto the square end of the worm
assembly. The breaker plate slides over the worm knife drive pin, and is held from rotating by pins in the grinding
bowl. Put on the retaining ring.
ONLY HAND TIGHTEN RETAINING RING
For best results, use knife and plate as a set. Do not operate machine for any period of time without product
in the grinding bowl. This will cause heating and dulling of the knife and plate.
11. Check placement of all warning labels and Manual. Machine is now ready for trained operators to process
product.
12. Use meat deflector attached to tray to eliminate meat splatter.
13. Contact your local Distributor or BIRO directly if you have any questions or problems with the installation or
operation of this machine.
4
NOTE TO OWNER AND ELECTRICIAN: IF THIS MACHINE IS NOT CORD
AND PLUG CONNECTED TO THE ELECTRICAL SUPPLY SOURCE, THEN IT
SHOULD BE EQUIPPED WITH, OR CONNECTED TO, A LOCKABLE,
MANUALLY-OPERATED DISCONNECT SWITCH (OSHA 1010.147).