
DL d8c564f6e5ad9bb88b396d3c23ca


19
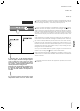
1
4
3
2
Installation Guide
Series: All
EnglishFrançais
Required accessories to be ordered separately:
Central connection Kit (KCCITU)
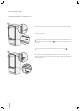
Each appliance comes with its own set of side prole trim covers for
where the appliance connects to the niche side walls. In side-by-side
congurations only 1 side prole trim cover will be needed from each
set. Where the two appliances connect together will be covered
with a central connection trim cover provided in the connection kit
accessory.
Operate as follows:
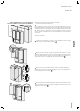
Position the appliances in front of the installation area, leaving
enugh space to operate at their back
1
.
Place the two units side by side, level them with respect to each
other by aligning the screw holes in the side prole trims and then join
them at the front either using pop rivets (supplied with central con-
nection kit) or with 1/4” length #6 screws (not supplied)
2
.
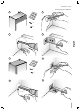
At the back of the appliances mount the connection brackets:
x one side of the top and lower brackets to one of the appliances
and subsequently to the other
3
.
Once units are fully installed snap the central cover frame onto the
central connection pro les by rmly pressing toward the front of the
appliance until it clicks
4
.
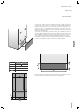
Built-in installation of two or more appliances
Note: top ventilation caps not shown in illustrations