
Installation Instructions


22
INSTALLATION CHECKLIST FINAL PREPARATION
A qualifi ed installer should carry out the following
checks:
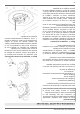
Range mounted on its legs
Island trim or Backguard attached accor-
ding to instruction
Anti-tip device properly installed
Clearance to cabinet surfaces as manu-
facturer’s guideline
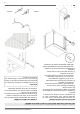
Proper ground connection
Gas service line connected following ma-
nufacturer’s guideline
Valves, stoppers and gasket installed
between the range and the service line
Gas connection tested and free of gas
leaks
Range settled for the type of gas available
in the household
Each burner lights satisfactorily, both indi-
vidually and with other burners operating
Flame appear sharp blue, with no yellow
tipping, shooting or fl ame lifting
Minimum settled for all burners
Oven light works properly
• Before using the oven, remove any protective
wrap from the stainless steel.
• All stainless steel body parts should be wiped
with hot, soapy water and with a liquid stainless
steel cleanser.
• If buildup occurs, do not use steel wool, abrasi-
ve cloths, cleaners, or powders!
• If it is necessary to scrape stainless steel to re-
move encrusted materials, soak with hot, wet
cloths to loosen the material, then use a wood
or nylon scraper.
• Do not use a metal knife, spatula, or any other
metal tool to scrape stainless steel! Scratches
are almost impossible to remove.
• Before using the oven for food preparation,
wash the cavity thoroughly with a warm soap
and water solution to remove fi lm residues and
any dust or debris from installation, then rinse
and wiped dry.
Attention!
When using the oven for the fi rst time it
should be operated for 15-30 minutes at a tem-
perature of about 500°F/260°C (main oven) or
440°F/227°C(auxiliary oven) without cooking
anything inside in order to eliminate any moi-
sture and odours from the internal insulation.
/ Installation checklist / fi nal preparation