
Installation Manual


TrailMax™ II Fold and Tumble Rear Seat – Installation Instructions
Rev. 4 0907 39440 / 39441 pg. 3
Front
Rear
Striker
Plate
Seat Belt
Mounting
Bracket
Install Seat
1986 and Newer Vehicles
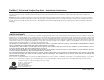
Install Striker Plate
1986 and Newer Vehicles
Remove the Seat Belt Mounting Bracket and set it
aside to be reinstalled.
Orient the Striker Plate with the raised catch toward
the rear of the vehicle. Place the plate in the vehicle
with the rear hole over the hole from the seat belt
bracket and the catch toward the rear. Re-place the
Seat Belt Mounting Bracket on top of the Striker Plate
and align the hole in the bracket with the rear hole in
the plate. Re-install the bolt to secure the Seat Belt
Mounting Bracket and the Striker Plate.
Tumble the Seat back and hook the lock on the rear
of the seat to the catch on the Striker Plate.
Check that the Seat is in the proper position and
that the Latch catches securely to the Striker
Plate. Securely tighten all hardware.
Failure to install the E-Clip may result in the seat moving off the Front
Brackets which could result in serious injury to you and others.
Remove Seat Belt Mounting Bracket
Hook Seat Latch to Striker Plate
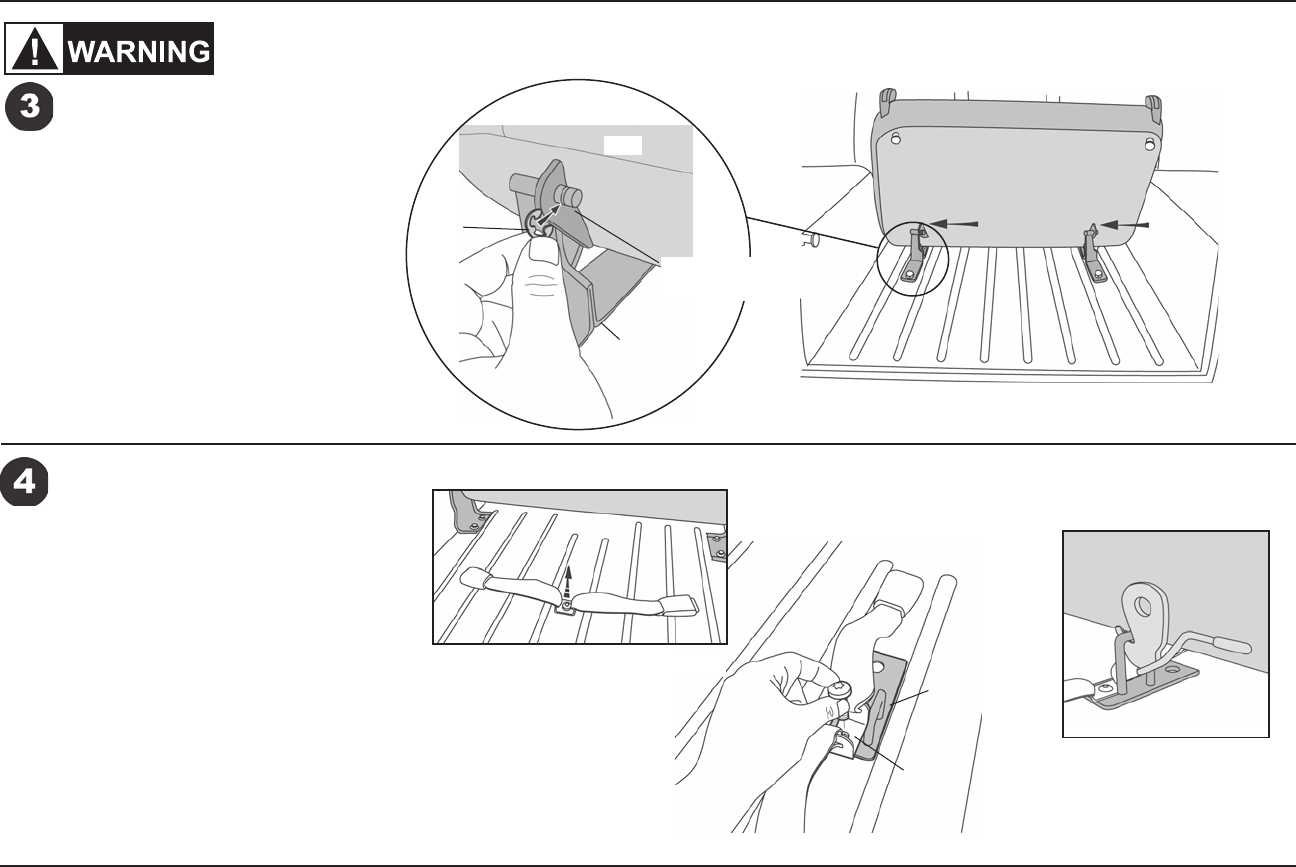
Orient the Seat, with the Legs on the bottom of
the seat facing the rear of the vehicle. Fold the
Seat back down into the closed position. Place
Seat in the vehicle.
Slide the Seat toward the front of the vehicle.
Align the holes of the brackets, on the bottom
of the seat cushion, with the pins of the Floor
Mounting Bracket. Slide the bracket holes over
the pins on the Floor Mounting Brackets. Slide
an E-Clip into the notch on the bracket pin.
Seat
E-Clip
Slide Brackets
on Seat over
Pins on Floor
Mounting
Brackets
Floor Mounting
Bracket