
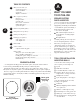
How to Guide

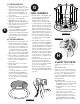

2. When you’re reasonably sure of where the
ceiling joist (studs or framing) are (and are
T
OTALLY sure that there isn’t an electrical
cable, water pipe or heating duct in that vicinity
of your proposed cutout) position one of the
cardboard mounting templates and draw
around the inside outline with a pencil.
3. Drill a 1-inch hole in the center of the pencil
outline which you have just drawn.
4. Obtain a length of stiff wire such as an un-
wound, totally un-bent coat hanger. Bend it
so that the last 12 inches is at a right angle to
the rest.
5. Insert the angled part into the 1-inch hole you
just drilled and probe to left and right to con-
firm that a stud is not close on either side.
s If there is a close stud on one side, just re-
position the cardboard template a few inches
in the opposite direction and re-draw your
pencil outline, keeping the 1-inch hole within
the pencil outline’s inner boundaries.
6. If there are no obstructions, cut the hole along
the pencil outline. If the surface is wallboard,
simply cut it increasingly deeper with utility
knife until it gives way and then pull it out by
grasping the cut-out through the 1-inch hole.
s If you’re dealing with lath and plaster or
thick paneling, you need to use a different tech-
nique. Drill 1-inch holes at opposite sides of
the pencil outline. Then use a keyhole saw or
even a hacksaw blade with VERY slow strokes
to saw through and remove the inner surface.
7. Temporarily place the B
.
I
.
C speaker into the
cut-out to insure that it fits properly. It’s OK
if the hole is slightly large, since it will be
covered by the speaker’s outside frame.
Actual installation will happen later, after
you’ve routed the speaker wires.
8. Repeat if installing more than one speaker.
9. Now it’s time to drill the hole on the OTHER
end – at the point where the wires from the
speakers will exit to the amplifier/receiver.
s Use the same 1-inch drill bit as before.
s If you want a totally finished job, install an
outlet box against a stud and cover it with a
TV cable or single outlet plate which has one
hole in the middle for the wires to exit from.
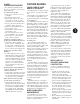
5
E
RUNNING
CONNECTING WIRE(S)
Now you know where the wire(s) have to run.
It’s time to actually route them.
If you have an attic or overhead crawl space,
your two steps are:
1) Route wire(s) up from the amplifier to the
crawl space;
2) Route wire(s) across the crawl space to the
speaker(s).
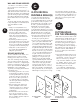
ROUTING WIRE UP TO SPEAKER
(ATTIC CRAWL SPACE)
See Drawing 6
1. You’re about to ascend into your attic.
Grab the following:
s Tape measure
s Cordless drill with a 1-INCH BIT (or non-
cordless model with long extension cord)
s A VERY long roll of speaker wire
s Wire cutters – either diagonal pliers or
wire strippers which include a cutting surface.
s Plumb bob or string with a small weight
(such as a metal nut) on the end
s Tape – any kind will do
2. Crawl up into the attic with all the afore-
mentioned stuff and proceed to a spot that’s
directly over a speaker cut-out hole.
3. Time to use that roll of cable. Push a cable
through the speaker cut-out.
4. Making sure the end doesn’t get pulled back
up through the hole, reel out cable while
moving across the attic/crawl space until you
reach the location above your amplifier.
5. Extend at least 10 (TEN) more feet of cable
for the roll and cut it.
6. You now have a cable running from the
speaker. Repeat steps above if installing
more than one speaker. Time to get them
down the wall to where the amplifier will be.
7. Drill a 1-inch hole through the horizontal
2 x 4 directly above the amplifier wall outlet.
8
. Now you’re going to guide cables down to
where they’ll emerge from the wall. Since this
hole isn’t very big, just stuffing them down and
grabbing them won’t work. Instead, it’s time
for the plumb bob or string-with-weight (or
w
ire if there’s insulation to contend with).
Tape the two cable ends (which come from
the speakers) to the plumb bob string just
above the weight and lower the whole thing
down through the 1-inch hole above the
a
mplifier. You’ll probably have to “feed out”
the attached cable to get the weight to descend.
9. Continue “feeding out” both cables until they
and the weight hit
bottom. Tie the free end of
the plumb bob string to something so that it
doesn’t fall down the hole.
10. Exit the attic crawl space.
11. Go over to the 1-inch amplifier wire hole
and look for the extended string/plumb
bob and attached cables. If they’re not visible,
form a small hook on the end of your stiff
wire/coat hanger, fish around for them, and
pull them through the hole. Then rescue the
plumb bob from the attic.
12. At the speaker holes, things are much easier.
You can just reach through and grab the cables.
Pull their whole free length out the cut
speaker holes. You’ve done it!
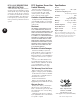
DRAWING 6 DRAWING 7
F
HOOKING UP
YOUR SPEAKER(S)
The main thing to remember when hooking up
a speaker is that two conductors in the speaker
wire are not interchangeable. One will be used as
a POSITIVE (+) conductor and the other as a
NEGATIVE (-) conductor. These correspond to
the RED (+) and BLACK (-) connectors on your
B
.
I
.
C Ceiling Speaker and also to the speaker
terminals on your amplifier or receiver.
IDENTIFYING “+” and “-”
Your need to be able to discriminate between
the two conductors in the zip cord.
If your wire has transparent insulation, this is
easy: One conductor will be copper-colored and
the other silver-colored. Generally, professionals
denote the copper one as POSITIVE (+) and
the silver one as NEGATIVE (-).
If you’ve used wire which has an opaque insu-
lation, there are still differentiating markings.
Examine the wire closely and look for:
s A series of ribs or grooves on one conductor
s A painted stripe
s A single strand of yarn intertwined with the
multi-stranded wire in one conductor.
Denote any of these as the POSITIVE (+) con-
ductor for similar connections on both ends.