LE 33" TRIP BLAD E MOWE R L COMMERCIA Thank You for Selecting The Powerful Self-Propelled Billy Goat Mower Operator Owner's Manual FM3301IN & FM3301INE Patent Number: D494985 2 Accessories Specifications 3 Mulching Kit P/N 520144 Reduces lawn clippings to fine nutrient-rich particles that filter down to the soil. Grass Catcher Kit P/N 520142 Easily convert your mower to bag grass and leaves. Transaxle Guard Kit P/N 520155 Engine: HP Engine:Type Engine: Fuel cap. Engine: Oil Cap.
5 IN THE INTEREST OF SAFETY BEFORE STARTING ENGINE, READ AND UNDERSTAND THE “ENTIRE OPERATOR'S MANUAL & ENGINE MANUAL.” THIS SYMBOL MEANS WARNING OR CAUTION. DEATH, PERSONAL INJURY AND/OR PROPERTY DAMAGE MAY OCCUR UNLESS INSTRUCTIONS ARE FOLLOWED CAREFULLY. WARNING: The Engine Exhaust from this product contains chemicals known to the State of California to cause cancer, birth defects or other reproductive harm. WARNING: DO NOT 12. DO NOT run engine at excessive speeds.
9 GENERAL SAFETY For your safety and the safety of others, these directions should be followed: Do not operate this machine without first reading owner's manual and engine manufacturer's manual. Use of Ear Protection is recommended while operating this machine. Use of Eye and Breathing protection is recommended when using this machine. This cutting machine is capable of amputating hands and feet and throwing objects.
11 ASSEMBLY Read all safety and operating instructions before assembling or starting this unit. PUT OIL IN ENGINE BEFORE STARTING. DISCONNECT SPARK PLUG WIRE BEFORE ASSEMBLING UNIT. Your Billy Goat Mower is shipped from the factory in one crate, completely assembled except for the handles and console assembly. 5.
12 LITERATURE ASSY P/N 520165 Literature Checklist Check Check Check Warranty Card 400972 Owner's Manual 520188 8171004 Washer 3/8" FC Qty 4 Declaration of Conformity 520167 8177012 Washer Split Lock 3/8" Qty 4 33" TRIPLE BLADE ELECTRIC START MODEL 900407 Ty Wrap Qty 4 8171003 Washer 5/16" FC Qty 2 520119 Clevis Pin Qty 1 8041051 Screwcap 3/8" x 1.
15 INSTRUCTION LABELS These labels should be included on your Billy Goat Finish Mower. If any of these labels are damaged, replace them before putting this equipment into operation. Item and part numbers are given to help in ordering replacement labels.. WARNING US DESIGN PATENT NO: D494985 400268 WARNING 890254 STOP ENGINE AND ALLOW T O COOL BEFORE REFUELING. Label Do Not Fill While Engine Is Hot Item 4 Part No.400268 FM 900327 EXPLOSIVE FUEL Label Ear Eye Breathing Item No. 114 Part No.
OPERATION 16 INTENDED USE: This unit is mainly designed for cutting grass. Some overgrown weeds, and taller grass may also be cut. Be sure to inspect work area and machine before operating. Make sure that all operators of this equipment are trained in general machine use and safety. Like all mechanical tools, reasonable care must be used when operating machine. Do not operate unit in areas where bystanders may be present. Do not operate if excessive vibration occurs.
16 16.3 OPERATION continued CUTTING HEIGHT ADJUSTMENT CAUTION: DO NOT make cutting height adjustment when engine is running. Cutting height can be adjusted from 1.0" to 3.5" by placing spacers above or below caster spindles. For easiest adjustment change the height on one side at a time.
16 16.5 OPERATION continued PROPULSION HILLSIDE MOWING 16.6 This unit is self-propelled, and is controlled by an operator presence control. To engage the wheel drive, first push down on the BRAKE RELEASE lever on the right side, then lift the operator's DRIVE lever on the right side against operator's handle. The drive is disengaged by releasing the lower lever. (see figure 16-6). Push and hold the Brake lever to free wheel.
MAINTENANCE 17 Use only a qualified mechanic for any adjustments, disassembly or any kind of repair . DISCONNECT SPARK PLUG WIRE BEFORE SERVICING UNIT. WARNING: TO AVOID PERSONAL INJURY, ALWAYS TURN MACHINE OFF, MAKE SURE ALL MOVING PARTS COME TO A COMPLETE STOP. RECONNECT SPARK PLUG WIRE, AND ALL GUARDS BEFORE STARTING ENGINE. WARNING: FOLLOWING ENGINE OIL CHANGE BE SURE OIL DRAIN VALVE IS CLOSE & TWIST LOCKED. Note: Blade, blade brake puck, transaxle brake, and drive belts are normal wear items.
17 17.1 MAINTENANCE continued Blade Drive Control Cable Adjustment CABLE ADJUSTMENTS CAUTION: DO NOT make cable adjustment when engine is running. Disconnect spark plug wire before making any adjustments. Brake Adjustment The brake control cable is spring loaded and requires no adjustment; however, the transaxle brake is adjustable. When the mower is in neutral and can be pushed by hand without depressing the brake lever, the transaxle brake needs adjustment.
17 MAINTENANCE 17.4 continued BLADE REMOVAL / SHARPENING 17.5 NOTE: When sharpening the blade it is a good idea to check the balance of the blade. A properly balanced blade will increase life of the bearings and other components. Tools required: ratchet, 3/4” inch socket, torque wrench, adequate support, block to inhibit blade rotation. 1. Disconnect spark plug wire. 2. Support front of unit to allow access to the blades. Note: Unit is heavy. Be sure support is adequate to prevent personal injury. 3.
17 17.5 MAINTENANCE continued BELT REPLACEMENT continued Blade Drive Belt Replacement continued 15. Observe the idler pulley when the blade drive lever is lowered and released (see figure 17-7). NOTE: Idler should tighten the belt when blade drive lever is pressed and the belt should be slack when the lever is released. With the lever depressed, the edge of the belt guide should not rub on the belt. 16. Replace the cover 17. Reconnect spark plug wire. 18.
17 17.6 MAINTENANCE continued BRAKE PUCK REPLACEMENT Tools Required: 5/32” Allen wrench; 3/8” wrench. 1. Remove the spark plug wire. 2. Remove the belt deck cover. 3. Remove the brake spring (A) and control cable spring (B) (see figure 17-10). 4. Remove the blade drive belt (C) from the drive pulley (D). 5. Using a 3/8” wrench and 5/32” allen wrench, remove the nuts from the #10 puck retaining bolts (see figure17-11). 6. Remove the bolts from the puck. 7. Remove the brake puck.
18 PARTS DRAWING FM3301IN & FM3301INE DECK ASSEMBLY 7 38 127 126 189 173 172 1 171 126 53 5 169 38 23 42 174 166 168 145 62 170 24 20 46 147 164 165 139 171 65 163 173 155 17 16 41 172 168 2 171 130 167 119 21 175 155 81 127 179 178 151 144 144 151 56 71 144 126 180 5 151 144 87 103 18 35 33 ITEM NO. 1 2 5 7 16 17 18 20 21 23 24 33 35 38 41 42 46 53 56 62 65 71 81 87 103 119 DESCRIPTION FM3301INE QTY PART NO.
PARTS DRAWING 18 FM3301IN & FM3301INE ENGINE ASSEMBLY 183 Battery is 190 not included 123 89 40 96 IV IV III III II I II 104 140 I 4 13 91 144 151 151 147 50 37 83 137 55 178 102 44 116 51 184 36 151 36 143 187 9 148 6 58 182 138 143 151 29 120 151 59 86 137 144 125 184 83 49 143 92 144 181 150 144 159 93 118 85 6 102 90 151 137 111 109 106 ITEM NO.
PARTS DRAWING 18 FM3301IN & FM3301INE DRIVE ASSEMBLY 125 147 70 25 176 57 36 108 127 129 144 151 142 150 70 TO CONSOLE 105 142 143 73 124 BRAKE CABLE 61 132 39 110 150 63 143 54 27 160 141 BELT LAYOUT 101 112 150 157 105 48 19 152 ENGINE PULLEY 150 156 48 186 132 162 155 26 188 158 22 155 162 BLADE CLUTCH IDLER PULLEY SPINDLE PULLEY 156 158 160 150 DECK DRIVE PULLEY 110 136 ITEM NO.
PARTS DRAWING 18 FM3301IN & FM3301INEB HANDLE ASSEMBLY 74 99 95 191 98 191 100 113 3 134 10 8 47 68 143 14 154 143 75 28 60 150 82 135 123 67 79 52 121 114 34 116 150 144 77 143 153 150 143 77 122 135 177 154 76 3 80 143 69 32 97 150 117 143 113 11 78 30 12 191 32 123 66 185 72 31 121 TO TRANS. ITEM NO.
ACCESSORIES 19 19.1 GRASS CATCHER KIT 520142 Purpose: Easily convert your mower to bag grass and leaves. 1 4 10 3 10 2 5 9 11 7 8 6 Item No. 1 2 3 4 5 6 7 8 9 10 11 12 19.2 Part No.
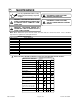
TROUBLESHOOTING Before Requesting Service Review These Suggestions NOTE: For repairs beyond the minor adjustments listed below, contact your nearest authorized service dealer. Problem Possible Cause Solution The engine will not start 1. Engine not properly primed. 2. Out of gasoline or bad or old gasoline. 3. Spark plug wire disconnected. 4. Dirty air cleaner. 5. Blade Clutch is engaged. 1. Prime to choke. 2. Check gasoline. 3. Check for spark with an approved tester. 4.