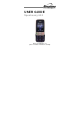
USER GUIDE Speakeasy 600 Before operating this set, please read these instructions carefully.
If you need help … The Binatone Help Line is available from 9.00am-5.00 pm, Monday to Friday, on 0845 345 9677 (BT Local Call rate) Or visit our website: www.binatonetelecom.com Unpacking your Speakeasy 600 In the box are: the mobile handset a mains power adaptor a rechargeable battery pack USB data cable earphones set this user guide Keep the packing materials for future use. Keep your sales receipt - it is your guarantee. IMPORTANT –Your handset is not supplied with a SIM card.
Contents 1 2 3 3.1 3.2 3.3 3.4 4 5 5.1 5.2 5.3 5.4 6 7 7.1 7.2 7.3 7.4 7.5 7.6 7.7 7.8 8 8.1 8.2 8.3 8.4 8.5 8.6 8.7 8.8 3 WHERE TO FIND IT ............................................... 8 SYMBOLS ON THE DISPLAY ............................. 11 MENU OPERATION ............................................. 12 Navigation keys ............................................................12 Selection keys ..............................................................12 Main menu..............................
9 QUICK NUMBER FUNCTION .............................. 27 9.1 9.2 9.3 9.4 Add a Quick Number ....................................................27 Call a Quick Number ....................................................27 Edit a Quick Number ....................................................28 Delete a Quick Number ................................................28 10 USING THE PHONEBOOK & SETTING SPEED DIALS ................................................................... 29 10.1 10.2 10.3 10.
12.3 13 13.1 14 14.1 15 15.1 15.2 16 Manage your MMS ........................................................42 12.3.1 Inbox ...................................................................43 12.3.2 Drafts ..................................................................43 12.3.3 Outbox ................................................................44 BROADCAST MESSAGES .................................. 45 Broadcast message settings.......................................45 CALL HISTORY ........
16.11 17 17.1 18 18.1 18.2 18.3 18.4 18.5 19 Sound recorder.............................................................59 USER PROFILES ................................................. 60 Activate a User profile .................................................60 17.1.1 Customise a User profile .....................................60 SETTINGS ............................................................ 62 Dual SIM settings .........................................................62 Phone settings...
20.2 20.3 20.4 21 21.1 21.2 21.3 21.3 22 23 23.1 23.2 24 25 26 27 7 Network provider menu ...............................................79 Internet service .............................................................80 20.3.1 Browsing the Internet ..........................................80 20.3.2 Settings ...............................................................80 Data account .................................................................80 SMS REMOTE CONTROL ............................
1 WHERE TO FIND IT 1 Earpiece 2 LCD Screen 3 Key Scroll up a menu or options list. Home screen mode: Press to enter the main menu. Editing mode: Move cursor During a call: Press to switch to handsfree mode. 4 Key Scroll down a menu or options list. Home screen mode: Press to enter the Quick Number list. Editing mode: Move cursor www.binatonetelecom.
5 6 Press to answer a call or put the current call on hold. Press to select the function shown above it on the display. Key Key Press and hold to power up or power down the phone. Press to reject a call, end active or held calls. Press to select the function shown above it on the display.
Status Lights Red light on when charging. Red light flashes when there is no link to a mobile network. Blue light flashes when linked to the SIM network. 11 Charger / Data Connect power cable to charge Transfer phone battery from the mains power Connector socket. Connect USB data cable to charge phone battery or transfer data from a computer. 12 Earphones Connector Connect the supplied earphones for FM radio listening or for use during a call. 13 Slide switch for Push up to turn on the torch light.
2 SYMBOLS ON THE DISPLAY The icons in the status bar at the top of the home screen give you information on the current status of your Speakeasy 600.
3 3.1 MENU OPERATION Navigation keys Press , , or to move around and highlight an item on the screen. When an item is highlighted, Press OK to confirm your selection. 3.2 Selection keys Apart from making and answering calls, and also serve as selection keys to select the menus or options directly above them on the screen of the phone. The options for include OK, Option, Select, Yes, Pause, List, Edit, Start. The options for include Back, Cancel, Reset, No, Stop, Done, Abort, Split. 3.
Settings Page 62 Organizer Page 64 Services Page 79 1. From the home screen, press to access the main menu. 2. Press or to scroll through the menu list. 3. Press OK to enter a sub-menu. 4. Press Back to exit. 5. Slide the phone closed to return to the home screen. 3.4 Writing text and numbers Speakeasy 600 supports the following input modes: 1. Abc 2. ABC 3. abc 4. 123 Press to keys that are marked with the corresponding letter you wish to enter.
Enter punctuations/ symbols to show the options. Press Press , , or to select the punctuation or symbol and press OK to confirm. Insert a space Press Delete text Press Clear to delete the character before the cursor. Press and hold Clear to delete all the characters entered. Move cursor Press (except 123 mode). or . www.binatonetelecom.
4 Read these notes first Your phone is an electronic product and should be treated with care to meet any warranty and safety obligations. • • • • • 15 SWITCH ON SAFELY – Do not switch on when mobile phone use is prohibited or when it may cause interference or danger. HEARING AID FRIENDLY – This phone is hearing aid friendly. Mobile phone may interfere with some hearing aids, please contact your hearing aid provider. WATER-RESISTANCE – Keep it dry. The phone is not water-resistant.
5 INSTALLATION AND SETUP To use Speakeasy 600, you must first insert a valid SIM card supplied by your network provider. The SIM card contains your subscription information, your mobile telephone number, and a memory in which you can store phone numbers and messages. 5.1 Install SIM card Speakeasy 600 supports the use of two SIM cards in one phone. Follow these instructions to insert the SIM cards. If only one SIM card is to be inserted, you can use either slot.
3. Slide the SIM card into SIM1 or SIM2. Make sure that the metal contact of the card is facing down and the beveled corner is in the direction as shown in the picture. 5.2 Insert Battery 1. Align the gold contacts of the battery with the corresponding connectors in the battery compartment. 2. Push down the battery until it clicks into place. 3. Replace the back cover by aligning the back cover tabs with the notches located in the back panel. 4.
5.3 Charge Battery Speakeasy 600 is powered by a rechargeable battery. New batteries are only partially charged when shipped. Before you start using your phone, you need to charge the battery for at least 12 hours. 1. Connect the supplied power adaptor to a wall outlet. 2. Connect the power cord to Speakeasy 600 as shown in the picture. The battery charging indicator starts scrolling and the red status light turns on. 1. The charging indicator stops scrolling when the battery is fully charged. 2.
Caution: Risk of explosion if the battery is replaced by an incorrect type. Dispose of used batteries according to the instructions. IMPORTANT Use only the rechargeable battery that is provided with your Speakeasy 600. 5.4 Insert a Memory (micro SD) card If you want to download music or pictures using Bluetooth, record Audio or Video, or store many photos, you will need to insert a micro SD memory card to store these files. 1.
6 SWITCHING ON AND OFF To switch the phone on and off To switch off, press and hold until the display clears. To switch back on, press and hold until the display turns on. Warning! Do not switch on when mobile phone use is prohibited or when it may cause interference or danger. www.binatonetelecom.
7 MAKING & ANSWERING CALLS 7.1 Make a call 1. Slide the phone open. 2. Enter the phone number using the keypad and press twice. (When you install two SIM cards, you can select SIM1/SIM2 voice call) 7.2 Answer a call 1. When the phone rings, slide the phone open or press to answer the call. 2. If you are using the supplied earphones, press the earphone button to answer the call. 7.3 End a call 1. Slide the phone closed or press . 2.
7.6 Dial from the phonebook 1. From the home screen, press to access the Phonebook. 2. Enter the first letter(s) of the name, and/or scroll to the name, then press twice to call the number. (When you install two SIM cards, you can select SIM1/SIM2 voice call) 7.7 Dial from the call log 1. From the home screen, press to access the Call Log. 2. Scroll to the name or number you wish to call and press twice to call the number. (When you install two SIM cards, you can select SIM1/SIM2 voice call) 7.
8 SOS CALL FUNCTION IMPORTANT: Make sure that the SOS Call Function is activated (see Activate / Deactivate SOS Call function on page 24) The SOS Call button works even when the phone is locked. In an emergency situation, you can make an SOS call by pressing the blue SOS call button located at the back of the phone. It enables the user to quickly call up to 5 different numbers for help. 8.1 Using the SOS call button 1.
8.2 Activate / Deactivate SOS Call function If the SOS key setting is deactivated, pressing the blue SOS call button will not initiate the SOS sequence, and a warning note will be shown on the display. 1. From the home screen, press to enter the main menu. 2. Scroll to and select Care > SOS key. 3. Scroll to Settings and select Activate or select Deactivate. 8.
8.5 Add SOS numbers The SOS Call function will not work unless the SOS Num contains at least one number. 1. From the home screen, press to enter the main menu. 2. Scroll to and select Care > SOS key. 3. Scroll to SOS Num and press OK. The screen will show a list of stored numbers or Empty. 4. Scroll to the entry you wish to add an SOS number and press Option. You can add up to 5 numbers. 5. Enter the user name using the keypad. 6. Press Option and then OK to confirm it is done.
8. Press and then modify the phone number. Press to delete the number before the cursor. 9. When you have changed the phone number, Press OK. 10. Press Yes to save the changes. 8.7 Delete SOS numbers 1. From the home screen, press to enter the main menu. 2. Scroll to and select Care > SOS key. 3. Scroll to SOS Num and press OK. 4. Scroll to the entry you wish to delete and press Option. 5. Scroll to Erase and press OK. 6. Press Yes to delete the entry. 8.8 Edit SOS SMS Content 1.
9 QUICK NUMBER FUNCTION Speakeasy 600 lets you store up to 5 frequently used numbers so that you can easily access these numbers from the home screen. to access the Quick From the home screen, press Number list. Scroll to the number you wish to call and press twice to call the number. (When you install two SIM cards, you can select SIM1/SIM2 voice call) 9.1 Add a Quick Number 1. From the home screen, press to enter the Quick Number list. 2.
9.3 Edit a Quick Number 1. From the home screen, press to enter the Quick Number list. 2. Scroll to the entry you wish to edit and press Option. 3. Scroll to Edit and press OK. 4. If you wish to change the name, press Edit, then modify the user name using the keypad. Press Clear to delete character before the cursor. 5. Press Option then OK to confirm it is done. and then modify the phone number. 6. Press Press Clear to delete the number before the cursor. 7. Press OK when it is corrected. 8.
10 USING THE PHONEBOOK & SETTING SPEED DIALS You can save names and phone numbers in the SIM1/SIM2 card memories or the phone memory. You can store up to 300 names and numbers in the phone memory, but the total number of entries you can store in the SIM cards depends on the capacity of your SIM card memories. 10.1 Add a number to the phonebook 1. From the home screen, press to access the Phonebook list. New Entry is highlighted. 2. Press Option then OK. 3. Enter the name using the keypad. 4.
10.3 Edit a phonebook entry 1. From the home screen, press to access the Phonebook list. 2. Scroll to the entry you wish to edit. 3. Press Option, scroll to Edit and press OK. 4. Edit the name using the keypad. and edit the phone number. 5. Press 6. Press Option and then Yes to save the modified entry. 10.4 Delete a phonebook entry 1. From the home screen, press to access the Phonebook list. 2. Scroll to the entry you wish to delete. 3. Press Option, scroll to Delete and press OK. 4.
10.6 Turn speed dial on or off 1. From the home screen, press to access the Phonebook list. 2. Press Option, scroll to Setup and press OK. 3. Scroll to Speed dial and press OK. 4. Scroll to Status and select On or Off to set the status. 10.7 Set My number 1. From the home screen, press to access the Phonebook list. 2. Press Option, scroll to Setup and press OK. 3. Scroll to and select My number > Edit my number. 4. Enter the name using the keypad. 5.
10.9 Set extra numbers 1. From the home screen, press to access the Phonebook list. 2. Press Option, scroll to Setup and press OK. 3. Scroll to Extra numbers and press OK. 4. Scroll to SIM1 owner numbers, SIM2 owner numbers, SIM1 fixed dial or SIM2 fixed dial and press OK. 5. Follow the onscreen instructions to set the extra numbers. 10.10 Check memory status 1. From the home screen, press to access the Phonebook list. 2. Press Option, scroll to Setup and press OK. 3. Scroll to Memory status and press OK.
5. Press Yes to proceed and copy all the contacts as specified. 10.12 Move Phonebook contacts 1. From the home screen, press to access the Phonebook list. 2. Press Option, scroll to Setup and press OK. 3. Scroll to Move contacts and press OK. 4. Scroll to SIM1 to phone, Phone to SIM1, SIM2 to phone, Phone to SIM2, SIM1 to SIM2 or SIM2 to SIM1 and press OK. 5. Press Yes to proceed and move all the contacts as specified. 10.13 Delete All Phonebook contacts 1.
11 SMS TEXT MESSAGING 11.1 Write and send SMS SMS enables you to send text messages to another party, using Short Messaging Service (SMS). You can use the Messaging menu to send messages to another mobile phone or a device that is capable of receiving SMS messages. To compose and send an SMS message, follow the steps below: to enter the main menu. 1. From the home screen, press 2. Scroll to and select Messaging > SMS > Write message. 3.
11.2 Manage your SMS Your messages are sorted in the following folders: Inbox: received messages Sent messages: sent messages (provided Save sent messages is set; see Save Sent message on page 38) Drafts: messages saved as drafts Outbox: unsuccessfully sent messages 11.2.1 Inbox 1. From the home screen, press to enter the main menu. 2. Scroll to and select Messaging > SMS > Inbox. 3. Scroll to SIM1 Inbox or SIM2 Inbox and press OK. 4. Scroll to a message and press OK to read it. 5.
4. Press Option to access the following options: Send Edit Delete Delete all Advanced 11.2.3 Outbox to enter the main menu. 1. From the home screen, press 2. Scroll to and select Messaging > SMS > Outbox. 3. Scroll to SIM1 Outbox or SIM2 Outbox and press OK. 4. Scroll to a message and press OK to read it. 5. Press Option to access the following options: Resend Edit Delete Delete all Advanced 11.2.4 Sent messages 1. From the home screen, press to enter the main menu. 2.
5. Press Option to access the following options: Forward Delete Delete all Advanced 11.3 SMS settings Some of your SMS settings are dependent on the service you subscribe with the network provider. Consult your network provider for more information regarding the settings. 1. From the home screen, press to enter the main menu. 2. Scroll to and select Messaging > SMS > Setup. 3. Scroll to SIM1 message settings or SIM2 message settings and press OK.
11.3.1 Save Sent message 1. From the home screen, press to enter the main menu. 2. Scroll to and select Messaging > SMS > Setup. 3. Scroll to SIM1 message settings or SIM2 message settings and press OK. 4. Scroll to Common settings and press OK. 5. Scroll to Save sent message and select On or Off to set the function. 11.4 Message Templates There are 10 preset SMS messages on the phone, which you can change if you wish. 11.4.1 Edit Template 1. From the home screen, press to enter the main menu. 2.
11.5 Remove Template 1. From the home screen, press to enter the main menu. 2. Scroll to and select Messaging > SMS > Setup. 3. Scroll to Templates and press OK. 4. Scroll to the template you wish to edit and press Option. 5. Scroll to Remove and press OK. 6. Press Yes to confirm the removal.
12. MMS MESSAGING 12.1 Create and Send MMS To compose and send an MMS message, follow the steps below: 1. From the home screen, press to enter the main menu. 2. Scroll to and select Messaging > MMS > Write message. 3. Press Edit to add recipients. 4. Select Add number to enter the recipient’s number manually or search for the recipient from the phonebook. Press OK when done. or Select Add Email to enter the recipient’s email address. Press Option and OK when done. 5.
11. Enter the MMS message and press Option to: Done Input method Add picture Add audio Add video Add attachment Add slide before Add slide after Add bookmark Preview Slide time 12. Scroll to Done and press OK. 13. Press Done, then scroll to your preferred send option and press OK. 12.2 MMS Settings Some of your MMS settings are dependent on the service you subscribe with the network provider. Consult your network provider for more information regarding the settings. 1. 2. 3. 4. 5.
5. Press press Back to exit, scroll to Common settings and OK. Compose Set MMS Creation mode, Picture resizing, Best page time, Auto signature and Signature Send Set Validity period, Delivery report, Read report, Priority, Slide time and Delivery time Retrieve Set retrieval preference in Home network or Roaming; set preference for Read report, Delivery report Filter Set filter for MMS from Anonymous sender or Advertisement Memory status Check memory usage 6. Press Done and then Yes to save.
12.3.1 Inbox 1. From the home screen, press to enter the main menu. 2. Scroll to and select Messaging > MMS > Inbox. 3. Scroll to a message and press OK to read it. 4. Press Option to access the following options: View Reply Call sender Forward Delete Delete all Properties Use details 12.3.2 Drafts to enter the main menu. 1. From the home screen, press 2. Scroll to and select Messaging > MMS > Drafts. 3. Scroll to a message and press Option. 4.
12.3.3 Outbox 1. From the home screen, press to enter the main menu. 2. Scroll to and select Messaging > MMS > Outbox. 3. Scroll to a message and press Option. 4. Press OK to view the message or scroll to the following options: View Send Delete Delete all Properties Use details www.binatonetelecom.
13 BROADCAST MESSAGES Broadcast messages are public messages broadcast to mobile users. Please contact your network provider for a list of channel numbers and their broadcast information. 13.1 Broadcast message settings 1. From the home screen, press to enter the main menu. 2. Scroll to and select Messaging > SMS > Broadcast message. 3. Scroll to SIM1 broadcast message or SIM2 broadcast message and press OK to access the following options: Receive mode Turn receive mode on or off.
14 CALL HISTORY Call history provides you with records of your incoming, outgoing and missed calls. It includes a call settings option that allows you to set call-related options. 14.1 Check Call history 1. From the home screen, press to enter the main menu. 2. Scroll to and select Call history. 3. Scroll to SIM1 history or SIM2 history and press OK. 4.
15 CALL SETTINGS 15.1 Basic call settings 1. From the home screen, press to enter the main menu. 2. Scroll to and select Call history > Call settings. 3.
15.2 Advanced Call settings 1. From the home screen, press to enter the main menu. 2. Scroll to and select Call history > Call settings. 3. Scroll to Advance settings and press OK to set the following options: Call Firewall Settings Add phone numbers to Blacklist, White List, Block Unknown numbers or Block Anonymous numbers, Limit incall firewall. Set the Black list/White list/Firewall on or off.
16 MULTIMEDIA 16.1 FM Radio IMPORTANT! The supplied earphones work as an antenna for the FM radio. You must plug in the supplied earphones to listen to the radio. 16.1.1 Auto tune 1. From the home screen, press to enter the main menu. 2. Scroll to and select Multimedia > FM radio. 3. Press Option. 4. Scroll to Auto search and press OK. 5. Press Yes to start the auto search. Stations found will be saved in the Channel list and the radio will start playing the first station from the Channel list. 16.1.
16.1.3 Select from the Channel list 1. From the home screen, press to enter the main menu. 2. Scroll to and select Multimedia > FM radio. 3. Press Option. 4. Scroll to Channel list and press OK. 5. Scroll to your preferred station and press Option. 6. Scroll to Play and press OK to start listening to that channel. 16.1.4 Enable / Disable Background play 1. From the home screen, press to enter the main menu. 2. Scroll to and select Multimedia > FM radio. 3. Press Option. 4.
16.1.6 Record a radio broadcast Note: You may need a memory card installed for long recordings. 1. 2. 3. 4. 5. 6. 7. 8. From the home screen, press to enter the main menu. Scroll to and select Multimedia > FM radio. Press Option. Scroll to Record and press OK. Recording begins. Press Pause to pause recording and press Stop to stop recording. Modify the filename, if required. Press Clear to delete existing entries and enter filename using the keypad. Press Option and then OK to save the recording.
5. Press 6. Press or to select your preferred quality. OK to confirm the setting. 17.1.9 Record storage 1. From the home screen, press to enter the main menu. 2. Scroll to and select Multimedia > FM radio. 3. Press Option. 4. Scroll to Settings > Record storage. or to select your preferred storage 5. Press location, if available. 6. Press OK to confirm the storage location. 16.2 Camera Speakeasy 600 comes with a digital camera that allows you to take pictures (up to 1.3 Megapixels). 17.2.1 Take photos 1.
16.3.1 Adjust camera exposure to enter the main menu. 1. From the home screen, press 2. Scroll to and select Multimedia > Camera. to reduce exposure or press to 3. Press increase exposure. 4. Press to take photo. 5. Press to exit. 16.3.2 View captured photos The photos you have taken are automatically saved in Image viewer. to enter the main menu. 1. From the home screen, press 2. Scroll to and select Multimedia > Image viewer. 3. Scroll to the photo you wish to view and press Option. 4.
Image settings or to adjust the 1. Press settings. 2. Press OK to confirm. White balance 1. Press or to adjust the settings. 2. Press OK to confirm. Scene mode 1. Press or to adjust the settings. 2. Press OK to confirm. Effect settings 1. Press or to adjust the settings. 2. Press OK to confirm. Storage Select your preferred storage location and press OK to confirm. Restore default Press Yes to restore or press No to exit. 16.
3. Press to start recording. to pause/continue recording. 4. Press The video clip is automatically saved in Video player (see View recorded videos on page 55). 5. Press and then Yes to save the video. 16.6 Zooming in and out 1. From the home screen, press to enter the main menu. 2. Scroll to and select Multimedia > Video recorder. 3. Press to zoom in or press to zoom out. to start recording. 4. Press 5. Press to pause/continue recording. 6. Press and then Yes to save the video. 16.
3. Scroll to the video clip you wish to view and press Option. 4. Press OK to view the video clip. 5. Press to exit. 16.9 Adjust camcorder settings 1. From the home screen, press to enter the main menu. 2. Scroll to and select Multimedia > Video recorder. 3. Press to enter the options menu and scroll to the setting you wish to adjust: Camcorder settings 1. Press OK then press or and or to adjust the settings. 2. Press OK to confirm. Video settings 1. Press OK then press or and or to adjust the settings.
Storage Press OK then or to select your preferred storage location and then press OK to confirm. Restore default Press OK then press Yes to restore or press No to exit. 16.10 Audio player Note: You will need a memory card installed that contains the audio files (mp3). 1. 2. 3. 4. 57 From the home screen, press to enter the main menu. Scroll to and select Multimedia > Audio player. Press List to show a list of the available songs.
Settings Press OK to change the source of the playlist (Pre. playlist), list auto generation (List auto gen.), to repeat play (Repeat), to shuffle play (Shuffle), to continue playing in the background (Background play), Bluetooth settings, Lyrics display. Note: List auto gen. must be turned off to transfer songs to the playlist from the memory card. www.binatonetelecom.
16.11 Sound recorder 1. From the home screen, press to enter the main menu. 2. Scroll to and select Multimedia > Sound recorder. 3. Press Option to show the following options: 59 New record Press OK to start recording. Press Pause to pause recording or Stop to stop recording and then press Yes to save the audio. List Press OK to list the audio clips you have recorded. You can then choose to Play, Append, Rename, Delete, Delete all files, Use as or Send.
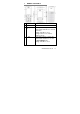
17 USER PROFILES User Profiles provides you with four options for quick changes to the phone sounds when in different places. Each profile can be personalised to give different sounds for your Speakeasy 600 according to your situation. There are 4 preset profiles – General, Meeting, Outdoor and Bluetooth. Each profile includes the following settings: Tone settings Volume Alert type Ring type Extra tone Note: You cannot select Bluetooth.
4. Scroll to Customize and press OK. 5. Scroll to the function you want to change and press OK. Tone settings Set alert tone for SIM1/SIM2 incoming call, Alarm, Power on, Power off, Cover open, Cover close, SIM1/SIM2 message and Keypad Volume Set volume for the Ringtone and Key tone Alert type Set the alert type: Ring only - ringer on, no vibrate Vib. only - ringer silent, vibrate on Vib. and ring - ringer on, vibrate on Vib.
18 SETTINGS 1. From the home screen, press to enter the main menu. 2. Scroll to Settings and press OK. 3. Scroll to the setting you wish to adjust and press OK. 18.1 Dual SIM settings 1. Scroll to the option you want and press confirm. OK to Dual SIM open If you have inserted two SIM cards, select this option to activate both SIM cards on your phone. Only SIM1 open Select this option if you only want to activate SIM card 1 on your phone.
Display Settings Select Wallpaper, Screen saver, Power on display, Power off display, and enable/disable Show date and time, or set Greeting text on power up. Auto update Enable/disable Auto update of date of date and and time. time LCD backlight 18.3 Network settings SIM1/SIM2 network settings 18.4 63 Set Brightness and Time (duration).
Change password Change password for phone lock (Default: 0000) and SMS messages (Default: 1234). Privacy firewall Set password protection for access to your Phone Book, SMS and Call History (Default: 0000). 18.5 Restore factory settings Restore your phone settings to their factory default values. You need to enter your phone lock password (Default: 0000). 19 ORGANIZER The phone comes with a number of useful tools that you can access via the Organizer menu. 19.
Alarm time Enter the alarm time using the keypad. Repeat mode Press or to select Once, Everyday, or Custom. , then or For Custom, press to select the day, and On or Off to set the days for the alarm to sound. Snooze Press or to set the snooze duration (Default, 1 to 10 minutes) Alert type Press or to select the alert type when the alarm time is reached: Ring only, Vib. only, Vib. and ring. Note: set ring tone in User profiles > Customize > Tone settings > Alarm. 5. Press Done and then setting.
3. Press Option > Add to add a new task. (Or just Add if there are no stored tasks.) 4. Enter the required information for each setting: Date Enter the date for the task using the keypad. Time Enter the time for the task using the keypad. Subject Enter the task subject using the keypad or choose from Templates. Alarm Press or to set the task alarm On, 5 min before, 10 min before, 15 min before, 30 min before, Custom or Off. If you select Custom, enter the date and time.
19.2.2 Manage the task list 1. From the home screen, press to enter the main menu. 2. Scroll to and select Organizer > Tasks. 3.
19.3.1 Connecting to a Bluetooth device Consult the user documentation of the Bluetooth device to be connected and prepare the Bluetooth device for pairing. to enter the main menu. 1. From the home screen, press 2. Scroll to and select Organizer > Bluetooth. 3. Scroll to Power and press On to activate Bluetooth, if it is not already activated. 4. Scroll to Visibility and press On, if it is not already turned on. 5. Scroll to Paired Devices to view previously connected devices. 6.
19.3.2 Connect to a previously connected device 1. Check that the Bluetooth function is enabled on the Bluetooth device. 2. On Speakeasy 600, go to Organizer > Bluetooth > Paired Devices. 3. Scroll to the device in the list. 4. Press Option, scroll to Connect and press OK. The connection is established. 19.3.3 Rename a device in the device list To rename a device in the Paired Devices: 1. Go to Organizer > Bluetooth > Paired Devices. 2. Scroll to the device in the list. 3. Press Option and scroll to Rename.
19.3.5 Getting connected by a Bluetooth device For a Bluetooth device to connect to your Speakeasy 600, the Bluetooth must be turned on and made visible. 1. From the main menu, scroll to and select Organizer > Bluetooth. 2. Scroll to Power and press On to activate Bluetooth, if it is not already activated. 3. Scroll to Visibility and press On, if it is not already turned on. 4. The pairing is made when you receive and accept a pairing request from another device (enter the passcode if necessary). 19.3.
4. Enter the second number. 5. Press OK to get the results. Press entries. to clear 19.5 Calendar The Organizer provides a Calendar to check dates and add reminders for important events. 1. From the main menu, scroll to and select Organizer > Calendar. or to go to the previous or next day, or 2. Press press or to go to the previous week or next week, when viewing the monthly calendar. 3.
19.6 World clock The World clock allows you to check the current date and time of many cities around the world and show the position relative to your time zone. 1. From the main menu, scroll to and select Organizer > World clock. 2. Press or to select the time zone (GMT) or city list, and press or to change the time zone or city. The date and time is shown and the map shows the position. 3. Press Option to set Daylight saving On or Off. 19.
5. Press OK and the converted amount will appear. 19.8 Currency converter The currency converter allows you to convert between different currencies based on exchange rates. 1. From the main menu, scroll to and select Organizer > Currency converter. 2. Enter the exchange rate, using the keypad and press for decimal point. 3. Press OK, then or to toggle the exchange ratio. 4. Enter the local currency amount and then press OK. The foreign currency amount is displayed. 5. Press Reset to clear the amounts. 19.
3. Press Start to start the stopwatch running and Pause to stop it. For Split timing, press Split to add up to 20 split times, which can be saved at the end. For Lap timing, press Lap to add up to 20 lap times, which can be saved at the end. The saved Split and Lap timings can be viewed by selecting View records. For 4Way stopwatch, press , , , to switch to different timers while the main timer runs. 4. Press Back to exit from the stopwatch. 19.
19.11 Ebook reader The Organizer includes an option to view Ebooks saved in your phone. To access Ebooks, you must copy and save the file in the Ebook folder of your phone or SD card memory, and the Ebook must be in .txt format. 1. From the main menu, scroll to and select Organizer > Ebook reader. The display will show the Bookshelf with a list of your books or No files if there are none stored in the memory location set. 2.
Full screen or Press On or Off to toggle full screen Encoding or Press encoding to select text Alignment Press or text alignment to set Left or Right Book info, to see details of the Ebook; Delete, to delete the Ebook from the list; Delete all files, to delete all Ebooks from the list; Sort by, to sort the list by Name, Type, Time, Size or None; Apply global settings, to reset the settings; Help, to see shortcut keys that can be used during reading. 5.
Settings To change the settings for reading the Ebook Apply global settings To reset the settings Help To see shortcut keys that can be used during reading Close To close the Ebook and return to the Bookshelf 19.12 File manager All the files on your phone are stored inside folders in the phone memory or on a micro SD card memory, if inserted. You can add new folders and rename, delete or sort the files and folders. 1. From the main menu, scroll to and select Organizer > File manager. 2.
Note: for the Memory card, when you press Open, it will show all files and folders on the card, not just the ones listed above; and it will also include more options: Remove To remove the memory card safely Rename To change the card name Details To check the total size and free space available on the card www.binatonetelecom.
20 SERVICES 20.1 Access Services 1. From the home screen, press to enter the main menu. 2. Scroll to Services and press OK. 3. Scroll to the service you wish to use and press OK. 20.2 Network provider menu The availability of the features in this menu depends on whether or not your SIM card supports it. If your SIM card supports the function, the menu will be displayed on the screen. Follow the onscreen instructions to use the services.
20.3 Internet service You can use this menu to browse the Internet. Consult your network provider for the service subscription, data account information, and WAP settings. 20.3.1 Browsing the Internet You can browse the Internet with the following browse options: Homepage Bookmarks Recent pages Input address Service inbox Settings 20.3.2 Settings You can set the following Internet browsing options: Select SIM Profiles Browser options Service message settings Clear cache Clear cookies 20.
21 SMS REMOTE CONTROL Anyone with a phone can enable remote settings on your Speakeasy 600 by means of SMS commands. Such remote settings include: Quick numbers, SOS numbers, contacts and alarm clock. 21.1 Set quick number On another phone, enter: AT+L:name:number:password and then send the message to your Speakeasy 600. [For example]: AT+L:Jack:13333333333:1234 Jack’s quick number is 13333333333. 1. You can store up to 5 quick numbers.
the same name but different number, the existing SOS number will be replaced with the new one. 2. When the phone had saved up to 5 SOS numbers, and you want to add another SOS number with the same name but different number, then the existing SOS number will be replaced with the new one. However, if the SOS number is completely new, the foremost saved SOS number on your Speakeasy 600 will be replaced with the new one. 21.
Note: 1. Default password: 1234. It can be changed (See page 64). 2. Above letters (AT+L,AT+S,AT+P,AT+A) have to be entered in capital characters. 3. Name: if the length of a name exceeds 15 characters, th the 16 character will be cut off; (New entry is saved in SIM card at first. If the length of a name exceeds 14 characters, the 15th character will be cut off). 4. Number: if the length of a number exceeds 40 digits, st the 41 digit will be cut off. 5.
22 TROUBLESHOOTING The phone cannot be switched on 1. Is there any power in the battery? 2. Is the battery installed properly? Battery cannot be charged 1. Check if the charger is connected to the phone properly. 2. Is the battery still usable? The performance of the battery will be reduced after several years. 3. Is the battery completely discharged? The phone needs to be connected to the charger for a while before it has sufficient charge to turn on. Fails to register to the network 1.
Cannot call out 1. Is the SIM card registered to the network? 2. Is call barring enabled? 3. Is calling prohibited due to unpaid call charges? 4. Have you enabled the FDN function? 5. Have you selected line 2 though your network provider doesn't provide this service? Cannot call in 1. Is the SIM card registered to the network? 2. Are incoming calls prohibited due to unpaid call charges? 3. Is call divert enabled? 4.
23 GUARANTEE AND SERVICE INFORMATION Speakeasy 600 is guaranteed for 12 months from the date of purchase on your sales receipt. The warranty does not cover any faults or defects caused by accidents, misuse, fair wear and tear, neglect, lightning, tampering with the equipment or any attempt to adjust or repair other than through approved agents. Please keep your original dated sales receipt as proof of warranty. You should also keep the original packing material.
23.2 Servicing After Warranty Has Expired If the unit is no longer covered under warranty: 1. Pack all components of your Speakeasy 600 using the original packaging. Remember to include the power adapter. 2. Call our Service Help Line 0845 345 9677 to obtain a quotation for the repair charges. Our customer service staff will provide you with details on where to send your Speakeasy 600 for repair. 3.
24 BATTERY INFORMATION The rechargeable battery needs several charge and discharge cycles to reach full capacity! When the operating time becomes noticeably shorter than normal, it is time to buy a new battery. Use only batteries & chargers approved by Binatone and unplug the charger when not in use. (There is a risk of explosion if the lithium battery is replaced by an incorrect type or is not disposed of correctly.
25 ADDITIONAL SAFETY INFORMATION Operating environment Follow the regulations in force in any area and always switch off your phone whenever it is forbidden to use it, or when it may cause interference or danger, e.g. when driving, on an aircraft, in a petrol station, in a hospital or any other area with warning signs. Pacemakers Pacemaker manufacturers recommend keeping at least 20cm between a handheld wireless phone and a pacemaker to avoid potential interference with the pacemaker.
Placing the unit Do not place the handset in the area over an air bag or in the air bag deployment area. Parts of the phone are magnetic and may attract small objects, so check there are no sharp items, particularly by the earpiece. Do not place credit cards or other magnetic storage media near the phone, because information stored on them may be erased.
26 TECHNICAL DATA Standard: GSM Mobile Frequency Bands: GSM 900MHz/DCS1800 MHz Dual Band Handset Dimensions (closed): about 102mm x 54mm x 18mm Battery: Rechargeable Li-ion, 3.7V, 1050mAh Handset Weight, about 120g including battery: Power Adapter: Input: Operation Temperature: -10oC to +40 oC AC 100V~240V, 50Hz/60Hz.
27 DECLARATION OF CONFORMITY www.binatonetelecom.