
Instruction manual


20
Software Reference
Acquire Options
These selections must be made before you acquire the image.
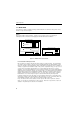
Select Image Rectangle
After you acquire the first image of a gel, you may be able to improve the quality of subsequent images
by drawing an Image Rectangle over your area of interest. (The sensitivity of the camera becomes
greater as you reduce the extremes of intensity in the imaging area.) To mark a region using the Image
Rectangle,
1. Place the cursor where you want the first corner of the Image Rectangle. Note that the cursor
becomes the Marking Cursor when it is in the image area of the screen.
2. Click and drag the cursor to draw a rectangle over the desired area.
3. Release the mouse button when the desired region is enclosed.
4. Notice that the histogram information changes to reflect the marked region.
A previously drawn Marking Rectangle remains in effect until a new one is defined.
Image Size
Image size is selected in the Image Display Options window. The image may be acquired for display in
one of the following sizes:
• Medium format. This is the most common since it yields an image which is easily viewed and a
manageable file size.
• Small format. This results in a smaller image on the screen and a smaller image file. (This is
accomplished by the software, which averages the values of four pixels and outputs that averaged
value for a single displayed pixel.) However, the image data available for analysis in the Band
Tables is the same as with other formats.
• Large format. This provides the largest image display, and results in a larger image file size.
However, the data available in the Band Tables is the same as that for the other formats.
Make New Bright Field File
The Bright Field File serves as a reference image for the subsequent imaging of gels. It allows the soft-
ware to correct for any imperfections in the optics on the CCD camers. Carbohydrates and Proteins
share the same Bright Field file; DNA imaging requires its own Bright Field file. If any components of
the optical path (such as the lenses, filters, UV light, mirror and camera) are cleaned, moved, replaced,
or altered in some manner, a new Bright Field file must be created. For detailed discussion of the Bright
Field file, refer to Maintenance and Troubleshooting.
Image Information
To enter a description or record notes for any particular image file. In the window that is displayed, enter the
following:
Description: Enter a short description for the information you want to save.
Edit Notes: Click on this button and in the window that is displayed, you can enter and save notes on
the Image.