
User Manual


EXCISION TOOL CONTROLS
8-1
8.0 EXCISION TOOL CONTROLS
This section describes the excision tool controls that are common between the Manual Excision Tool,
Analysis Set Excision Tool and Lane/Volume Excision Tool. All other controls and dialogs are discussed in
their respective sections.
8.1 ACQUIRE IMAGE PANEL
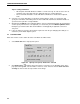
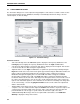
Figure 8-1. “Acquire Image” panel
The “Acquire Image” panel is used to acquire gels and blot images.
1. Select a light source for image acquisition.
•
White Trans
: Select this option for visibly stained gels or blots.
•
UV EPI
: Select this option for gels and blots stained with fluorescent dyes such as SYPRO
Ruby. The maximum exposure time is 10 seconds.
2. Click Acquire image to obtain an image with the selected light option.
8.2 IMAGE CONTROLS
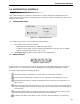
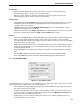
Figure 8-2. Image controls
Image controls are used to zoom in, zoom out, drag or transform gel and blot images. They are located
below or to the side of an image as well as on the PDQuest
™
and Quantity One
®
software’s toolbar.
The image controls perform the following functions.
Full View
: This image control button is used to return a zoomed image to full view.
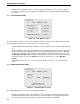
Drag & Zoom
: Click this button to zoom into an area defined by click and drag of the mouse.
Drag Tool
: Click this button to activate the drag hand cursor and move the zoomed image to an
adjacent area.
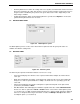
Zoom In
: Click the Zoom In button, place the cursor over the area to zoom in on and then click the
mouse. The image will be zoomed in centered at the cursor location. Click in the zoomed image to
zoom in further.
Zoom Out
: Click this button to activate the Zoom Out cursor and then place the cursor over the
image and click the mouse. Click in the image again to zoom out further.
Transform
: This image control button is used to open the "Transform" dialog (see Section 8.3).