
Owner's manual
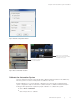
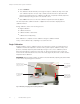
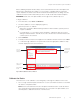
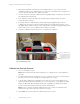


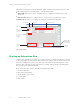
Table Of Contents
- CFX Automation System II Installation
- Using the CFX Automation System II
- Starting an Automation Run
- Adding Plates after Starting an Automation Run
- Canceling an Automation Run
- Pausing or Canceling a Single Plate Run in a CFX System
- Emptying the Waste Rack
- LIMS Information
- PrimePCR Information
- Create the Plate List: Additional Features
- Barcode Controls: Advanced Features
- Modify Settings
- Status Tab
- History Tab
- Resources
- Ordering Information
Chapter 1: CFX Automation System II Installation
| 15CFX Automation System II | 15
When calibrating the plate handler, always use the same brand and model of PCR plates that
will be used in experiments. See Table 7 for a list of plates compatible with the automation
system. All plates should be sealed. If both CFX96 and CFX384 Systems are being used, the
calibration instructions will indicate which positions should use 96-well and 384-well plates.
WARNING! Stand clear of the plate handler arm throughout the calibration process.
To begin calibration:
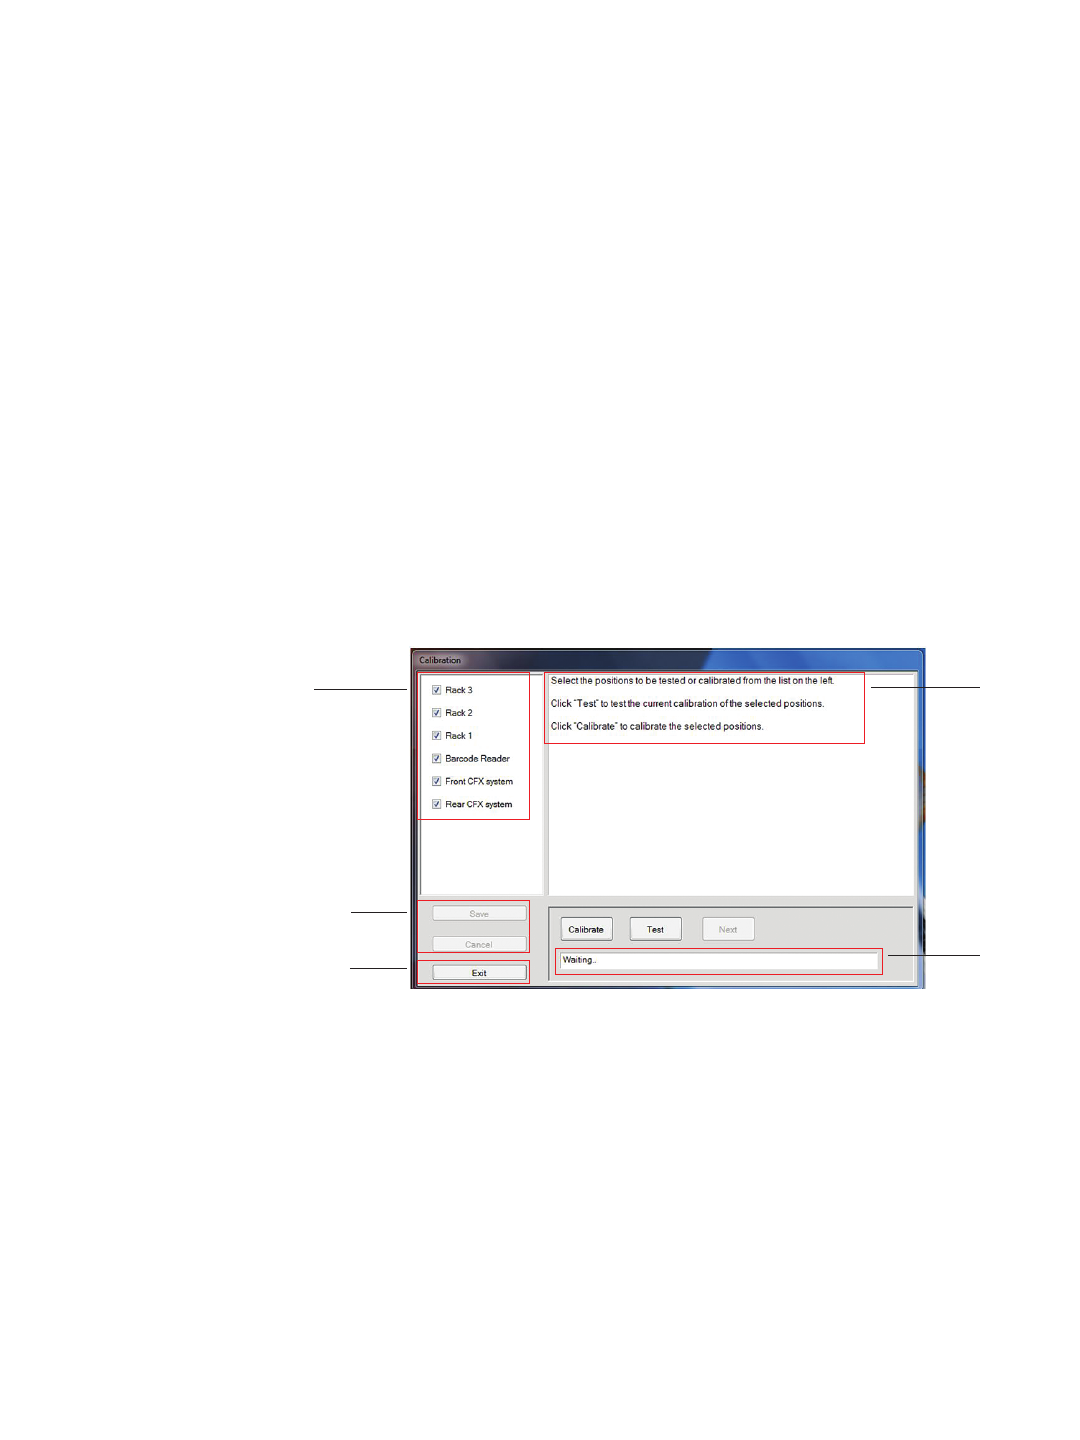
1. In the menu bar, select Tools > Calibration.
2. The main calibration screen is displayed (Figure 15).
3. Select the positions to calibrate.
■n
All positions should be calibrated during installation. After installation, specific positions
may be recalibrated
■n
If you will always or occasionally use barcoded plates, calibrate the barcode scanner
during the initial installation. This will ensure a smooth automation run when the barcode
software options are selected
4. Select Calibrate.
5. Carefully follow the instructions that appear in the calibration window and then select Next
to continue through calibration. The system will execute the appropriate calibration steps
and then display the next set of instructions.
Calibrate the Racks
The instructions on the calibration screen will guide you through the calibration of the racks.
1. Place a single sealed PCR plate at the bottom of each rack. Well A1 should face out toward
the exterior of the plate handler.
Note: Use the same brand and model of the plates that will be used in actual automation
runs. If both 96-well and 384-well CFX Systems are connected to the plate handler, use a
384-well plate to calibrate the bottoms of all three racks.
Fig. 15. Main calibration and test window.
Save or cancel
calibration
Exit calibration
wizard
Provides status
information
Carefully read
and follow all
instructions
displayed
Select all
positions to be
calibrated