
User's Manual


CONNECT READER FOR CONFIGURATION
Part # 430-00186-00 ©Copyright 2007, Bioscrypt Inc.
PIV-Station Installation Guide All rights reserved.
17
10 Connect Reader for Configuration
Once the ports are set up, the readers will need to be configured before being added to the network.
In this section you will:
• Configure the reader using the USB port and a PC
• Set Unit Network ID to a unique number
• Set Host Port Protocol
• Set Host Port Baud Rate
10.1 Initial Reader Setup
1. When you click the OK button on the Network Setup Screen (in Section 9 Step 7).
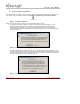
2. The Network Configuration Manager dialog will appear. See Figure 9.
3. Supply power to the proper connectors on the rear of the PIV-Station Reader (Refer to Table 5 for a
wiring diagram).
4. When power is applied, the front LED will glow blue, and the top LED will blink amber, and then turn
off (It will remain on for Readers configured to 1:N ).
5. Connect the Reader’s USB bottom port to your PC’s USB port using the USB programming cable
provided with the Reader.
6. Check the USB com port as described in Section 10.2 if this is the first use of it.
7. Once a Reader is connected, you can now set the Network ID on the reader. Double-click on the
icon for that Reader in the Network Tree, bringing up the Unit Parameters dialog.
8. In the Communication tab, type the desired ID number in the Assign Unit Network ID field. Press
the Apply button to make the change. Note this will change the Network ID in flash on the reader
and will also modify the Transmit ID that is being used by the PC so that you may continue to
communicate. The General tab of this dialog box shows the current communication settings.
9. Select the appropriate baud rate from the Host Port Baud Rate dropdown list. Keep in mind that
you are currently talking over the USB port, but you are changing the Host Port settings that will be
used when you connect to the Reader through the Host Port wires on the back of the Reader.
10. The PIV-Station Host Port parameter, in the Communication tab in the Unit Parameters dialog in
VeriAdmin, will allow the user to select the desired Host port. Options are Protocol (Either RS-485
or RS-232) and Baud Rate.
11. If this reader is being configured for Ethernet, click the Advanced button in the Advanced settings
window. This will launch a window from which you can set the IP address and TCP port.
12. Select the COM port to which you are adding a Reader and click ADD UNIT.
13. Enter the Transmit ID that will be used for this Reader and a name if desired.
14. Click Refresh.
15. Repeat steps 3 through 14 for each Reader being added.
As with all removable USB hardware, care must be taken to properly stop the
device before unplugging to avoid hanging the software. Bioscrypt recommends
the following sequence of steps when temporarily using the USB Aux port to
communicate with a VeriSeries reader:
1. Physically connect the reader to the PC via USB
2. Open VeriAdmin
3. Perform necessary operations
4. Close VeriAdmin
5. Disconnect Reader