
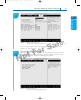
Specifications

149
Maintaining, Installing, and Configuring a Motherboard
3
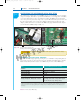
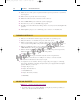
the case to connectors on the motherboard. Audio and USB connectors are shown
as the two left connectors in Figure 3-52. You can see these ports for audio and USB
on the front of the case in Figure 3-57. Look in the motherboard documentation for
the location of these connectors. The audio and USB connectors are labeled for one
board in Figures 3-58(a) and (b).
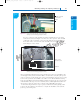
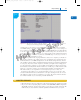
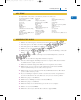
Speaker connected
to front panel
header
Figure 3-56 Front panel header with all connectors in place
Courtesy: Course Technology/Cengage Learning
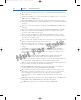
USB ports
Audio-out and
microphone ports
Figure 3-57 Ports on the front of the computer case
Courtesy: Course Technology/Cengage Learning
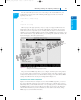
After you install the motherboard and connect all cables and cords, next you install the video
card and plug in the keyboard and monitor. Make one last check to verify all required power
cords are connected correctly and the video card is seated solidly in its slot. You are now ready
to turn on the system and observe POST occurs with no errors. After the Windows desktop
loads, insert the CD that came bundled with the motherboard and execute any setup program
on the CD. Follow the steps on-screen to install any drivers, which might include drivers for
onboard devices and ports such as video, network, audio, USB, RAID, or the chipset.
Look back at the general list of steps to replace a motherboard at the beginning of this
section for the list of things to check and do to complete the installation, and return the
system to good working order.
A+ 220-702
A+
220-702
1.1
1435487389_ch03_CTP.qxd 7/30/09 5:23 PM Page 149