TM USER'S GUIDE 10N4 SERIES 220-240V 2 Thank You 3 Safety Instructions 4-5 6 7-12 13-15 Product View Assembly Operations Maintenance and Care 16 Troubleshooting 17 Accessories 18 Replacement Parts 19 Warranty 20 Consumer Care
Thanks for buying a BISSELL Lift-Off™ Deep Cleaner We’re glad you purchased a BISSELL Lift-Off deep cleaner. Everything we know about floor care went into the innovative design and construction of this complete, high-tech home cleaning system. Your BISSELL Lift-Off deep cleaner is well made, and we back it with a limited two year warranty. We also stand behind it with a knowledgeable, dedicated Consumer Care department, so, should you ever have a problem, you’ll receive fast, considerate assistance.
IMPORTANT SAFETY INSTRUCTIONS When using an electrical appliance, basic precautions should be observed, including the following: Read all instructions before using your deep cleaner. Always connect to a properly Earthed outlet. Unplug from outlet when not in use and before conducting maintenance or troubleshooting.
Product view Upper Handle Carry Handle Heat Indicator Light Formula & Water Tank Power Button Power Cord Quick Release™ Cord Wrap Flex Hose Dirty Tank Portable Spot Cleaning Release Pedal EdgeSweep™ Brushes 4 w w w. b i s s e l l .
Product view Spray Trigger Cord Clip Tool Storage Support Handle Tool Storage (select models) WARNING: To reduce the risk of fire Hose Secure Latch Recline Pedal Cleaning formula and electric shock due to internal component damage, use only BISSELL cleaning formulas intended for use with the deep cleaner. Keep plenty of genuine BISSELL 2X cleaning formula on hand so you can clean and protect whenever it fits your schedule. Always use genuine BISSELL deep cleaning formulas.
Assembly Your Lift-Off deep cleaner comes in two easy to assemble components: 1. Upper handle 2. Portable spot cleaner/Base The only tool you will need to assemble your cleaner is a long Phillips screwdriver. 1. Slide the upper handle onto the body of the machine by guiding the 2 posts on the body into the opening on the upper handle. 1. 2.
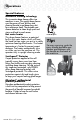
Operations Special features Innovative cleaning technology This innovative deep cleaner offers two machines in one. The upright deep cleaner uses the power of heat, brushes and cleaning formula to get deep down dirt for a maximum clean. The portable spot cleaner detaches to clean tough spots and stains and hard to reach areas. Hot water heater This deep cleaner features a patented built-in hot water heater which will heat the hand hot tap water you put in to safely optimize cleaning effectiveness.
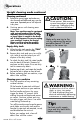
Operations Warning: Before you clean 1. Move furniture to another area if cleaning an entire room (optional). 2. Vacuum area with a dry vacuum cleaner thoroughly before deep cleaning. 3. Pretreating (optional): 3a. Pretreating is recommended to improve cleaning effectiveness for heavily soiled carpet in high traffic areas such as entryway and hallways. 3b. BISSELL Tough Stain precleaner Spray the BISSELL Tough Stain precleaner formula onto heavy traffic areas, soiled areas or stains.
Operations Upright cleaning mode continued Cleaning continued CAUTION: Do not overwet. Take care not to 3. Release the spray trigger and make one slow forward and backward pass over the same area. Repeated passes will help aid in dry time. 4. Continue passes until cleaning area is complete. Note: Your machine may be equipped with a circuit breaker that will automatically shut off the brush if a large or loose object is caught in the brush roll.
Operations Upright cleaning mode continued Cleaning your machine continued 2. Rinse nozzle assembly of any dirt and debris. Remove portable spot cleaner from the base of the machine. Remove the nozzle assembly from the machine by unscrewing 3 screws and lifting away the upper and lower nozzle. Rinse upper and lower nozzles out at the faucet. Place lower nozzle back onto the machine by hooking the tabs into the holes on the bottom sides of the front of the machine.
Operations Portable spot cleaning mode Preparing the machine 1. Step on the portable spot cleaning pedal to release the portable spot cleaner. 2. Release flex hose by twisting the hose secure latch clockwise. Unwrap flex hose completely. 3. Attach the desired tool to the hose grip until it snaps together. Make certain the tool is securely attached. 4. Twist the Quick Release cord wrap clockwise to unwrap the power cord completely and plug into grounded outlet. Filling tank 1.
Operations Portable spot cleaning mode continued Cleaning with Deep Reach™ Tool (select models only) 1. 1. Set tool on soiled surfaces and press the spray trigger to spray solution onto the soiled area to be cleaned. 2. Slowly move the tool back and forth over the soiled surface, keeping the tool in contact with the carpet. Release spray trigger and move tool slowly over the soiled area to suction up water and dirt. 4. Continue to clean the area, working in small sections, until no more dirt can be removed.
Maintenance and care Machine care (check regularly) WARNING: To reduce the risk of fire, Cleaning suction gate The suction gate automatically diverts air when the portable deep cleaner is detached. This should be checked and cleaned regularly for any dirt and debris. electric shock, or injury, turn power OFF and disconnect plug from electrical outlet before performing maintenance or troubleshooting. 1. Step on the pedal and remove the portable spot cleaner. Remove dirty tank. 2. 2.
Maintenance and care Small belt removal and replacement (as needed) Occasional replacement of one or both belts may become necessary. If that is needed, please follow the instructions below. 1. Turn off the machine, and unplug it from the outlet. Remove portable spot cleaner. 2. Remove the nozzle assembly from the machine. Refer to step 2 on page 10. WARNING: To reduce the risk of fire, electric shock or injury, unplug from the outlet before servicing. 2. 3. Turn the machine on its side.
Maintenance and care Brush removal and large belt replacement (as needed) Brushes can be removed for cleaning or replacement as needed. 1. Follow small belt removal Instructions on page 14 items 1-7. 2. Remove brush rolls by pulling them off of the metal rods. Be careful not to lose the small washer at each end of the brush rolls. WARNING: To reduce the risk of fire, electric shock or injury, unplug from the outlet before servicing. 2. 3. 4. 5. 6. 7. 3.
Troubleshooting Built-in heater ready light does not illuminate Possible causes Remedies 1. The power is not turned ON 1. The power must be ON to activate the heater ready light 2. The portable spot cleaner is not attached completely 2. Make sure the portable spot cleaner is attached Push down firmly to check Reduced Spray or No Spray Possible causes Remedies 1. Formula & water tank may be empty 1. Refill tank 2. Formula & water tank may not be seated completely 2. Turn power OFF.
Accessories Item Part No. Part Name 1 2 3 4 5 6 7 203-6651 203-6652 203-6653 203-6654 203-7885 203-7569 310-3040 3” Tough Stain Tool Powered TurboBrush™ Hand Tool 4” Upholstery Tool 6” Stair Tool Spraying Crevice Tool Deep Reach™ Tool Mesh Bag *Not all parts are included with every model. 1 2 3 5 6 7 4 Cleaning Formula: Refer to bottom of page 5 of this guide for a full selection of cleaning formula available for purchase. w w w. b i s s e l l .
Replacement parts Below please find a list of common replacement parts. While not all of these parts may have come with your specific machine, all are available to you for purchase, if desired. Item Part No.
Warranty This warranty gives you specific legal rights, and you may also have other rights which may vary from country to country. If you need additional instruction regarding this warranty or have questions regarding what it may cover, please contact BISSELL Consumer Care by E-mail, telephone, regular mail as described below, or contact your local in country distributor.
Consumer care If your BISSELL product should require service: Call BISSELL Consumer Care at the numbers below and we will give you the location of a BISSELL Authorized Service Center in your area. If you have questions about your warranty or need replacement parts please contact the numbers below.