Lift-Off™ B A G LE S S USER’S GUIDE 3750 SERIES-220-240V 3 Safety Instructions 4 Product View 5-6 Assembly 6-10 Operation 10-13 Maintenance and Care 14 Troubleshooting 15 Consumer Services 15 Replacement Parts 16 Warranty
Thank you for buying a BISSELL Lift-Off™ Vacuum We’re glad you purchased a BISSELL Lift-Off vacuum. Everything we know about floor care went into the design and construction of this complete, high-tech home cleaning system. Your BISSELL Lift-Off is well made, and we back it with a limited two year warranty. We also stand behind it with a knowledgeable, dedicated Consumer Services department, so, should you ever have a problem, you’ll receive fast, considerate assistance.
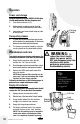
IMPORTANT SAFETY INSTRUCTIONS When using an electrical appliance, basic precautions should be observed, including the following: Read all instructions before using your upright VACUUM. WARNING: To reduce the risk of fire, electric shock, or injury: ■ ■ ■ ■ ■ ■ ■ ■ ■ ■ ■ ■ ■ ■ ■ Use indoors only. Do not leave machine when it is plugged in. Do not use with damaged cord or plug.
Product view Comfort Grip Dusting Brush/ Upholstery Tool Upper Tank Knob Handle Cord Clip Hose Clip Release Button Stretch Hose Power Switch Quick Release Cord Wrap Carrying Handle Clean Filter Indicator Crevice Tool (select models only) Telescoping Extension Wand Hose Grip Power Cord HEPA Media PostMotor Filter Handle Release Hose Pedal Grip Base Dirt Container Pre-Motor Filter Brush On/Off Switch Detachable Cylinder Louvers/Filter Frame Upper Tank Filter (Inside Louvers) Upper Tank Lock 'n S
How to put it together This user’s guide has been designed to help you get the most satisfaction from your BISSELL Lift-Off. You’ll find assembly and operating instructions, safety precautions, as well as maintenance and troubleshooting instructions. Please read this user’s guide thoroughly before assembling your vacuum cleaner. Pay particular attention to the product diagram, assembly instructions, and part names. Locate and organize all parts before assembly.
Assembly Attach vacuum hose and tools 1. Position the Twist 'n Snap hose assembly on the vacuum and line up the tabs on the base of the hose with the corresponding notches. Turn the Twist 'n Snap hose to the right to lock into place. 2. Slide the end of the hose grip onto the hose grip base. Place the hose into the hose clip. NOTE: The Powerfoot will not operate effectively unless the hose is firmly attached to the base. 3.
Operation Power switch/brush switch continued The brush switch is located just below the handle on the front of the detachable cylinder next to the power switch. This switch turns the rotating brush on and off. The brush switch should be in the “ON” (I) position for normal carpet cleaning. You may want to turn the brush switch “OFF” (O) for bare floor cleaning or other delicate surfaces. Tip: Your vacuum feature a Quick Release Cord Wrap.
Operation Special tools Your BISSELL Lift-Off is not only a powerful floor vacuum cleaner, it’s also a versatile stairs and above floor vacuum when you select one of the special tools. NOTE: The tools can be used with the vacuum in the upright position or with the detachable cylinder. 1. Detach the vacuum hose by grasping the hose grip and lifting to separate from the hose grip base. 2. Attach tools by firmly pushing onto vacuum hose or telescoping extension wand.
Operation Release Button Cleaning with the detachable cylinder The detachable cylinder feature makes it possible to easily take the powerful cleaning action of your BISSELL Lift-Off to stairways, auto interiors, and other hard-to-reach areas in your home. Before detaching the cylinder, your Lift-Off must be in its fully upright position. You do not need to turn off the power first. 1. Press the release button at the top of the cylinder handle and lift the cylinder to remove. 2.
Operation Power cord storage When you are done using your BISSELL Lift-Off, return it to the upright position and store the power cord. 1. Turn vacuum cleaner off (O). 2. Unplug power cord by grasping the plug (NOT the cord) and disconnect from outlet. 3. Loop power cord around cord wraps on side of the cylinder. Carrying Handle Transporting cleaner 1. To move your vacuum cleaner from room to room, put the handle in the upright position, tilt the cleaner back on its rear wheels and push forward. 2.
Maintenance and care Cleaning the upper tank & filter Use only BISSELL replacement filters in your BISSELL Lift-Off. 1. Unplug the cleaner from electrical outlet. 2. The upper tank filter can be reached by removing the dirt container, reaching underneath the upper tank and turning the rim of the filter frame to unlock. Pull straight down to remove. Brush the dirt off the louvers and upper tank filter. 3. The foam upper tank filter may be removed and hand washed in cold water with mild detergent.
Maintenance and care Check rotating brush and drive belt You should check your vacuum cleaner’s rotating floor brush and drive belt regularly for wear or damage. You should also clean the brush and brush ends of strings, hair, and carpet fibres. These can wrap around the brush and hamper its ability to effectively clean your carpet. Also remove any debris that has accumulated under the brush cover. 1. Unplug cleaner from electrical outlet. 2. Remove detachable cylinder from vacuum cleaner. 3.
Maintenance and care TurboBrush maintenance Select Models Only The TurboBrush should be checked regularly for clogs or debris wrapping around the brush roll. Unplug vacuum from electrical outlet. If a clog is present or debris is visible, unscrew the two screws on the back of the TurboBrush to remove the faceplate and clear any obstructions. Belt Cover To clean debris from the brush roll, remove the screw located on the belt cover. Lift the belt cover.
Maintenance and care Cleaning clogs Low suction or poor pickup may be due to a clog in the vacuum cleaner. If you notice a change in the sound of the motor or a reduction in the spinning action, check for clogs. 1. Unplug cleaner from electrical outlet. 14 2. Empty dirt container. 3. Check upper tank for build up or clogs. 4. Remove the upper tank and check the suction inlet for a clog. 5. Grasp the hose grip and lift to separate from the suction opening. Check for a clog in the base or the hose.
Maintenance and care Thermal protector An internal thermal protector has been designed into your cleaner to protect it from overheating. When the thermal protector activates, the main vacuum motor will stop operating. If this happens, proceed as follows: 1. Turn the cleaner off (O) and unplug from electrical outlet. 2. Check the upper tank area, pre-motor filter and post-motor filter for dirt accumulation. 3. Refer to the "Clearing clogs" section above. 4.
Troubleshooting WARNING: Vacuum cleaner won't run. To reduce the risk of injury from moving parts and/ or electrical shock, turn power switch OFF and disconnect plug from electrical outlet before performing troubleshooting checks. Possible causes Remedies 1. Power cord not firmly plugged in 1. Check electrical plug 2. Thermal protector activated 2. Allow cleaner to cool for 30 minutes, see pg. 15 No power at rotating floor brush. Possible causes Remedies 1. 1.
Troubleshooting Vacuum cleaner is difficult to push. Possible causes Remedies 1. 1. Adjust powerfoot to correct height setting Incorrect height adjustment Visible dirt escaping from cleaner. Possible causes Remedies 1. Dirt container full 1. Empty dirt Container 2. Filters missing or installed incorrectly 2. Check upper tank, pre-motor and post-motor filters for correct installation 3. Dirt container installed incorrectly 3.
BISSELL Consumer Services If your BISSELL product should require service: In the UK, Australia or New Zealand, call BISSELL Consumer Services at the numbers below and we will give you the location of a BISSELL Authorized Service Center in your area. For all other countries, contact your local in country distributor for questions, service, or repair. If you have questions about your warranty or need replacement parts please contact the numbers below.
Replacement parts Item Part No.
Warranty This warranty gives you specific legal rights, and you may also have other rights which may vary from country to country. If you need additional instruction regarding this warranty or have questions regarding what it may cover, please contact BISSELL Consumer Services by telephone, or regular post as described below, or contact your local in country distributor. Limited Two Year Warranty Subject to the *EXCEPTIONS AND EXCLUSIONS identified below, BISSELL Homecare, Inc.