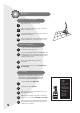
ProHeat ™ USER’S GUIDE 7901 SERIES 8910 SERIES 3 Safety Instructions 4 5 6-17 17-19 20-21 22 23 24 Product View/Accessories Assembly Features / Operations Routine Maintenance Troubleshooting Consumer Services Replacement Parts Warranty
Thanks for buying a BISSELL ProHeat ® We’re glad you purchased a BISSELL ProHeat® heated formula deep cleaner. Everything we know about floor care went into the design and construction of this complete, high-tech home cleaning system. Your ProHeat is well made, and we back it with a full one-year warranty. We also stand behind it with a knowledgeable, dedicated Consumer Services department, so, should you ever have a problem, you’ll receive fast, considerate assistance.
IMPORTANT SAFETY INSTRUCTIONS When using an electrical appliance, basic precautions should be observed, including the following: Read all instructions before using your PROHEAT® Use only cleaning products formulated by BISSELL for use in this appliance. ■ Keep openings free of dust, lint, hair, etc. ■ Do not point attachment nozzle at people or animals. ■ Keep appliance on a level surface. To reduce the risk of ■ Turn off all controls before unplugging.
Keep plenty of genuine BISSELL Fiber Cleansing Formula™ and Scotchgard™ Protector Cartridges on hand so you can clean and protect whenever it fits your schedule. Always use genuine BISSELL deep cleaning formulas. Non-BISSELL cleaning solutions may harm the machine and void the warranty. Trigger Upper Handle 3. SmartTemp® Switch Crevice Tool Storage Tool Caddy Power Cord Quick Release Power Switch Tough Stain Brush Storage 2. 4. Tank-inTank™ Hex Nuts TurboBrush® Storage (select models only) 5.
How to use this guide WARNING: Do Not plug in your cleaner This User’s Guide has been designed to help you get the utmost satisfaction from your BISSELL ProHeat. You’ll find assembly and operating instructions, safety precautions, as well as maintenance and troubleshooting instructions. Please read this Guide thoroughly before assembling your deep cleaner. Pay particular attention to the product diagram, assembly instructions, and part names. Locate and organize all parts before assembly.
Special Features of your BISSELL ProHeat The BISSELL SmartClean® System The ProHeat is a home cleaning system that automatically mixes hot tap water with Fiber Cleansing Formula and heats the solution as it is applied to the carpet. The combination of heated cleaning solution, powered brush and suction provide a safe and effective method of cleaning. SmartTemp® Temperature control automatically heats the cleaning solution as it is being applied to the carpet (*) to safely optimize cleaning effectiveness.
SmartMix 4. 5. Replace SmartMix concentrate bottle. Choose the SmartMix setting that fits the cleaning job. Water Rinse / Carpet Protector -This setting must also be used when applying the carpet protectant through the applicator, to prevent the pump from temporarily losing its prime. SmartMix Dial High Traffic- automatically mixes the right amount of water and concentrate to dissolve tough grime and heavy soil.
Tank-in-Tank Continued 2. 3. Lift the Tank-in-Tank handle. The handle locks the lid in place. Carry it like a bucket to fill at the sink. Note: You may notice hair and debris deposits on the carpet that were loosened by the brushing action (especially with newer carpets that have never been deep cleaned before). This debris should be picked up and thrown away. Debris that deposits in the Brush Belt should be cleaned between uses to keep the Belts running free. 4.
When It’s Time to Empty Tank-in-Tank Continued 3. 4. 5. Remove Tank Lid by rotating handle forward to unlatch lid and lifting lid off tank. Pour out dirty water. Pour out 3 Rotate Handle to Unlatch After each use, remove and rinse the lint screen located on the tank lid. A. Remove tank assembly from unit. B. Remove tank lid. C. Remove any debris caught in lint screen. D. Reinsert lint screen on tank lid. The screen will click into place E. Replace tank lid. F. Reinsert tank assembly into unit. 6.
Operations Before You Clean Carpets 1. 2. Plan activities to give carpet time to dry. Remove easily moved furniture from the room (chairs, lamps, coffee tables, etc). 9 EXIT 3. Vacuum thoroughly to pick up loose debris and pet hair before using the ProHeat. 12 10 11 3' 7 6 5 2 1 RT STAERE H 4' 3 4. Plan your cleaning route to leave an exit path. It is best to begin cleaning in the corner farthest from your exit. 4 Machine Preparation 1.
Carpet Cleaning 1. 2. Plug into a proper outlet and turn the Power and the SmartTemp switches ON. Wait two minutes for the heater to warm up before beginning to clean. While pressing the trigger, make one slow forward wet pass and another one back. Let the SmartTemp heated formula and DirtLifter Powerbrush do the work for you. Caution: Do not overwet. Note: Take care not to run over loose objects or edges of area rugs. Stalling brush may result in premature belt failure. 3.
Stain Removal Do Not Delay! Failure to attend to an accident soon after it occurs may cause it to set and become permanent. Before treating any stain, follow these pre-treatment steps: Blot up liquids with an absorbent cloth or paper towels. White materials are recommended because certain dyes may bleed and make the stain worse. 1. 2. Gently scrape up semi-solids with a spoon or spatula. Do not use a knife or other utensil with sharp edges because it could damage the carpet or upholstery. 3.
TurboBrush® (Available on select models only) Assembly Unplug cleaner from the outlet before attaching TurboBrush. Attach TurboBrush to the flex hose by pressing tool onto the grip/trigger until button snaps into hole. Make certain tool is securely in place. Use 1. Move the TurboBrush switch to the “BRUSH” position. This activates the brush when the unit is running. 2. Place the tool directly on the soiled surface.
Scotchgard™ protector Applicator (Optional) The Scotchgard protector applicator (with formula included) can be used to help retain the carpet cleanliness you achieve with your ProHeat machine. For best results the post cleaning treatment should be applied while the carpet is still wet or damp. It is recommended that the Scotchgard protector is applied every 12 months in all carpeted areas, and after every deep cleaning for high traffic areas such as entryways and stairs.
How to Clean Upholstery and Small Areas Important - Check Upholstery Tags: Check manufacturer’s tag before cleaning. “W” or “WS” on the tag means you can use your ProHeat. If the tag is coded with “X” or “S” (with a diagonal strike through), or says “Dry Clean Only,” do not proceed. The Scotchgard™ protectort is not recommended for use on velvet, silk, 100% cotton upholstery, vinyl or leather. If manufacturer’s tag is missing or not coded, check with your furniture dealer. 2.
Cleaning Bare Floors Tilt Handle Back The Bare Floor Tool (available with select models only) provides effective cleaning for linoleum, vinyl, and tile floors. Caution: Do not use on hardwood floors. Use BISSELL Floor Cleansing Formula. 1. Vacuum or sweep thoroughly to pick up loose debris and pet hair. 2. Handle Release Remove easily moved furniture from the room, (chairs, tables, etc.) 3. Carrying Plan your cleaning route to leave an exit path. 4.
Bare Floor Cleaning Technique 1. Slowly move the machine nozzle with Bare Floor Tool forward and back over soiled surface one time while pressing the trigger. Caution: Do not over wet. 2. Repeat the motion without pressing the trigger using the Bare Floor Tool to squeegee and suction up the dirty water. WARNING: To reduce the risk of fire, electric shock or injury unplug from outlet before servicing. Repeat steps 1 and 2 backing along the exit path. 3.
Pump Belt Replacement 2 1. Turn the machine off and unplug from the wall outlet. 2. Step on the release pedal and recline the handle down onto floor. (see illustration). 3. Remove Tank-In-Tank and SmartMix tanks. Set them aside (see illustration). 3b 3a 4 4. 5. 6. Remove Belt Access Door located near the Floor Cleaning/ Tools switch by inserting a flat head screwdriver into the slot nearest to the handle and gently prying the access door off (see illustration).
To Install the Replacement Pump Belt 1 1. 2. 3. With the unit still on its side, loop one end of the replacement pump belt around the red pump pulley and then the other end around the silver motor shaft (see illustration). Do not twist the replacement pump belt. Re-install the toothed brush belt first onto the red pump pulley and then onto the toothed end of the brush (see illustration). Re-Install the brush into the base of unit. 4.
Troubleshooting SmartTemp Ready Light does not illuminate. WARNING: To reduce the risk of fire, electric shock or injury unplug from outlet before servicing. Possible Causes Remedies The SmartTemp switch is not turned ON. Turn on the SmartTemp switch. The machine Power Switch is not turned ON. Both switches must be ON to activate the SmartTemp Ready Light. Reduced spray or no spray Possible Causes Remedies Bladder may be empty. Refill bladder with hot tap water. SmartMix bottle may be empty.
Troubleshooting Continued DirtLifter PowerBrush does not turn. Possible Causes The Brush Belt or Pump Belt is off or broken. Carpet Protector is not spraying. Possible Causes Remedies Turn the machine OFF and unplug from the outlet. To check if a Pump Belt has broken, you will need a flat head screwdriver. Insert the blade end into the lower slot of the Belt Access door to release the lower snap. If necessary, insert the blade end into the upper slot to release the upper snap.
BISSELL Consumer Services For information about repairs or replacement parts, or questions about your warranty, call: BISSELL Consumer Services 1-800-237-7691 Monday - Friday Saturday 8 a.m. — 10 p.m. ET 9 a.m. — 8 p.m. ET Or write: BISSELL Homecare, Inc. PO Box 3606 Grand Rapids MI 49501 ATTN: Consumer Services Or visit the BISSELL website - www.bissell.com When contacting BISSELL, have model number of unit available.
Replacement parts - BISSELL ProHeat® Item Part No.
About Your Warranty This warranty gives you specific legal rights, and you may also have other rights which may vary from state to state. If you need additional instruction regarding this warranty or have questions regarding what it may cover, please contact BISSELL Consumer Services by E-mail, telephone, or regular mail as described below.