
User`s guide


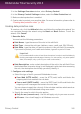


1. Click the vault in the table and select Open vault in the menu that appears.
Note
If a previously created vault does not appear in the table, right-click the vaults
table header, select Add existing vault and browse to its location.
2. A new window will appear.
The vault name and path on the disk are displayed. Choose a drive letter from
the menu.
3. Type the vault password in the Password field.
4. Click Open.
Bitdefender will immediately inform you about the result of the operation. If an error
has occurred, use the error message to troubleshoot the error.
Adding files to vaults
To start a wizard that will allow you to add files to a vault, follow these steps:
1. Open the Bitdefender window.
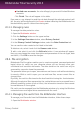
2. On the File Encryption panel, click Encrypt and select Add Files to Vault
from the drop-down menu.
You can navigate through the wizard using the Next and Back buttons. To exit the
wizard, click Cancel.
1. Select files & folders
Click Add target to select the files/folders that will be added to the vault.
2. Select File Vault
You can select an existing vault, browse for a previously created vault or create
a new one in which to add the files.
3. Create File Vault
If you have chosen to create a new vault, this is where you specify the necessary
information about it. For more information, please refer to “Creating file vaults”
(p. 107)
4. Enter password
If you have selected a locked vault, you must enter the password to open it.
5. Confirm
This is where you can review chosen operations.
Privacy Control
108
Bitdefender Total Security 2013