
User`s guide


29.3. Managing Safebox from Windows
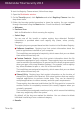
Whenever you right-click a folder or inside a folder, the Windows contextual menu
will give you quick access to all available Safebox operations.
29.3.1. Adding folders to Safebox
To add a folder to Safebox, right-click its icon or anywhere inside the folder and
select Add to Safebox.
A remote folder is created on Bitdefender servers and the entire folder contents are
uploaded to it. When the folder synchronization is completed, the Bitdefender icon
will appear over the folder icon.
The icons of the files and folders in a Safebox folder will change according to the
status of their synchronization with the remote folder:
The file / folder is synchronized.
The file / folder is not synchronized.
The file / folder is being synchronized.
Once a folder is added to Safebox and as long as Auto Sync is on, the folder contents
are automatically synced with the online (remote) folder.
29.3.2. Removing folders from Safebox
To remove a folder from Safebox sync, right-click it, point to Bitdefender Safebox
and select Remove from Bitdefender Safebox. A confirmation window will appear.
Click Yes to stop Safebox from syncing the folder.
29.3.3. Restoring files deleted from Safebox
Once a folder is added to Safebox, Bitdefender keeps track of all the modifications
made in that folder. This allows you to restore files deleted from a local Safebox
folder and to recover previous versions of files you modified over time.
To restore the files that were deleted from a Safebox folder, right-click the folder
icon or anywhere inside the folder, point to Bitdefender Safebox and select
Restore deleted files. This will restore the latest versions of all the files deleted
from the folder.
To restore a single file to a certain version, follow these steps:
1. Right-click the file.
2. Point to Bitdefender Safebox and select View previous versions.
Safebox online backup and sync
151
Bitdefender Total Security 2013