User's Manual Label Printer Rev. 1.07 SLP-T400 / T400E SLP-T403 / T403E SLP-D400 / D400E SLP-D403 / D403E http://www.bixolon.
SLP-T40xx/D40xx ■ Table of Contents ※ Manual Information & Usage Precautions..................................................................3 1. Content Confirmation ....................................................................................................7 2. Product Part Names.......................................................................................................8 3. Installation & Usage.............................................................................................
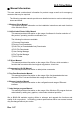
SLP-T40xx/D40xx ■ Manual Information ※ Manual Information & Usage Precautions This user manual contains basic information for product usage as well as for emergency measures that may be required. ※ The following separate manuals provide more detailed content on various technological issues and areas. 1. Windows Driver Manual This manual provides information on the installation instructions and main functions of the Windows Driver. 2.
SLP-T40xx/D40xx ■ Safety Precautions In using the present appliance, please keep the following safety regulations in order to prevent any hazard or material damage. WARNING Violating following instructions can cause serious injury or death. Do not plug several products in one multi-outlet. You must use only the supplied adapter. • This can provoke over-heating and a fire. • If the plug is wet or dirty, dry or wipe it before usage. • If the plug does not fit perfectly with the outlet, do not plug in.
SLP-T40xx/D40xx CAUTION Violating following instructions can cause slight wound or damage the appliance. If you observe a strange smoke, odor or noise from the printer, unplug it before taking following measures. Keep the desiccant out of children’s reach. • If not, they may eat it. • Switch off the printer and unplug the set from the mains. • After the disappearance of the smoke, call your dealer to repair it. TO UNPLUG PROHIBIT PRINTER Install the printer on the stable surface.
SLP-T40xx/D40xx ■ Other Precautions The copyright for this user manual and various other manuals is property of the BIXOLON Co., Ltd. Any copying or conversion into electronic firm and saving of this material without the express written permission of BIXOLON Co., Ltd. is strictly prohibited. Use of the information contained in this manual is not subject to any patent liability. This manual has been prepared with utmost care and attention to detail but may contain certain errors and/or omissions. BIXOLON Co.
SLP-T40xx/D40xx 1. Content Confirmation The following items should all be contained in the printer package. Contact the dealer from which the purchase was made if any item is damaged and/or missing. SLP-T40xx/D40xx Power Cord Holder Ribbon (2ea) Ribbon AC Adapter CD Paper Cleaning Pen User’s Manual ※ Optional items RS-232C(Serial) Cable IEEE1284 (Parallel) Cable USB Cable Rev. 1.
SLP-T40xx/D40xx 2. Product Part Names Pause Button Feed Button Cover Peel-off (Option) Cover Lever Paper Cover Ribbon Assembly Printer Head Paper Holder Paper Reflector Sensor Paper Guide & Gap Sensor Peel-off Sensor (Option) Rev. 1.
SLP-T40xx/D40xx Fan-Fold or Exter Paper Dip Switch USB IEEE1284 (Parallel) Power Switch RS-232C (Serial) Power Jack Cover Peel-off (Option) Auto Cutter (Option) External Paper Supplier (Option) Rev. 1.
SLP-T40xx/D40xx 3. Installation & Usage 3-1 Power Connection Connect power to the printer as shown below. OFF Power Switch AC Adapter Power Cord 1) Turn off the printer power switch. 2) Check to see that the AC adapter voltage matches that of the power source. 3) Connect the AC adapter jack to the printer power connector. 4) Connect the power cord to the AC adapter. 5) Connect the power cord to a power source/outlet. Rev. 1.
SLP-T40xx/D40xx 3-2 Interface Cable Connection Connect the interface cable as shown below. This printer supports the following communications interface standards. - RS-232C (Serial) IEEE1284 (Parallel) (exclusively for SLP-T400D,T403D/D400D,D403D) USB Ethernet (exclusively for SLP-T400E,T403E/D400E,D403E) RS-232 (Serial) Cable USB Cable IEEE1284 (Parallel) Cable or LAN (Ethernet ) Cable 1) Turn off the power switch. 2) Connect the communication cable to the printer communication port to be used.
SLP-T40xx/D40xx 3-3 Paper Installation 1) Open the Paper Cover. 2) Spread the paper holder and insert paper as shown. 3) Open the Ribbon Assembly and spread the paper guide. 4) Adjust the paper guide to the width of the paper and close the Ribbon Assembly. (keep note of paper printing direction) Ribbon Assembly Paper Guide 5) Close the Paper Cover. Rev. 1.
SLP-T40xx/D40xx 3-4 Ribbon Installation 3-4-1 Type of Ribbon 1) Type by Film Coating Location - Take note before ribbon purchase that only ribbons facing outward can be used. (O) (X) Coated Area (Surface to be printed) Coated Area (Surface to be printed) Outside Ribbon Inside Ribbon ※ Note - Follow the procedure described below to determine the coating surface of the ribbon.
SLP-T40xx/D40xx 3-4-2 Inserting a One-Inch Core Ribbon 1) Insert the Holder ribbon into the core and ribbon. (keep note of ribbon printing direction) Core (one-inch) Holder ribbon 2) Open the ribbon assembly and insert the ribbon and core by pushing from left to right. 3) Apply tape to the coiling portion of the ribbon. Tape 4) Press the Close area to shut the ribbon assembly.
SLP-T40xx/D40xx 3-4-4 Knob Adjustment by Ribbon Length Ribbon lengths of 74m, 100m (0.5” core), and 300m (1” core) can all be used with this product. Adjust the knob accurately according to the ribbon length (74 ~ 300 m). Exercise care as print quality and operation can be affected. z The product is shipped with a default setting for a ribbon length of 300m (1” core). To use a 74m (0.5” core) ribbon, adjust (rotate) the knob in the direction of 74m prior to use.
SLP-T40xx/D40xx 3-4-5 Narrow Ribbon Installation When using ribbons of widths of 110mm or lower, install in a centered position on the holder ribbon. 3-4-6 Ribbon Removal 1) Use a knife or other sharp-edged object to cut the ribbon. (Take care not to injure hands) 2) Open the ribbon assembly and remove the ribbon and core by pushing from left to right. 3) Detach the ribbon holder from the ribbon and core.
SLP-T40xx/D40xx 3-5 LED Display Pause : During print jobs, this button can be used to temporarily cease printing and/or again to resume printing. Status : The current printer status can be viewed. (Refer to table) Error : The current printer status can be viewed. (Refer to table) Feed/Cancel : Paper feed or cancel the print job. The current printer status can be viewed via the printer’s LED display.
SLP-T40xx/D40xx 3-6 Test printing 3-6-1 Printing using Windows driver 1) Install the Windows driver. Refer to the “Windows driver manual” in the CD for the installation procedure. 2) Set the “port” of Windows driver to the appropriate interface to be used. Refer to the “Ethernet interface user’s manual” in the CD when using Ethernet interface. 3) Print the test page using the “Print test page” function of Windows driver.
SLP-T40xx/D40xx 4. Self-Test The self-test checks whether the printer has any problems. (Users cannot perform this procedure if using the printer’s label peel-off option.) If the printer does not function properly, contact an authorized dealer. The self-test checks the following; 1) Make sure that the paper roll has been installed properly. 2) Turn on the power while holding down the FEED button. The self-test begins.
SLP-T40xx/D40xx 5. Detailed features 5-1 Printer Settings with Dip switches The following functions can be selected using the dip switches. - Print Speed, Print Density, Paper Select - Auto Cutter, Back Feed, Ribbon Sensor Operation, Paper Sensor Operation - Serial Communication Speed and Busy Status The dip switches are located on the bottom of the printer. Follow these steps when changing dip switch settings: 1) Turn the printer power switch off.
SLP-T40xx/D40xx [Table 1] Dip Switch 1 No Functions 1-1 Details Off On 4 Off Off Off Off On On On On Off On Off On Off On Off On Speed Selection 1-2 1-3 Density Selection 1-4 1-5 Exhibition Selection 1-6 Media Selection 1-7 Auto Cutter 1-8 Back Feed Option [Table 2] Dip Switch 2 No Functions 2-1 Baud Rate Selection 2-2 2-3 Media Detection 2-4 Ribbon Sensor 2-5 Reserved 2 Off Off On On Off On off On Off 2-6 Busy Condition Paper End Sensor Status Long Label 2-8 Split Printing 2-7 Rev.
SLP-T40xx/D40xx 5-2 Printer Settings with Utility Program The printer settings utility program offered by the manufacturer can be used to change a variety of basic printer settings. The basic settings set via the utility override printer command settings. Thus, users wishing to use command settings to control the printer should not change the basic settings via the utility. Run the BIXOLON United Label Printer Utility from the enclosed CD and click the User Setting Manager button.
SLP-T40xx/D40xx 5-3 Pause/Cancel During multiple-page print jobs, the Pause and Cancel button can be used to temporarily cease printing and cancel the print job altogether, respectively. Print Pause/Resume Print Cancel/Standby 5-3-1 Pause/Resume Function 1) When printing labels, pressing the Pause button will result in the temporary stoppage of printing after the currently printed label is completed, and a change in the LED status.
SLP-T40xx/D40xx 5-4 Gap Sensor Auto-Calibration Gap sensor auto-calibration is used when the printer does not detect a gap on the label paper correctly. Generally a printer is set to detect most gap types, but sometimes detection fails and paper continues to be fed without stopping when special paper is used. In such cases, use the gap sensor auto-calibration function to facilitate proper detection. 1) Check to see that the paper is aligned correctly.
SLP-T40xx/D40xx 5-5 Gap Sensor Manual-Calibration Manual-calibration of media detection can be used when the printer cannot detect a media gap (or black mark) even after auto-calibration has been executed. Users can calibrate sensor parameters in detail by using the utility program provided by the manufacturer. The utility can be obtained from the enclosed CD or downloaded from the Internet via the BIXOLON website www.bixolon.com Please make sure the printer is connected and execute the utility program.
SLP-T40xx/D40xx 5-6 The Peel-Off As a function that is used to peel-off labels, it is used only with label paper. (After adjusting the peeler switch, power must be turned off and on in order for the operation to be acknowledged.) 1) Open the paper cover. 2) Open the Ribbon Assembly. 3) Open the label peel-off cover and set the peeler switch to the ON position. - Check to see that the LED has turned on. LED 4) Remove one sheet of the label paper, and insert the paper as shown in the image below.
SLP-T40xx/D40xx 5) Adjust the paper guides and close the label peel-off cover. (O) (X) 6) Close the Ribbon Assembly and paper covers. Rev. 1.
SLP-T40xx/D40xx 5-7 Using Fan-Fold Paper Supplying paper to the printer externally is done as follows. 5-7-1 Printer Preparation Remove the rear paper supply cover on the back side of the printer with a knife or other cutting instrument. ※ CAUTION - Take care not to injure the hands and/or any other part of the body when performing this step. Remove 5-7-2 When Using Pan-Fold Paper 1) Insert the paper at the rear of the printer using the slot and guides.
SLP-T40xx/D40xx 5-8 Auto Cutter (Option) For auto paper cutting, products equipped with auto cutter are available. In factory setting, the auto cutter is attached. For printers with auto cutter, the dip switches from 1 to 7 are set to On. ※ The paper installation method is the same as paper with no auto cutter. Rev. 1.
SLP-T40xx/D40xx 6. Cleaning Head Printing quality might be degraded by dust, foreign substance, adhesive substance, or other pollution materials stuck in the printer head or inside the printer. When dirty, clean the print head as follows: ※ CAUTION - Make sure to turn the printer power off prior to cleaning. - As the print head gets very hot during printing, if intending to clean the print head, turn the printer power off and wait approximately 2~3 minute before commencement.
SLP-T40xx/D40xx 6-2 Cleaning Sensors, Roller or/and Paper Path 1) Open the paper cover and ribbon assembly, and remove the paper and ribbon. 2) Remove any dust or foreign substance using dry cloth or cotton swab. 3) Soak the cloth or cotton swab in alcohol for medical use and use it to remove adhesive foreign substances or other pollution materials.
SLP-T40xx/D40xx 7. Appendix 7-1 Specifications Item Printing Method Dot Density Printer Printing Width Printing Speed Paper Ribbon AC Adapter Usage Conditions Width Roll Core Length / Width Type Core Input Voltage Frequency Output Voltage Temperature Humidity (except for paper) Description Thermal Transfer / Direct Thermal Printing SLP-T400 / D400: 203 dpi (8 dot/mm) SLP-T403 / D403: 300 dpi (11.
SLP-T40xx/D40xx 7-2 Certification 1) EMC & Safety Standards • Europe: CE EMC,CB-Scheme:IEC60950-1, GS: EN60950-1: 2001 • North America: FCC rules parts 15B WARNING Use of an unprotected interface cable with this printer conflicts with EMC standards. Users should only use cables approved by BIXOLON.