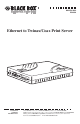
MARCH 2003 PC435A Ethernet to Twinax/Coax Print Server CUSTOMER SUPPORT INFORMATION Order toll-free in the U.S.: Call 877-877-BBOX (outside U.S. call 724-746-5500) FREE technical support 24 hours a day, 7 days a week: Call 724-746-5500 or fax 724-746-0746 Mailing address: Black Box Corporation, 1000 Park Drive, Lawrence, PA 15055-1018 Web site: www.blackbox.com • E-mail: info@blackbox.
FCC AND IC RFI STATEMENTS FEDERAL COMMUNICATIONS COMMISSION AND INDUSTRY CANADA RADIO-FREQUENCY INTERFERENCE STATEMENTS This equipment generates, uses, and can radiate radio-frequency energy, and if not installed and used properly, that is, in strict accordance with the manufacturer’s instructions, may cause interference to radio communication.
ETHERNET TO TWINAX/COAX PRINT SERVER EUROPEAN UNION DECLARATION OF CONFORMITY This product is in conformity with the protection requirements of EU Council Directives 72/23/EEC and 89/336/EEC on the approximation of the laws of the Member States relating to standards EN60950 (Safety of Information Technology Equipment); EN50082-1 (Generic Immunity Standard for Residential, Commercial, and Light Industrial Products); and EN55022 (Limits and Methods of Measurement of Radio Interference from Information Technol
TRADEMARKS USED IN THIS MANUAL TRADEMARKS USED IN THIS MANUAL AnyNet, AS/400, IBM, OS/2, and OS/400 are registered trademarks of International Business Machines Corporation. Microsoft, Windows, and Windows NT are registered trademarks or trademarks of Microsoft Corporation in the United States and/or other countries. NetWare and Novell are registered trademarks of Novell, Inc. UL is a registered trademark of Underwriters Laboratories Incorporated.
ETHERNET TO TWINAX/COAX PRINT SERVER NORMAS OFICIALES MEXICANAS (NOM) ELECTRICAL SAFETY STATEMENT INSTRUCCIONES DE SEGURIDAD 1. Todas las instrucciones de seguridad y operación deberán ser leídas antes de que el aparato eléctrico sea operado. 2. Las instrucciones de seguridad y operación deberán ser guardadas para referencia futura. 3. Todas las advertencias en el aparato eléctrico y en sus instrucciones de operación deben ser respetadas. 4. Todas las instrucciones de operación y uso deben ser seguidas.
NOM STATEMENT 12. Precaución debe ser tomada de tal manera que la tierra fisica y la polarización del equipo no sea eliminada. 13. Los cables de la fuente de poder deben ser guiados de tal manera que no sean pisados ni pellizcados por objetos colocados sobre o contra ellos, poniendo particular atención a los contactos y receptáculos donde salen del aparato. 14. El equipo eléctrico debe ser limpiado únicamente de acuerdo a las recomendaciones del fabricante. 15.
ETHERNET TO TWINAX/COAX PRINT SERVER Contents Chapter Page 1. Specifications ........................................................................................................8 2. Introduction ........................................................................................................11 2.1 Overview .......................................................................................................11 2.2 The Complete Package ........................................................
CONTENTS Chapter 5. Page Novell NetWare Printing......................................................................................41 5.1 Configuring the Print Server........................................................................41 5.1.1 Remote (Printer on IPX) ..................................................................42 5.1.2 Remote (LPR on IP)..........................................................................42 5.1.3 Forward Jobs to a Queue ....................................
ETHERNET TO TWINAX/COAX PRINT SERVER Contents (continued) Chapter Page 5.8 Remote Printer, Novell NetWare 3.x and 2.x, PCONSOLE ......................66 5.8.1 Adding Print Queue Objects on the Novell Server .........................67 5.8.2 Optional: Adding a Print Server Object on the Novell Server .......67 5.8.3 Adding Printer Objects on the Novell Server ..................................68 5.8.4 Associating Printer Objects with Print Queue Objects ...................69 5.8.
CONTENTS Chapter 9. Page Troubleshooting ................................................................................................100 9.1 Performing Software/Firmware Updates..................................................100 9.2 The Print Server’s Self-Test ........................................................................100 9.2.1 Printing a Self-Test Using the Print-Control Utility ......................100 9.2.2 Printing a Self-Test Using the Print Server’s Mode Button ..........101 9.
ETHERNET TO TWINAX/COAX PRINT SERVER 1.
CHAPTER 2: Introduction 2. Introduction 2.1 Overview The Ethernet to Twinax/Coax Print Server connects an IBM® or IBM compatible twinax or 3270-coax printer to an AS/400® or IBM mainframe across an Ethernet topology using SNA and TCP/IP protocols. It lets you retain your investment in expensive but reliable twinax or 3270-coax printers where you have converted from twinax or 3270-coax to Ethernet.
ETHERNET TO TWINAX/COAX PRINT SERVER • (1) Print Server • (1) CD (manual and software) • (1) Twinax “V” cable (DB9 female to two twinax female) • (1) Power supply • (1) Power cord 2.3 The Print Server’s External Components The Ethernet to Twinax/Coax Print Server has labels on both the top and bottom panels that indicate what the switch and each of the connectors and LEDs are. Please refer to these labels as you read the rest of this section. 2.3.
CHAPTER 2: Introduction Printer Activity: This green LED on the top cover will light while data is being sent to the twinax or 3270-coax printer. It will go dark when all data has been transmitted to the attached printer. Printer Error: This green LED on the top cover will go dark during print-server operation. If there is an error condition, this LED will either light steadily or blink.
ETHERNET TO TWINAX/COAX PRINT SERVER 2.4 Network Connectivity The Ethernet to Twinax/Coax Print Server acts as a node in the local area network with its own unique network address. It receives data from across the network in the form of packets. If the data is from an IBM AS/400 or mainframe, the data package is passed on to the twinax or 3270-coax printer in its native format. That format may be SCS, IPDS, or SCS/DSC (LU1/LU3).
CHAPTER 2: Introduction 2.7 Multi-Protocol IBM Host-to-LAN Printing 2.7.1 AS/400 TO LAN PRINTING When printing from an AS/400 host, the Ethernet to Twinax/Coax Print Server supports several protocols. Which protocol to use depends on the type of printer being attached to the print server and whether the print server and printer are located within a local area network or remotely located (using routers).
ETHERNET TO TWINAX/COAX PRINT SERVER For SCS/DSC data streams: Use the TN3270e TCP/IP protocol for 3287 type SCS/DSC printers. Configuration of the print server is very simple. However, the mainframe will require much more extensive configuration, including the installation of a Telnet server.
CHAPTER 2: Introduction Table 2-1. Protocols to use for IBM mainframe printing.
ETHERNET TO TWINAX/COAX PRINT SERVER 3. Installation 3.1 Hardware Installation 1. Perform a self-test of the printer you want to attach (check the printer’s manual). Then power OFF the printer. 2. Attach the LAN cable to the Ethernet to Twinax/Coax Print Server’s 10/100BASE-T connector. The print server will automatically sense which Ethernet data rate to use.
CHAPTER 3: Installation 3.2 Print-Control Software Installation The print-control software is a utility that runs under Windows 3.1/95/98/2000, Windows NT, Windows XP, or Windows Me. Before you begin to install it, make sure that the PC you want to put it on is attached to the same LAN segment as the Ethernet to Twinax/Coax Print Server and has at least 2 MB of disk space available. Also, the PC will have to be able to communicate with other network devices across TCP/IP or IPX/SPX. 1.
ETHERNET TO TWINAX/COAX PRINT SERVER 3.4 Proceeding with the System Configuration Once you’ve finished installing the Ethernet to Twinax/Coax Print Server and its print-control utility, configure your print server, host computer(s), operating system(s), and/or printer for the appropriate protocols as described in Chapters 4, 5, and 6. Then configure the print server’s twinax or coax characteristics as described in Chapter 7.
CHAPTER 4: TCP/IP Printing 4. TCP/IP Printing Refer to this chapter for instructions on setting up TCP/IP connectivity protocols to both the IBM mainframe and AS/400. If you have not already installed the print-control utility, please go back to Section 3.2 and do so now. Then proceed configuring the print server and the hosts that you will be printing from. Chapter 4 consists of the following sections: Configuring the Print Server . . . . . . . . . . . . . . . . . . . . . . . . . . . . . . . . .
ETHERNET TO TWINAX/COAX PRINT SERVER 4.1 Configuring the Print Server 4.1.1 ASSIGN TCP/IP ADDRESS After starting the print-control utility, select the desired print server from the displayed list. The print servers are identified through their serial number and network address. Both of these are unique to the specific print server and can be found on the bottom of the print server as well as on the self-test print out.
CHAPTER 4: TCP/IP Printing 4.1.3 CONFIGURING A PRINT SERVER ON A REMOTE TCP/IP SUBNET The print-control utility can also change the configuration of a print server that is located on a remote TCP/IP subnet. The print server must initially be configured with an IP address from a PC running PrintControl that is located within the same TCP/IP subnet as the print server. After this step is completed, the print server may be moved to a remote location.
ETHERNET TO TWINAX/COAX PRINT SERVER c. Enter the remote TCP/IP subnet mask in the “Remote Subnet Mask” field. You may view the last eight subnet mask entries made in this field by clicking on the down arrow. If the desired subnet mask is listed, click on that entry. d. Click OK. • To scan for all print servers located on the local subnet: a. Check the radio button to the left of the “Scan the local subnet” option. b. Click OK. 3.
CHAPTER 4: TCP/IP Printing TN3270e to type 3287. Connection to the IBM mainframe is accomplished through a TN3270e server. The TN3270e server can be either internal to the IBM mainframe or externally attached, such as a channel or LAN-attached gateway. The print server then accepts SCS/DSC (LU1/LU3) data from the IBM mainframe application through TCP/IP (TN3270e). Printer messages are returned through the same TN3270e link.
ETHERNET TO TWINAX/COAX PRINT SERVER • Have the most recent version of Client Access installed on the AS/400 (Client Access for Windows 95/NT V3R1M3 or newer, or Client Access Enhanced for Windows 3.1 V3R1), and • Have the most recent version of the Telnet server installed. The following is a list of the necessary PTFs that support TN5250e. This list is based upon the IBM APAR# II11226 dated January 4, 1999. Newer PTFs may be available—check with IBM for an up-to-date listing.
CHAPTER 4: TCP/IP Printing To determine if your AS/400 has these PTFs installed and actively running, use the following steps: 1. At the AS/400 command prompt, type DSPPTF 2. Press F4 to provide the list. 3. Type in the product number and press . 4. Scroll down to select the desired PTF. The PTF status should be temporarily applied, permanently applied, or superceded.
ETHERNET TO TWINAX/COAX PRINT SERVER 2. Open the configuration dialog box by double clicking on the desired print server or by highlighting the desired print server and then pressing the Configure button displayed in the tool bar. 3. If the print server already has an IP address, proceed directly with step 4. Otherwise, follow these instructions: a. Select the TCP/IP by checking the white box in front of that selection.
CHAPTER 4: TCP/IP Printing 8. The print server will automatically restart a TN5250e printer session on the AS/400 whenever any of the attached printers are powered on. However, at times it may be advantageous to restart a TN5250e printer session while leaving other protocols uninterrupted. This can be accomplished by clicking on the Restart Now button. 9.
ETHERNET TO TWINAX/COAX PRINT SERVER 4.5 Configuring OS/400 for AnyNet AnyNet is an IBM gateway technology that allows any application to run over any networking protocol. Black Box’s implementation of AnyNet allows printing of SNA (APPC) data over TCP/IP, giving users the security and functionality of SNA (APPC) as well as the routability and ease-of-use of the popular TCP/IP protocol. Use this protocol for all SCS twinax printers.
CHAPTER 4: TCP/IP Printing A. This name must be unique to the AS/400. B. The name must be no longer than 8 characters. C. The name must start with an alpha character (A–Z). D. The name must consist of the characters A–Z, a–z, or 0–9. Spaces, underscores, slashes, etc. are not accepted. E.
ETHERNET TO TWINAX/COAX PRINT SERVER If there is not an AnyNet controller already configured on the AS/400, you will have to create one. If you are not following Black Box’s recommended method of using only one AnyNet controller for all your AnyNet devices (including print servers), the AnyNet controller name and the AnyNet remote control name must be different from the print server Name. If your AS/400 is using more than 254 AnyNet devices, you should configure one AnyNet controller for every print server.
CHAPTER 4: TCP/IP Printing Adding the Print Server to the AS/400 TCP/IP Host Table 1. On your AS/400’s command line, type cfgtcp to enter the configure TCP/IP menu. 2. Select 10 Work with TCP/IP host table entries. Scroll down and make sure there are no duplicate print server addresses. 3. Place a 1 in front of the blank line on top of the list to add another TCP/IP device. Press . 4. Enter the print server TCP/IP address in the Internet address field. 5. Under Host names: Name...
ETHERNET TO TWINAX/COAX PRINT SERVER Press . 3. Type a 1 in front of the APPC controller and press . Alternate Method: Creating One AnyNet Controller for Each Print Server It is possible to create an individual AnyNet controller for every print server installed. However, this approach can be confusing since any programmable AnyNet APPC device (and the printers attached to the print server will fall into this category) will randomly configure under the different APPC controllers.
CHAPTER 4: TCP/IP Printing 4.5.3 CONFIGURING THE PRINT SERVER FOR ANYNET PRINTING 1. After starting the print-control utility, select the desired print server from the displayed list. Print servers are identified through their serial number and network address. Both of these are unique to the specific print server and can be found on the bottom of the print server, as well as on the self-test print out. 2.
ETHERNET TO TWINAX/COAX PRINT SERVER 7. The print server will now automatically create the following devices on your AS/400: • A 5494 Controller with the first five characters of the “Interface Control Point” name followed by the identifier RMT. • A printer device for every printer that was attached to the print server at the time the new configuration was sent to the print server or when the print server was last reset.
CHAPTER 4: TCP/IP Printing 3. Review the Installed Network Software list. If the TCP/IP protocol and Microsoft TCP/IP Printing service are not found, you must add them before continuing with the instructions below. Consult your Microsoft documentation for more information. Follow the procedures below to create printers for the print server on a Windows NT workstation. If there is more than one printer attached to the print server, perform this procedure once for each attached printer. 1.
ETHERNET TO TWINAX/COAX PRINT SERVER 4.7 Configuring Windows NT V4.x Make sure your Windows NT workstation has the TCP/IP protocol and the TCP/IP Printing service active. If you are unsure do the following: 1. Click on Start, then select Settings, and lastly Control Panel. 2. Double-click on the Network icon and review the lists under the Protocol and Services tabs. If the TCP/IP protocol and Microsoft TCP/IP Printing service are not found, you must add them before continuing with the instructions below.
CHAPTER 4: TCP/IP Printing 11. Complete the remaining requests from the Windows NT Add Printer Wizard. The printer attached to the print server is now available. Simply select it from your application as you would any other printer. 4.8 TCP/IP DirectPort Printing for Windows 95/98 Print servers can be accessed directly from a PC running Windows 95/98 with TCP/IP by installing the TCP/IP DirectPort client software on the PC.
ETHERNET TO TWINAX/COAX PRINT SERVER To add a new printer, follow these steps: 1. Click on Start, select Settings, and then go to Printers. 2. Click on the Add Printer Wizard icon. Follow the normal Windows process to add a local printer. Select generic for the type of printer attached to the print server. 3. When the screen appears giving you a listing of the available ports, select IPPort1 Black Box TCP/IP DirectPort (or the port name you choose during the DirectPort installation process). 4.
CHAPTER 5: Novell NetWare Printing 5. Novell NetWare Printing Refer to this chapter for instructions on setting up the print server and NetWare fileserver. Please note that only SCS twinax or SCS/DSC coax printers attached to the print server can be printed to using a “generic” text Epson FX, or IBM Proprinter print driver from the PC/LAN host. Rasterized data (such as most Windows print drivers send out) cannot be converted into EBCDIC text.
ETHERNET TO TWINAX/COAX PRINT SERVER Open the configuration dialog box by double-clicking on the desired print server or by highlighting the desired print server and then pressing the Configure button displayed in the tool bar. Follow these simple steps to configure the print server according to the Connection Type you chose previously. The options were: Remote (printer on IPX). . . . . . . . . . . . . . . . . . . . . . . . . . . . . Section 5.1.1 Remote (LRP on IP). . . . . . . . . . . . . . . . . . . . .
CHAPTER 5: Novell NetWare Printing 5.1.4 CLIENT CONFIGURATION Public Access printers can be configured from any client running the NetWare 5 client software. The user does not have to be signed on to the Novell network. To set up a Controlled Access printer, the client has to be signed on to the Novell network. 5.1.5 PUBLIC ACCESS PRINTERS 1. Double-click on the Network Neighborhood icon on the Windows desktop. 2. Double-click on the Entire Network icon. 3. Open the NDPS Public Access Printers folder. 4.
ETHERNET TO TWINAX/COAX PRINT SERVER 5.2.1 PREREQUISITES To create a Printer Agent under NDPS, the following requirements must be met: • The user must have at least Read, Write, Modify, and Create rights for the destination container where its associated Printer object will reside. This is not necessary when creating a Public Access printer. • The user must be designated as a Manager of the NDPS Manager that will control this Printer Agent. • A NDPS Broker must be running.
CHAPTER 5: Novell NetWare Printing ii. Click New. iii.Enter a name of your choice in the Printer Agent (PA) Name field. 3. Click on the Novell Printer Gateway and then click OK. 4. If the NDPS Manager has not been loaded before, you will now be prompted to do so. Click OK, then respond with OK again. 5. Select the most appropriate Printer Type and then highlight the Novell Port Handler in the bottom window. Click OK. 6. Select the appropriate Connection Type (see below). a. Remote (printer on IPX) b.
ETHERNET TO TWINAX/COAX PRINT SERVER 9. Click Finish. (Note: If you have selected Remote [printer on IPX] your workstation will post an error message. Click OK. Once you have configured the print server, this error condition will be resolved.) 10. Select a printer driver for each client operating system. Click Continue and then OK. 11. Proceed with configuration of the print server. 5.3 Print Server, Novell NetWare 4.
CHAPTER 5: Novell NetWare Printing IMPORTANT Observe the following points concerning the print server’s name: • Do not use more than 19 characters in the print server’s name. NWAdmin allows you to enter print server names longer that this, but the print server does not support names longer than 19 characters. • Do not use spaces in the print server name. Use dashes or underscores instead. NWAdmin allows spaces in the print server name, but the print server does not support this.
ETHERNET TO TWINAX/COAX PRINT SERVER 4. At the Create Print Queue window, enter the queue name in the Print Queue Name field. 5. Select the volume from the Print Queue Volume pull-down list in the Select Object window. 6. Click OK. 7. Click the Create button on the Create Print Queue window. 8. Double-click the icon for the just-created printer. 9. Click the Assignments button. 10. Click the Add… button. 11. Select the Queue name. This name becomes the selected object.
CHAPTER 5: Novell NetWare Printing b. If necessary, enter the Password for this print server object and change the Ethernet [frame] Type and the Queue Polling Time. The Queue List and Notify List are for information only. This information must be changed on the Novell NetWare server. 3. In the left column of the print-control screen, click on the white circle in front of NDS. 4. Then click the NDS button. 5. The column titled “Object Information” will display the available configuration parameters.
ETHERNET TO TWINAX/COAX PRINT SERVER where n is the number of the LPT port you want to assign the queue to and name is the name of the queue you want to capture. 5.4 Print Server, Novell NetWare 4.x (NDS), PCONSOLE Configuring the print server as a NetWare print server under NDS requires the following steps: Adding a Print Server Object. . . . . . . . . . . . . . . . . . . . . . . . . . Section 5.4.1 Adding Printer Objects . . . . . . . . . . . . . . . . . . . . . . . . . . . . . . Section 5.4.
CHAPTER 5: Novell NetWare Printing IMPORTANT Observe the following points concerning the print server’s name: • Do not use more than 19 characters in the print server’s name. PCONSOLE allows you to enter print server names longer that this, but the print server does not support names longer than 19 characters. • Do not use spaces in the print server name. Use dashes or underscores instead. PCONSOLE allows spaces in the print server name, but the print server does not support this.
ETHERNET TO TWINAX/COAX PRINT SERVER 8. In the Serviced Printers list, select the printer you just added, and press . The Printer Configuration form appears. NOTE Ignore the Printer Type, Configuration, Buffer Size, and Sampling Interval items on the Printer Configuration form. These items are not relevant to print server installations. 9. Select the Printer Number entry, and enter a value from the table below to associate that printer with the print server’s port. 10.
CHAPTER 5: Novell NetWare Printing 7. Press several times until the Exit? menu appears. Select Yes and press . 8. If you are installing a new print server, proceed to Section 5.4.4. Otherwise, reset the print server by powering it OFF and back ON again or by using the Reset button in the print-control utility. 5.4.4 CONFIGURING THE PRINT SERVER After starting the print-control utility, select the desired print server from the displayed list.
ETHERNET TO TWINAX/COAX PRINT SERVER 6. If you want to configure additional protocols, refer to the respective section. If your configuration of the print server is complete, click on the Apply Changes button on the bottom of the configuration window. Then Exit the utility. 5.4.5 CLIENT CONFIGURATION To enable a client workstation to print to a NetWare queue, a local port must be captured.
CHAPTER 5: Novell NetWare Printing Reloading the Print Server NLM. . . . . . . . . . . . . . . . . . . . . . . Section 5.5.5 Configuring the Print Server . . . . . . . . . . . . . . . . . . . . . . . . . . Section 5.5.6 Client Configuration . . . . . . . . . . . . . . . . . . . . . . . . . . . . . . . . Section 5.5.7 5.5.1 ENTERING NWADMIN 1. Login to NetWare as ADMIN, or as a user with ADMIN security equivalence. 2. Open the NetWare Tools group and double click on NWAdmin. 3.
ETHERNET TO TWINAX/COAX PRINT SERVER 3. Select Printer Object. 4. Enter a new Printer Name. 5. Click the Create button. 6. Double-click the Printer icon for the just-created printer. 7. Click the Configuration button. 8. At the Printer Type window, select Other/Unknown. 9. Optionally, set the IPX/SPX network address. 10. Click OK. 11. At the main NWAdmin window, double-click the Novell print server that exists in the context. 12. From the Print Server window, click the Assignments button. 13. Select Add.
CHAPTER 5: Novell NetWare Printing 8. Double-click the Printer icon for the just-created printer. 9. Click the Assignments button. 10. Click the Add... button. 11. Select the Queue name. This name becomes the selected object. The selected printer is automatically set as the default. 12. Click OK. 13. Click OK. 5.5.5 RELOADING THE PRINT SERVER NLM 1. Go to the console of the file server where the print server NLM is running or will be running. 2.
ETHERNET TO TWINAX/COAX PRINT SERVER 2. The column titled “Object Information” will display the available configuration parameters. a. In the Print Server field, enter then name of the Novell Print Server NLM. b. In the field next to the print server’s local port that the target printer is attached to, enter the Printer Number that was assigned in Section 5.5.3, or select the printer by name from the pop-up menu. 3. If you want to configure additional protocols, refer to the respective section.
CHAPTER 5: Novell NetWare Printing 5.6 Remote Printer, Novell NetWare 4.x (NDS), PCONSOLE Configuring the print server as a NetWare remote printer under NDS requires the following steps: Optional: Adding a Print Server . . . . . . . . . . . . . . . . . . . . . . . Section 5.6.1 Adding Printer Objects . . . . . . . . . . . . . . . . . . . . . . . . . . . . . . Section 5.6.2 Adding Print Queue Objects . . . . . . . . . . . . . . . . . . . . . . . . . . Section 5.6.3 Reloading the Print Server NLM. . . . . . .
ETHERNET TO TWINAX/COAX PRINT SERVER IMPORTANT Observe the following points concerning the print server’s name: • Do not use more than 19 characters in the print server’s name. PCONSOLE allows you to enter print server names longer that this, but the print server does not support names longer than 19 characters. • Do not use spaces in the print server name. Use dashes or underscores instead. PCONSOLE allows spaces in the print server name, but the print server does not support this.
CHAPTER 5: Novell NetWare Printing 8. In the Serviced Printers list, select the printer you just added and press . The Printer Configuration form appears. NOTE Ignore the Configuration, Buffer Size, and Sampling Interval items on the Printer Configuration form. These items are not relevant to print server installations. 9. We recommend that you use the default Printer Number.
ETHERNET TO TWINAX/COAX PRINT SERVER 7. If you want to add another queue to the printer’s Print Queues list, repeat step 2 through 6 of this procedure. 8. Press several times until the Exit? menu appears. Select Yes and press . 5.6.4 RELOADING THE PRINT SERVER NLM 1. Go to the console of the file server where the print server NLM is running or will be running. 2. If you already have a print server NLM loaded, unload it now by typing unload pserver at the prompt.
CHAPTER 5: Novell NetWare Printing a. In the Print Server field, enter then name of the Novell Print Server NLM. b. In the field next to the print server local port that the target printer is attached to, enter the Printer Number that was assigned in Section 5.6.2, or select the printer by name from the pop-up menu. 4. If you want to configure additional protocols, refer to the respective section.
ETHERNET TO TWINAX/COAX PRINT SERVER 5.7 Print Server, Novell NetWare 3.x and 2.x Configuring the print server as a bindery print server under NetWare can be done from within the PrintControl utility. This section contains the following two parts: Creating NetWare Objects . . . . . . . . . . . . . . . . . . . . . . . . . . . . Section 5.7.1 Client Configuration . . . . . . . . . . . . . . . . . . . . . . . . . . . . . . . . Section 5.7.2 5.7.1 CREATING NETWARE OBJECTS 1.
CHAPTER 5: Novell NetWare Printing IMPORTANT Observe the following points concerning the print server’s name: • Do not use more than 19 characters in the print server’s name. PCONSOLE allows you to enter print server names longer that this, but the print server does not support names longer than 19 characters. • Do not use spaces in the print server name. Use dashes or underscores instead. PCONSOLE allows spaces in the print server name, but the print server does not support this.
ETHERNET TO TWINAX/COAX PRINT SERVER • printer objects for all physical ports on the print server. 5.7.2 CLIENT CONFIGURATION To enable a client workstation to print to a NetWare queue, a local port must be captured. This can be accomplished using the NetWare User Tools from within MS Windows or through a capture command from the DOS prompt. To capture a local port using NetWare User Tools from within MS Windows: 1. Open NetWare User Tools from your desktop. 2. Click on the printer icon on the top tool bar.
CHAPTER 5: Novell NetWare Printing Client Configuration.........................................................................Section 5.8.7 5.8.1 ADDING PRINT QUEUE OBJECTS ON THE NOVELL SERVER If you are going to set up the print server remote printer to use print queues that already exist, skip this section. Otherwise, perform the procedure below to create NetWare print queue objects.
ETHERNET TO TWINAX/COAX PRINT SERVER IMPORTANT Observe the following points concerning the print server’s name: • Do not use more than 19 characters in the print server’s name. PCONSOLE allows you to enter print server names longer that this, but the print server does not support names longer than 19 characters. • Do not use spaces in the print server name. Use dashes or underscores instead. PCONSOLE allows spaces in the print server name, but the print server does not support this.
CHAPTER 5: Novell NetWare Printing 5.8.4 ASSOCIATING PRINTER OBJECTS WITH PRINT QUEUE OBJECTS 1. From the Printer Server Configuration menu, select Queues Serviced by Printer and press . 2. Select the printer you want to assign a print queue to and press . 3. Press to add a queue to the list. 4. Select the queue that you want the printer to service and press . 5. Enter a priority level and press . 6. Press until the Exit PCONSOLE dialog box appears.
ETHERNET TO TWINAX/COAX PRINT SERVER 2. The column titled “Object Information” will display the available configuration parameters. a. In the Print Server field, enter then name of the Novell Print Server NLM. b. In the field next to the print server’s local port that the target printer is attached to, enter the Printer Name assigned earlier (see Section 5.8.1). Alternately, you may enter the Novell printer number associated with the printer. 3.
CHAPTER 6: SNA (APPC) Printing 6. SNA (APPC) Printing If you haven’t already installed the print-control utility, please go back and do so now. Then proceed with the following instructions. Configuring the Print Server . . . . . . . . . . . . . . . . . . . . . . . . . . . . . . . Section 6.1 Retrieving AS/400 Parameters. . . . . . . . . . . . . . . . . . . . . . . . . . . . . . Section 6.2 After you have completed the configuration of these protocols, go to Chapter 7 to complete the print server’s setup.
ETHERNET TO TWINAX/COAX PRINT SERVER d. In the “Interface Control Point Name” field, enter a name for the print server. Make sure the name complies with the following requirements: 1) The name must be exactly 8 characters. 2) The name must start with a alphanumeric character (i.e. A–Z). 3) The name must consist of alphanumeric (a–z, A–Z) or numeric (0–9) characters only. Spaces, underscores, slashes, etc., are not accepted.
CHAPTER 6: SNA (APPC) Printing XX identifies the printer(s) that was (were) actually attached to the print server at the time the SNA (APPC) configuration was applied to the print server or at the time the print server was last reset. XX identifies the printer(s) attached to the print server in the following manner: XX-Value Printer Attached to Corresponding I-O Print Server logical port with physical port 5250 printer session 00 Twinax SCS1 6.
ETHERNET TO TWINAX/COAX PRINT SERVER 2. The Host Network ID is listed as the Local network ID and the Host Control Point Name is listed as the Local control point name. 6.2.3 AS/400 AUTO-CONFIGURATION Make certain that the AS/400 is set up for auto-configuration of new devices by doing the following: 1. On the AS/400 command line, type DSPSYSVAL SYSVAL (QAUTOCFG), then press . The Auto Configure device parameter should be set to 1=ON. 2.
CHAPTER 7: Twinax/Coax Configuration 7. Twinax/Coax Configuration The Ethernet to Twinax/Coax Print Server connects 5250-type twinax or 3270-type coax printers to their respective IBM host (such as an AS/400 or 3270-type mainframe) using Ethernet wiring in lieu of twinax or 3270-coax cables. The print server provides connection to the IBM host by way of SNA, AnyNet, or TCP/IP (TN5250e or TN3270e) for SCS printers. For IPDS printers, the print server communicates to the IBM host using TCP/IP (PPR/PPD).
ETHERNET TO TWINAX/COAX PRINT SERVER Host Data Type In Network Protocols Data to Printer Printer Type AS/400 SCS SNA, AnyNet, TN5250e* SCS Twinax AS/400 IPDS TCP/IP (PPR/PPD, AnyNet) IPDS Twinax DOS ASCII (Epson/ PPDS) IPX/SPX, TCP/IP SCS Twinax Windows ASCII (Generic) (DirectPort) IPX/SPX, TCP/IP SCS Twinax UNIX, NT, other ASCII (Epson/ PPDS) TCP/IP (LPR/LPD) SCS Twinax Mainframe SCS/DSC TCP/IP (TN3270e) SCS/DSC 3270-Coax Mainframe IPDS TCP/IP (PPR/PPD) IPDS 3270-Coax
CHAPTER 7: Twinax/Coax Configuration To setup the Ethernet to Twinax/Coax Print Server, select which protocol you are using to communicate between the IBM host and the print server. Designate whether the printer is attached using twinax or coax. For 3270-coax printers, you will also have to identify if the printer is an IPDS printer. You may also need to customize how the twinax or 3270-coax printer treats some of the instructions coming from the IBM hosts.
ETHERNET TO TWINAX/COAX PRINT SERVER a. Print Configuration Report: Check this option if you want to have the print server’s configuration report printed on the printer attached to this port. The configuration report is printed each time the print server is powered-on or reset, and it lists the current values of the unit’s configuration parameters. An unchecked box is the default setting. b. Busy on Commands: The twinax protocol requires printers to report BUSY after a command is received.
CHAPTER 7: Twinax/Coax Configuration 6. Using the check boxes or drop-down menus, you can now customize how the attached 3270-coax printer will function. a. Print Configuration Report: Check this option if you want to have the print server’s configuration report printed on the printer attached to this port. The configuration report is printed each time the print server is powered-on or reset, and it lists the current values of the unit’s configuration parameters.
ETHERNET TO TWINAX/COAX PRINT SERVER a. ASCII Printer Emulation: Use this option to select the type of ASCII printer data stream that is being received by the print server from the ASCII host (a PC, a LAN server, or other ASCII host). You need to make the same selection here as used on the ASCII host so that the print server can convert the incoming ASCII data stream into the appropriate EBCDIC data stream for the attached twinax or 3270-coax printer.
CHAPTER 7: Twinax/Coax Configuration c. Adjust MPP on CPI Change: IBM twinax and 3270-coax printers maintain a Maximum Print Position (MPP) even when CPI changes. MPP normally is associated with the CPI (10 CPI has a MPP of 132 associated with it, 15 CPI has a MPP of 198, and so on). Using this option will cause the print server to adjust the twinax or 3270-coax printer’s MPP so that the maximum amount of text can be printed on a line.
ETHERNET TO TWINAX/COAX PRINT SERVER h. Command Pass-Thru: Command Pass-Thru (CPT) is a useful feature that allows access to printer features that may not be available through the standard ASCII driver. When using CPT, printer-specific commands are sent with the print data from the host. The commands are in EBCDIC hex format and are flagged with the CPT identifiers &%. When the print server receives CPT commands, it will not attempt to interpret them, but will “pass the command through” to the printer.
CHAPTER 7: Twinax/Coax Configuration &%2B D2 04 29 00 0F&% Then, to change printing back to 10 CPI, enter: &%2B D2 04 29 00 0A&% Only characters from 00 to FF are recognized (alphabetical characters must be in upper case). Errors in the Command Pass-Thru sequence will cause the Print Box to ignore the command and printing will resume at the point the error occurred. Command Pass-Thru may invalidate horizontal spacing.
ETHERNET TO TWINAX/COAX PRINT SERVER 8. IBM IPDS Printing The Ethernet to Twinax/Coax Print Server is designed to pass through all IPDS commands it receives from the IBM host. The print server uses IBM’s proprietary TCP/IP protocol, PPR/PPD, for connection between either the IBM mainframe or the AS/400. Configuring the print server is a simple matter of assigning a TCP/IP address to the print server and modifying any of the print server’s default setup parameters.
CHAPTER 8: IBM IPDS Printing Configuring a TCP/IP Host Table Entry . . . . . . . . . . . . . . . . . . . . Section 8.1.3 Configuring V3R1 or V3R6 . . . . . . . . . . . . . . . . . . . . . . . . . . . . . . . Section 8.1.4 Configuring V3R2 . . . . . . . . . . . . . . . . . . . . . . . . . . . . . . . . . . . . . . Section 8.1.5 Configuring V3R7, V4R1, and Above . . . . . . . . . . . . . . . . . . . . . . . Section 8.1.6 Verifying the IPDS Configuration on the AS/400. . . . . . . . . . . . . Section 8.1.7 8.
ETHERNET TO TWINAX/COAX PRINT SERVER Sockets SF30508 WRKAFP2 SF31461 PSF/400 APAR SA44304 OS/400 V3R7 PSF/400 APAR SA44304 8.1.2 CREATING A LINE DESCRIPTION ON THE AS/400 If the print server and the AS/400 host are not on the same LAN segment, have the system administrator verify that there is a route defined in the TCP/IP route List. If there is not a route defined, use the AS/400 ADDTCPRTE COMMAND to create a route definition.
CHAPTER 8: IBM IPDS Printing 6. In the Device Model (MODEL) field, enter 0. 7. In the Advanced Function Printing (AFP) field, enter *YES. 8. In the AFP Attachment (AFPATTACH) field, enter *APPC. 9. In the Font (FONT) field, enter an appropriate value such as 11. 10. In the Form Feed (FORMFEED) field, enter *AUTOCUT. If the printer is a dot matrix, enter *CONT. 11. In the Remote Location (RMTLOCNAME) field, enter TCPIP.
ETHERNET TO TWINAX/COAX PRINT SERVER 8.1.5 CONFIGURING V3R2 PSF/400 for V3R2 The following instructions are used to create a printer device description: 1. At the AS/400 command line, enter the command CRTDEVPRT. 2. Press the F11 key to display the keywords. 3. In the Device Description (DEVD) field, enter the name of the printer attached to the print server. The name may comprise of the letters A–Z and numerals 0–9. It must begin with a letter, and a maximum of 10 characters are allowed. 4.
CHAPTER 8: IBM IPDS Printing 6. In the Activation Release Timer (ACTRLSTMR) field, enter *NORDYF. This will cause PSF/400 to print all spooled files with a status of RDY before releasing the session (which does not terminate the writer). 7. In the Release Timer (RLSTMR) field, enter *SEC15. This is parameter should be set to a value at least equal to the timeout value on the printer. This is the time PSF/400 will maintain a session with the print server while there are no spooled files with a status of RDY.
ETHERNET TO TWINAX/COAX PRINT SERVER PSF/400 for V3R7, V4R1, and Above The following instructions are used to create a printer device description: 1. At the AS/400 command line, enter the command CRTDEVPRT. 2. Press the F11 key to display the keywords. 3. In the Device Description (DEVD) field, enter the name of the printer attached to the print server. The name may be comprised of the letters A–Z and numerals 0–9, must begin with a letter, with a maximum of 10 characters allowed. 4.
CHAPTER 8: IBM IPDS Printing 8.1.7 VERIFYING THE IPDS CONFIGURATION ON THE AS/400 To test that the AS/400 and the print server are connected and communicating, ping the print server from an AS/400 workstation with the following command: PING ‘TCP/IP ADDRESS’ or PING HOST NAME TCP/IP Address is the address of the print server (be sure to include the single quote marks around the address).
ETHERNET TO TWINAX/COAX PRINT SERVER Requirements . . . . . . . . . . . . . . . . . . . . . . . . . . . . . . . . . . . . . . . . . . Section 8.2.1 Define the Communications Control Unit to MVS. . . . . . . . . . . . Section 8.2.2 Modify the TCP/IP Profile in MVS. . . . . . . . . . . . . . . . . . . . . . . . . Section 8.2.3 Verify the Printer Connection (Ping the Print Server). . . . . . . . . Section 8.2.4 Handling MVS Connectivity Problems. . . . . . . . . . . . . . . . . . . . . . Section 8.2.
CHAPTER 8: IBM IPDS Printing 8.2.3 MODIFY THE TCP/IP PROFILE IN MVS The TCP/IP profile contains system configuration statements used to initialize the TCP/IP address space. Some statements require special considerations when you are printing from PSF/MVS.
ETHERNET TO TWINAX/COAX PRINT SERVER KEEPALIVEOPTIONS: PSF relies on TCP to detect when a connection with a print server is no longer usable. When no data has been exchanged between PSF/MVS and the print server, TCP periodically sends keep-alive probes to the print server. These periodic probes, called keep-alive transmissions, enable TCP to discover when a connection is no longer usable, even if the print server is abruptly powered off or is no longer accessible through the network.
CHAPTER 8: IBM IPDS Printing Unsuccessful ping: EZA04581 Ping V3R1: Pinging host 9.99.12.33 (Use ATTN to interrupt.) EZA04631 PING: Ping #1 timed out. 8.2.5 HANDLING MVS CONNECTIVITY PROBLEMS If you encounter problems when pinging the print server from MVS, here’s how to resolve them: Ping is Not Successful If the ping is not successful, verify the following: • The print server and printer both are powered on. • The IP address is unique in the TCP/IP network.
ETHERNET TO TWINAX/COAX PRINT SERVER 3. Enter the ping command again from the MVS system. If you receive a successful response to the ping command, there is a duplicate IP address. Consult your system administrator. 8.2.6 DEFINE THE PRINTER TO JES When an print server is used with JES, it must be defined for deferred printing mode with JES.
CHAPTER 8: IBM IPDS Printing 8.2.7 DEFINE THE PRINTER TO PSF/MVS Each print server must be defined to PSF with a PRINTDEV statement in the PSF/MVS startup procedure. Currently, IBM does not supply a network printer-specific writer procedure. (Remember that the print server appears to the IBM mainframe as a network printer.) However, the APSWPROT sample from the APAR medium can be copied and modified for network printers.
ETHERNET TO TWINAX/COAX PRINT SERVER For more information on the PRINTDEV statement, see the IBM publication PSF/MSV System Programming Guide. 8.2.8 USING THE PRINT SERVER WITH MVS In normal operation, a session with the print server is maintained while there is output on the JES spool and the print server is available. When there is no more output on the spool and the disconnect interval expires, PSF/MVS ends the session with the print server.
CHAPTER 8: IBM IPDS Printing CANCEL printer-name where printer-name specifies the name of the printer FSA. The print server and printer can then be turned off. • To end the PSF FSA for the printer, use the JES commands.
ETHERNET TO TWINAX/COAX PRINT SERVER 9. Troubleshooting 9.1 Performing Software/Firmware Updates The latest versions of the Ethernet to Twinax/Coax Print Server’s bootcode and operating firmware (there are two firmware files), as well as the latest version of the print-control utility, are posted on www. blackbox.com. 1. Run your Internet browser and go to www.blackbox.com. 2. The new software/firmware is available as the following files: Filename Description F5450xxx.
CHAPTER 9: Troubleshooting 3. Click on the Physical Port where you want the self-test page to print (Twinax Port or Coax Port depending on which type of printer you have attached to the print server). 4. Check the Configuration Report box. 5. Click on the Apply Changes button. 9.2.2 PRINTING A SELF-TEST USING THE PRINT SERVER’S MODE BUTTON A more detailed self-test showing the Ethernet to Twinax/Coax Print Server’s various configuration parameters can be printed by pressing the print server’s Mode button.
ETHERNET TO TWINAX/COAX PRINT SERVER 9.4 Restoring the Print Server’s Factory Defaults Factory defaults can be restored for all of the Ethernet to Twinax/Coax Print Server’s configuration options or selectively for individual 5250 printer session. 9.4.1 RESTORING FACTORY DEFAULTS FOR THE PRINT SERVER USING THE PRINT-CONTROL UTILITY 1. If you haven’t already done so, start the print-control software. 2. Select a print server from the displayed list. 3.
CHAPTER 9: Troubleshooting B. On the AS/400 command line, type DSPSYSVAL SYS VAL(QAUTORMT), then press . The Auto Configure Remote Controller parameter should be set to 1=ON. C. On the AS/400 command line, type DSPSYSVAL SYS VAL(QAUTORMT), then press . The Number of devices to autoconfigure should be large enough to account for all virtual (APPC) devices on your network. If you are unsure, you may want to increase this number. D. On the AS/400 command line, type WRKLIND, then press .
ETHERNET TO TWINAX/COAX PRINT SERVER 9.5.2 TCP/IP PRINTING Problem: Print jobs are preceded by a banner (header) page and/or followed by a trailer page and/or a blank page. Resolution A: Follow this procedure to select/deselect banner and/or trailer page options on the print server: 1. Start the print-control utility and open the device configuration window for the desired print server print server. 2.
CHAPTER 9: Troubleshooting Example: Specifying a Remote Output Queue (also Name of printer on that machine/server in Windows NT) of: LPT2_nb_nt_nff would cause the banner (header) page, the trailer page, and a blank page to be suppressed when printing from this TCP/IP host to a printer attached to the Print Server’s LPT2 port. 9.5.3 TN5250E PRINTING Problem: The AS/400 assigns a 3812 printer device with a name of QPADEVnnnn (where nnnn is a 4-digit number).
ETHERNET TO TWINAX/COAX PRINT SERVER 3. Reset the Black Box LAN Print Server. This will re-establish the connection and printing will resume. Problem: The printer device is in Vary On pending state. Resolution: 1. End the Telnet session by using the AS/400 TCPADM command. At the command line, type GO TCPADM, take selection 7, then 3, find the IP address for the print server, then execute option 4 (End of Session). 2.
CHAPTER 9: Troubleshooting 4. Change the QINACTITV value to a longer value, or use *NONE to deactivate the inactivity timeout. 9.5.4 TN5250E CONNECTION STATUS MESSAGE The print server reports the success or failure of an attempt to communicate with the host by printing a brief connection status message on each attached printer.
ETHERNET TO TWINAX/COAX PRINT SERVER 0111 = Host Telnet session lost Usually means that the printer has been varied off at the host. Also, if the host has gone down, or if there is a communication (for example, router) failure. 2777 = Damaged device description 8902 = Device not available This code appears when the print server attempts to start a session for a printer whose name duplicates the name of a printer already active on the host.
CHAPTER 9: Troubleshooting 8925 = Creation of device failed 8928 = Change of device failed 8930 = Message queue does not exist 8935 = Session rejected 8940 = Automatic configuration failed or not allowed E001 = No Telnet printer support at host The operating system on the AS/400 supports only display (not printer) devices in Telnet sessions. You should either update your operating system, or reconfigure your print server for a non-Telnet mode of AS/400 communication.
ETHERNET TO TWINAX/COAX PRINT SERVER “15” means that PSF/400 timed out waiting for the printer’s response. You should check the value you entered for Activation Timer when using WRKAFP2 (V3R1 or V3R6), CRTPSFCFG (V3R2), or CRTDEVPRT (V3R7 or above). Codes “20–39” indicate a general communications failure. Make sure all of the components in your network are operational, such as routers. Codes “40–59” indicate a logic error between PSF and the printer control unit. Contact IBM Support.
CHAPTER 9: Troubleshooting Problem: The first print job on a newly installed LANRPC connected to an IPDS dot-matrix printer goes to pending status, and the device is reported as not ready. Releasing the job causes the print writer to end abnormally. Resolution: Prior to printing, the host requests the printer to report its printer characteristics including the default page size of the the printer. For LAN-attached IPDS dot-matrix printers, a valid page size must be setup on the printer.
ETHERNET TO TWINAX/COAX PRINT SERVER Resolution: Cycle power or reset the print server in order for the print server to automatically reconnect to the file server. The print server must be connected to the LAN while the file server is running. Then whenever the file server is brought down and then back up again, the print server will automatically reconnect. Problem: After configuring the print server to use Novell, and performing a reset, the Power LED blinks for a long time.
CHAPTER 9: Troubleshooting 8. Click on the R button to reset the print server. Notes on NDPS Printing NDPS (Novell Distributed Print Services) uses a completely different approach to printing. Central to NDPS printing is the Printer Agent. A Printer Agent represents a physical printer. Printers and Printer Agents are in a 1:1 relationship. Printer Agents can be embedded in a printer or run on a server. Ethernet to Twinax/Coax Print Servers utilize server-based Printer Agents.
ETHERNET TO TWINAX/COAX PRINT SERVER Table 9-1. NPDS printing.
CHAPTER 9: Troubleshooting 9.5.7 PRINT-SERVER OPERATION The following is a list of some other problems that you may run into when using the Ethernet to Twinax/Coax Print Server: Problem: During the normal power up process, all LEDs on the top cover turn on and do not turn off. Resolution: This indicates a hardware failure. Contact Technical Support Problem: During the normal power up process, both Mode LEDs flash together. Resolution: This indicates a hardware failure. Contact Technical Support.
ETHERNET TO TWINAX/COAX PRINT SERVER Problem: When printing from an ASCII host, the vertical spacing of the print is not consistent. Resolution: The vertical spacing commands are too complex for the limited capabilities of your twinax or 3270-coax printer. Connect an ASCII printer to the diagnostics port and print the job again. The ASCII printer attached to the diagnostic port will print out all the commands being sent to the twinax printer.
CHAPTER 9: Troubleshooting Problem: When a 3270-coax printer is initially attached to the print server, the Line Sync LED does stays off. Resolution: The print server is shipped from the factory with a default setting for a twinax printer. Use the PrintControl utility to identify that the attached printer is a 3270-coax type of printer. The LED will function properly afterwards. Problem: The twinax printer repeats its self-test cycle.
ETHERNET TO TWINAX/COAX PRINT SERVER Problem: Error 28 appears at the printer or the printer’s line sync light comes on. Resolution: If this situation occurs when you have pushed the Mode button twice on the print server to generate a self-test on the ASCII printer, the printer is telling you that it has lost line sync with the print server. This is normal.
CHAPTER 9: Troubleshooting Problem: When you use AnyNet to connect an IPDS printer, the host will not release print jobs. Resolution: AnyNet will not completely configure an IPDS print device. Use the WRKDEVD command and set the value of the Advanced Function Printing parameter to *YES. 9.5.8 HARDWARE PROBLEMS Problem: The Line Link LED does not light. Resolution: • Check the cabling and cable connectors. • Restore factory defaults on printer server.
ETHERNET TO TWINAX/COAX PRINT SERVER Problem: After configuring the print server to use Novell and performing a reset, the Power LED blinks for a time, there is no self-test report printed, and the print server cannot be seen in the print-control utility’s “List of Print Servers” screen. If the print server is left alone for a long time with the Power LED blinking, eventually the startup process will bypass the Novell login process and will then print the self-test.
CHAPTER 9: Troubleshooting • No Telnet server is active on the host. • Communication hardware (for example, router) required for this connection is down. • The host’s IP address is incorrectly configured on the print server. • The print server has not been correctly connected to the LAN. 0111 = Host Telnet session lost Usually means that the printer has been stopped on the host. Also appears if the host goes down or if there is a communication (router, etc.
ETHERNET TO TWINAX/COAX PRINT SERVER Table 9-2. The power-up LED sequence. Key: “ON” = steadily lit, “Flash” = flashing, blank = dark Power-Up Stage 1 2 3 4 5 6 7 8 9 Power Line Sync LAN Data Printer Activity Printer Error Mode (Both LEDs) Flash Flash Flash* ON ON ON ON ON ON ON Flash ON ON ON ON ON ON Flash Flash Flash** ON * The Power LED may continue to flash while a NetWare connection is being established (if that option has been configured).
CHAPTER 9: Troubleshooting Before you do, make a record of the history of the problem. We will be able to provide more efficient and accurate assistance if you have a complete description, including: • the nature and duration of the problem; • when the problem occurs; • the components involved in the problem; • any particular application that, when used, appears to create the problem or make it worse; and • the results of any testing you’ve already done. 9.
ETHERNET TO TWINAX/COAX PRINT SERVER Appendix: ASCII Commands This appendix lists ASCII commands and the Ethernet to Twinax/Coax Print Server’s interpretation of them in relation to the capabilities of the twinax or coax printer. All ASCII commands received on the parallel or serial port are either utilized or purged from the data stream sent to the EBCDIC printer.
APPENDIX: ASCII Commands Command Printer Emulation ASCII DEC HEX Description Interpretation BEL 7 07 Beeper Proprinter and Epson EBCDIC BEL command is sent which sounds the alarm and takes the printer off-line BS 8 08 Backspace Proprinter and Epson For printers supporting EBCDIC BACKSPACE, command is sent; for other printers the position is changed using SET ABSOLUTE HORIZONTAL POSITION command HT 9 09 Tab horizontally Proprinter and Epson A blank space is printed (TAB not supported)
ETHERNET TO TWINAX/COAX PRINT SERVER Command 126 Description Printer Emulation ASCII DEC HEX Interpretation FF 12 0C Form feed Proprinter and Epson EBCDIC FORM FEED command is sent CR 13 0D Carriage return Proprinter and Epson EBCDIC CARRIAGE RETURN command is sent SO 14 0E Select double-width (1 line) Proprinter and Epson 5 CPI sent to 4214M2 (twinax) ignored on all other printers SI 15 0F Select condensed mode Proprinter and Epson Twinax: 15 CPI sent (ignored on 5256 printer
APPENDIX: ASCII Commands Command Description Printer Emulation 7F Delete character Proprinter and Epson Ignored (not supported) 14 0E Select double-width (1 line) Proprinter and Epson 5 CPI sent to 4214M2 (Twinax), ignored on all other printers ESC SI 15 0F Select condensed mode Proprinter and Epson Twinax: 15 CPI sent (ignored on 5256 printer) Coax: Ignored if set to 10 CPI only, if not, 15 CPI sent to printer ESC EM 25 19 Automatic sheet feeder on/off Proprinter and Epson Twinax: Eps
ETHERNET TO TWINAX/COAX PRINT SERVER Command 128 ASCII DEC HEX Description Printer Emulation ESC $ 36 24 Set absolute print position Proprinter and Epson Twinax: EBCDIC SET ABSOLUTE HORIZONTAL POSITION command is sent Coax: CR and space positioning sent ESC % 37 25 Select userdefined set Proprinter and Epson Ignored (not supported) ESC & 38 26 Define user-defined characters Proprinter and Epson Ignored (not supported) ESC * 42 2A Select graphics mode Proprinter and Epson Ignore
APPENDIX: ASCII Commands Command Printer Emulation Interpretation Select vertical tab channel Proprinter and Epson Ignored (not supported) 30 Select 1/8inch line spacing Proprinter and Epson 9/72-inch sent (ignored on 5256 printer) 49 31 Select 7/72inch line spacing Proprinter and Epson Twinax: 7/72inch sent (ignored on 5256 printer) Coax: 8 LPI selected if LPI commands are set on front panel ESC 2 50 32 Select 1/6inch line spacing Epson Twinax: 12/72inch (6 LPI) sent (ignored on 5256 pri
ETHERNET TO TWINAX/COAX PRINT SERVER Command 130 ASCII DEC HEX Description Printer Emulation ESC 3 51 33 Select n/216 line spacing Proprinter and Epson Twinax: (n/3)/72inch sent (ignored on 5256 printer) Coax: Closest LPI selected for LPI commands set on front panel ESC 4 52 34 Select italic mode Epson Ignored (not supported) ESC 4 52 34 Set top-ofform Proprinter Current vertical format sent to establish new topof-form ESC 5 53 35 Cancel italic mode Epson Ignored (not supported
APPENDIX: ASCII Commands Command Description Printer Emulation ASCII DEC HEX Interpretation ESC 7 55 37 Cancel ESC 6 Epson Ignored (not supported) ESC 7 55 37 Select standard character set Proprinter Ignored not supported) ESC 8 56 38 Disable paper- out sensor Proprinter and Epson Ignored (not supported on EBCDIC printers) ESC 9 57 39 Enable paper-out sensor Proprinter and Epson Ignored (paperout always enabled on EBCDIC printers) ESC : 58 3A Copy ROM into RAM Epson Ignor
ETHERNET TO TWINAX/COAX PRINT SERVER Command 132 ASCII DEC HEX Description Printer Emulation ESC = 61 3D Set MSB to 0 Epson Ignored (not supported only Code Page 437 or 850 supported) ESC = 61 3D Define user-defined characters Proprinter Ignored (not supported) ESC > 62 3E Set MSB to 1 Proprinter and Epson Ignored (not supported only Code Page 437 or 850 supported) ESC ? 63 3F Reassign graphics mode Proprinter and Epson Ignored (not supported) ESC @ 64 40 Initialize printer
APPENDIX: ASCII Commands Command Description Printer Emulation 42 Set vertical tabs Proprinter and Epson Ignored (not supported LF sent) 67 43 Set page length in lines Proprinter and Epson Page length set to number of lines defined by following parameter ESC C 0 67 00 43 00 Set page length in inches Proprinter and Epson Ignored (not supported) ESC D 68 44 Set horizontal tabs Proprinter and Epson Ignored (not supported tabs treated as spaces) ESC E 69 45 Select emphasized mode (bold
ETHERNET TO TWINAX/COAX PRINT SERVER Command 134 Command Printer Emulation ASCII DEC HEX Description Interpretation ESC L 76 4C Select double density graphics Proprinter and Epson Ignored (not supported) ESC M 77 4D Select elite pitch Proprinter and Epson Twinax: 12 CPI sent to 4214 and 5219 printers. Ignored on 5256 printer 10 CPI; sent to all other printers. Coax: 12 CPI is sent if selected on front panel.
APPENDIX: ASCII Commands Command Description Printer Emulation ASCII DEC HEX Interpretation ESC Q 81 51 Set right margin Epson Line length set as defined by following parameter ESC Q 81 51 Deselect printer Proprinter Ignored (not supported) ESC R 82 52 International character set Epson Ignored (not supported only Code Page 437 or 850 supported) ESC R 82 52 Restore default tab settings Proprinter Ignored (tabs not supported are treated as spaces) ESC S 0 83 00 53 00 Select su
ETHERNET TO TWINAX/COAX PRINT SERVER Command DEC HEX Description Printer Emulation ESC W 87 57 Turn doublewidth on/off Proprinter and Epson Double-width command sent to 4214M2 (twinax) printer (01 or 31 selects 5 CPI; 00 or 30 returns to 10 CPI); ignored on all other printers ESC X 88 58 Set left and right margins Proprinter and Epson Ignored (not supported) ESC Y 89 59 High-speed Proprinter double densi- and Epson ty graphics Ignored (not supported) ESC Z 90 5A Quadruple density gra
APPENDIX: ASCII Commands Command Description Printer Emulation ASCII DEC HEX Interpretation ESC b 98 62 Set vertical tabs Proprinter in channels and Epson Ignored (not supported) ESC i 105 69 Turn immediate mode on/off Proprinter and Epson Ignored (not supported) ESC j 106 6A Perform n/216inch reverse LF Proprinter and Epson Ignored (not supported) ESC k 107 6B Select NLQ font Proprinter and Epson Ignored (not supported) ESC l 108 6C Set left margin Proprinter and Epson Ign
© Copyright 2003. Black Box Corporation. All rights reserved.