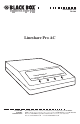
NOVEMBER 1996 FX150A Lineshare Pro AC are Pro LineSh RT 1 ON/ PO CUSTOMER SUPPORT INFORMATION 2 PORT PORT 3 PORT 4 Order toll-free in the U.S. 24 hours, 7 A.M. Monday to midnight Friday: 877-877-BBOX FREE technical support, 24 hours a day, 7 days a week: Call 724-746-5500 or fax 724-746-0746 Mail order: Black Box Corporation, 1000 Park Drive, Lawrence, PA 15055-1018 Web site: www.blackbox.com • E-mail: info@blackbox.
FCC STATEMENT FEDERAL COMMUNICATIONS COMMISSION RADIO FREQUENCY INTERFERENCE STATEMENT Class B Digital Device. This equipment has been tested and found to comply with the limits for a Class B computing device pursuant to Part 15 of the FCC Rules. These limits are designed to provide reasonable protection against harmful interference in a residential installation. However, there is no guarantee that interference will not occur in a particular installation.
LINESHARE PRO NORMAS OFICIALES MEXICANAS (NOM) ELECTRICAL SAFETY STATEMENT INSTRUCCIONES DE SEGURIDAD 1. Todas las instrucciones de seguridad y operación deberán ser leídas antes de que el aparato eléctrico sea operado. 2. Las instrucciones de seguridad y operación deberán ser guardadas para referencia futura. 3. Todas las advertencias en el aparato eléctrico y en sus instrucciones de operación deben ser respetadas. 4. Todas las instrucciones de operación y uso deben ser seguidas. 5.
NOM STATEMENT 11. El aparato eléctrico deberá ser connectado a una fuente de poder sólo del tipo descrito en el instructivo de operación, o como se indique en el aparato. 12. Precaución debe ser tomada de tal manera que la tierra fisica y la polarización del equipo no sea eliminada. 13.
LINESHARE PRO TRADEMARKS All applied-for and registered trademarks are the property of their respective owners.
LINESHARE PRO CONTENTS 1. Specifications....................................................................................9 2. Introduction .....................................................................................10 2.1 Before You Begin .....................................................................10 2.2 About the Lineshare Pro .........................................................10 3. Installation......................................................................................
LINESHARE PRO [3] No Answer Cascade ..........................................................40 [4] Answer/Disconnect Cascade ...........................................41 [5] Pulse Transfer ...................................................................41 [6] Open Line Notification....................................................42 [7] Inbound Tone Transfer ...................................................42 [8] Ring Reduction.................................................................
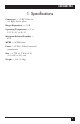
LINESHARE PRO 1. Specifications Connectors — (1) RJ-11 line in, (4) RJ-11 device ports Ringer Equivalency — 1.0 B Operating Temperature — 5° to 113° F (-15° to 45° C) Maximum Relative Humidity — 85% MTBF — 56,200 hours Power — 12 VAC, 830 mA external transformer Size — 1.7"H x 5.7"W x 6.1"D (4.3 x 14.5 x 15.5 cm) Weight — 3 lb. (1.
LINESHARE PRO 2. Introduction 2.1 Before You Begin This guide is designed to introduce you to the operating and installation procedures for using the Lineshare Pro. Please read this guide and select the installation procedures appropriate for your specific application before attempting to connect or operate the Lineshare Pro. NOTES According to standard industry practice, surge protection is recommended for all telecommunications devices.
LINESHARE PRO Listed below are examples of various telephone-activated devices that can be connected to the Lineshare Pro: • Fax/modem • Computer modem • Facsimile machine • Order-processing system • Point-of-sale terminal • Call diverter • Fluid-storage system • Energy-management system • Money-order dispensing system • Telephone Answering Device (TAD) • Laser fax cartridge • Telephone • Remote diagnostic system • Bulletin Board System (BBS) • Time and attendance system • Credit-card authorization
LINESHARE PRO 3. Installation The Lineshare Pro is a single-line device that can be installed on any type of modular or non-modular phone system that consists of one or more lines, with one or more phones. A modular phone system consists of phone cables that can be connected and disconnected from a telephone device. A non-modular phone system consists of cables that are hard-wired to the telephone device and cannot be disconnected from the equipment.
LINESHARE PRO LINE PORT 1 PORT 2 PORT 3 PORT 4 12V AC Figure 3-1. Rear Panel of the Lineshare Pro. Connect the telephone equipment to the modular ports on the Lineshare Pro as follows: LINE PORT 1 1. Use this port to connect a single telephone line from a wall jack to the Lineshare Pro. 2. Any type of analog telephone device may connect to this port (such as a fax, answering machine, computer modem, and so on). This port is also used for making any programming changes. 3.
LINESHARE PRO 3.2 Installing the Lineshare Pro on a Single Phone Line with a Single Phone Figure 3-2 shows a single-line/singlephone arrangement before installing the Lineshare Pro. If you have this type of arrangement, you can install the Lineshare Pro yourself using the instructions provided in this section. Telephone Wall Jack Figure 3-2. A Single-Phone Line/Single-Phone Arrangement Before Installing the Lineshare Pro.
LINESHARE PRO To install the Lineshare Pro on a single phone line, as shown in Figure 3-3, follow these steps: • Unplug the telephone cable from the wall jack. • Plug one end of the telephone cable provided with the Lineshare Pro into the LINE port on the back of the Lineshare Pro. Plug the other end of the cable into the wall jack where the phone was connected.
LINESHARE PRO 3.3 Connecting Telephone Equipment to the Lineshare Pro Figure 3-4 shows a complete installation for a single phone line/single phone arrangement. While the connections to the wall jack may be different for other types of phone systems, the connections to the Lineshare Pro remain the same for all phone configurations. Figure 3-4 illustrates only one of many possible configurations. As shown, the Lineshare Pro is configured with a voice priority phone port with three auxiliary ports.
LINESHARE PRO Telephone Wall Jack 110 Volt Outlet LINE PORT 1 PORT 2 PORT 3 PORT 4 12V AC Figure 3-4. Telephone Equipment Connected to the Lineshare Pro in a Single-Phone-Line/Single-Phone Arrangement.
LINESHARE PRO 3.4 Installing the Lineshare Pro on a Single Phone Line with Multiple Single-Line Phones You can install the Lineshare Pro in a phone configuration with multiple single-line phones by adding the Lineshare Pro on a single extension. If the Lineshare Pro is installed as an extension, choose the extension where it will be located and follow the procedure provided in Section 3.2. Refer to Figure 3-5 to see how to install the Lineshare Pro as an extension.
LINESHARE PRO NOTE CAUTION To fully use this application, you must turn the Extension Detection feature ON (see Chapter 5 for more information). You should be familiar with telephone wiring to complete this installation. If you have any questions or are not confident that you can complete this installation procedure, contact technical support. You should also set the time that the Lineshare Pro waits for detection with the Extension Detection timer.
LINESHARE PRO NOTE The RJ-11 jacks have four (4) posts: The red post is marked [R], the green post is marked [G], the yellow post is marked [Y], and the black post is marked [B]. 6. Connect the cut wires that feed all the phones in the location to jack “Number 2” by attaching the red wire to the red post and the green wire to the green post. 7. Plug one end of a phone cable into jack “Number 1.” 2.
LINESHARE PRO Phone Company Junction Box Red Red Green LINE PORT 1 Green PORT 2 PORT 3 PORT 4 12V AC Figure 3-6. The Lineshare Pro Installed on a Single Line with Multiple Phones while Maintaining Exclusion.
LINESHARE PRO 3.6 Installing the Lineshare Pro on a KSU or PBX System A KSU or PBX phone system is common in a medium or large office arrangement in which calls are coming in on two or more lines and can be routed to any number of extensions. A KSU or PBX typically has features like call holding, music on hold, conference calling, and intercom paging. Figure 3-6 shows telephone devices connected to the Lineshare Pro for a KSU or PBX phone system.
LINESHARE PRO 1 2 3 4 1 2 3 4 KSU/PBX Connect the Lineshare Pro to the last line in rollover. LINE PORT 1 PORT 2 PORT 3 PORT 4 12V AC Figure 3-7. The Lineshare Pro Installed on a KSU or PBX Phone System.
LINESHARE PRO 4. Using the Lineshare Pro 4.1 Special Operating Notes Before operating the Lineshare Pro, be sure that you understand the following information about the telephone equipment that is used with the Lineshare Pro (if you use a fax or fax modem card). Fax CNG tones: Most fax machines send audible beep tones called CNG (CalliNG) tones. Once a fax machine has dialed the destination fax machine’s number, it generates this tone while waiting for the receiving fax to answer.
LINESHARE PRO The Lineshare Pro has two basic modes of operation: • In the secured mode, when a call comes in, the Lineshare Pro answers the call on the first ring and waits silently for a prespecified routing tone. The Lineshare Pro will wait for the amount of time set in the Time at Home function. If the Lineshare Pro does not receive a routing tone before this time expires, the call is disconnected. If the Lineshare Pro receives a routing tone, the call is automatically routed to the correct port.
LINESHARE PRO You can reset the ring count for the Ring Reduction feature to six rings by performing any of the following steps: • Lift the receiver of the phone device connected to the primary default port. • Answer a call from any phone before the call is routed to another port. • Place an outbound call from a phone connected to the primary default port of the Lineshare Pro. (See Section 5.4 for more information about the No Answer Cascade and Ring Reduction features.
LINESHARE PRO “Hello, this is ________ . If you want to send a fax, press # 2 2 on your tone phone, or leave a message at the tone.” (In this application, your fax should be connected to Port 2.) 4.6 Retrieving TAD Messages from a Remote Location You can also announce the tone access code for Port 3 or Port 4 (# 3 3 or # 4 4) if you want to allow open access to these ports. (The Inbound Tone Transfer Feature must be turned on for this transfer to function.
LINESHARE PRO During an outbound call, you can also receive a data or fax transmission from someone that is ready to transmit. To route this transmission from a tone phone to a specific port, press # 11 for Port 1, # 22 for Port 2, # 33 for Port 3, or # 44 for Port 4. To use this feature, you must first turn Outbound Tone Transfer ON. (See Section 5.4 for more information.) 4.8 Emergency Call Override NOTE This feature works in conjunction with the threeway calling service provided by the phone company.
LINESHARE PRO 4.9 Sending a Fax or Modem Transmission To send a fax or modem transmission, you must either dial from the phone connected to the fax machine or modem, or use the auto-dial feature of the device you are using. (Refer to your fax machine or modem Operator’s Guide for instructions.) NOTE You cannot use a phone connected to a fax machine or computer modem connected to another port to answer a call ringing on Port 1. To answer a call ringing on Port 1, see Section 4.3. 4.
LINESHARE PRO 4.12 Dialing the Destination Computer through the Calling Computer To have the calling modem automatically “over dial” a port access code and access the modem connected to the Lineshare Pro, the caller must take into consideration whether the call is local or long distance.
LINESHARE PRO ATDP (phone number) T ,#22,#22,#22,#22 4.13 Using Single-Frequency Tone Detection Again, you should consider whether the call is local or long distance, and what the appropriate access code is for the desired port. When the Lineshare Pro answers a call, it listens for specific preprogrammed tones and automatically routes the call to the correct port. If a tone is not present, the call is routed to the primary default port.
LINESHARE PRO NOTE You must turn Protocol Tone Access Signal Detection ON to route calls to Port 1 and Port 2 using this application. Port 3 and Port 4 are factorypreset ON. See Section 5.5 for more information. To have the calling party automatically route calls to a port connected to the Lineshare Pro, the caller must use a device that can produce the single-frequency tones. 32 One device that identifies a modem-type device with a singlefrequency tone is called the Lineshare Master (FX155A).
LINESHARE PRO 5. Using the Lineshare Pro’s Custom Features and Functions The Lineshare Pro includes many options that enable you to customize its operation to meet specific application needs. The Lineshare Pro’s features and functions are factory-preset, and it is unlikely that you will need to make many changes. However, if necessary, you can alter any program using a tone-type phone connected to Port 1. The Lineshare Pro cannot be programmed with a rotary or pulse-dialing phone.
LINESHARE PRO If the Lineshare Pro does not enter the programming mode (the green LED continues flashing), try again with a different phone. When you are in the programming mode and entering changes, the Lineshare Pro notifies you of correct or incorrect entries with the following signals: • Three short beeps: Indicates that the entry is valid, and the Lineshare Pro has accepted the change.
LINESHARE PRO Table 5-1. Lineshare Pro Custom Features. Feature Number Feature Factory Setting Options Available 0 Extension Detection 0 0 OFF/1 ON 1 Home Routing 0 0 OFF/1 ON 2 Secured Operation 0 0 OFF/1 ON NOTE: Turning the secured operation feature ON affects the operation of other features.
LINESHARE PRO 5.3 Lineshare Pro Functions Enter the programming mode by pressing # *. Change function settings by entering the function number, followed by a valid entry from the options available column. Exit the programming mode by pressing * *. Table 5-2. Lineshare Pro Custom Functions.
LINESHARE PRO Table 5-2 (continued). Lineshare Pro Custom Functions. Function Number Function Factory Setting Options Available 76 Extension Detection to Timer 1.
LINESHARE PRO The following sections contain specific information about each feature and function and how to change the setting. 5.4 Changing ON/OFF features Earlier in this chapter, Table 5-1 listed the features that can be turned ON or OFF individually, or simultaneously with other features during a single programming session. The features are numbered [0] through [9]. In this section, you will find a description of each feature and instructions for turning the feature ON or OFF.
LINESHARE PRO factory-preset OFF, 0 0 *. To turn the Extension Detection feature ON, enter the programming mode and press the following on your tone phone: 1 Turn ON Turn this feature ON if you want to allow access of multiple ports during a single call in the secured mode.
LINESHARE PRO (For more information about the secured mode, see Section 4.2) The No Answer Cascade feature is factory-preset ON, 1 3 *. The Secured Operation feature is factory-preset OFF, 0 2 *. Turn this feature ON if you want to limit access to the Lineshare Pro ports.
LINESHARE PRO The Answer/Disconnect Cascade feature is factory preset OFF, 0 4 *.
LINESHARE PRO When ON, this feature is typically used when all the phones are wired directly to the primary default port of the Lineshare Pro. If you pick up a phone connected to the primary default port, and hear a busy tone indicating that a device on another port is on the line, simply hang up the phone. After the other device releases the line, OLN signals the phone devices connected to the primary default port with a short ring. You now have an open telephone line to make a call.
LINESHARE PRO If you do not want the Ring Reduction feature to reduce the ring count on the primary default port, you can turn the feature OFF. The feature is factory-preset ON, 1 8 *.
LINESHARE PRO [2] [1] Protocol Tone Access Signal Detection Protocol Tone Access Signal Detection allows you to turn ON or OFF each port’s ability to detect single-frequency routing tones. Setting the options for this function can be performed in two ways: • Setting an individual port ON or OFF. • Setting all ports ON or OFF in one programming sequence.
LINESHARE PRO NOTE Settings in this function do not affect the settings in the Dual Tone Assignments function.
LINESHARE PRO Table 5-3. Protocol Tone Access Signal Options. Keypad # Protocol Tone Access Signal 0 1000 Hz 1 1100 Hz (typically fax CNG tone) 2 1200 Hz 3 1300 Hz 4 1400 Hz 5 1500 Hz 6 1600 Hz 9 2225 Hz (typically reverse modem tone) The Protocol Tone Access Signal is factory-preset to 0 6 1 9 *. Protocol tone 0 will access Port 1, protocol tone 6 will access Port 2, protocol tone 1 will access Port 3, and protocol tone 9 will access Port 4.
LINESHARE PRO To select different protocol tones for all ports, press the following on your tone phone: 2 3 Protocol Tone Access Signal 0 Select all ports 1 through 4 The desired new protocol tones * End programming sequence (3 beeps indicate correct entry) (Optional entries for additional changes) * Save changes and exit programming NOTE You must enter all four digits to associate a tone to each port. If you enter only one or two numbers, the Lineshare Pro will produce an error tone.
LINESHARE PRO NOTE You can enter one, two, three, or all four port numbers in this function. The Lineshare Pro will release a call after it reaches the last port in this sequence. [4] Phantom Ring Style When the Lineshare Pro answers a call, it produces a “phantom” ring signal. This tone is intended to make the switching process transparent to the caller.
LINESHARE PRO To turn Emergency Call Override ON (automatic mode), enter the programming mode and press the following on your tone phone: 5 Emergency Call Override 1 Automatic * End programming sequence (3 beeps indicate correct entry) (Optional entries for additional changes) * Save changes and exit programming [6] Dual Tone Assignments The Dual Tone Assignments function allows you to define the port access code to each of the Lineshare Pro ports.
LINESHARE PRO [7][5] Time at Home [7][6] Extension Detection Timer The Time at Home function controls the amount of time that the Lineshare Pro holds the phone line open and listens for a routing command. It is activated when the Lineshare Pro is in the secured mode, or when Home Routing is turned ON and a call is routed home. When the Time at Home period expires, the Lineshare Pro disconnects the call without rerouting to another port.
LINESHARE PRO • Port 1 6 rings • Port 2 4 rings • Port 3 4 rings • Port 4 4 rings To change the Rings Available to a port to 20 rings, enter the programming mode and press the following on your tone phone: 8 Rings Available to the FAX/MODEM Port The selected port 2 0 The desired new number of rings * End programming sequence (3 beeps indicate correct entry) (Optional entries for additional changes) * Save changes and exit programming [8] [5] Rings to Answer Call The Rings to Answer Call feature determines t
© Copyright 1996. Black Box Corporation. All rights reserved.